Hotpoint Dryer Bearings

Hotpoint Appliance Parts

Popular Hotpoint Dryer Bearings

Your Price
$14.32
  In Stock
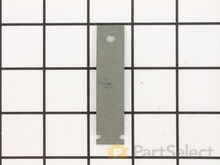
Hotpoint Dryer Drum Bearing Slide - Green (Sold individually)
★★★★★
★★★★★
27 Reviews
PartSelect Number PS6447706
Manufacturer Part Number WE1M1067
This original equipment manufacturer Drum Bearing Slide is a plastic, green, easy-to-install part for your dryer. It replaces the dryer's front drum slide to allow for easier movement. You'll know if this part is an issue if your dryer is unable to tumble properly or is very noisy. Damage can come from regular use. As the slides start to break down it may cause your dryer to make noise or not dry clothes in the usual amount of time. You will need to purchase two for both sides of your dryer. They attach to the outer-most sides of the bearing. The manufacturer recommends replacing both slides at the same time. Take this opportunity to clean out the lint and dust in the dryer, to keep it running smoothly. This is a genuine replacement part that comes directly from the manufacturer. This item is sold individually. The part attaches to the outermost side of the bearing. Although this part is denoted as being "Green" in its title, many users and technicians have noted that its true colour is closer to a dark gray or black.
Fixes these symptoms
Installation Instructions
Matthew from Plainfield, IL
Due to over loading of the dryer the drum ruined the slides and was making a bad noise due to plastic rubbing plastic
It was pretty easy. After already taking apart the dryer to install a new belt I knew exactly my plan of action. I removed the two screws that hold the top panel of the dryer to the front panel. I then removed the top panel and removed the screws that hold the front to each side panel. I than pulled the front away from the cabinet and drum. I put the new slides in place and installed a new felt strip. I put it back together and that was that. Very easy. Read more...
Your Price
$88.34
  In Stock
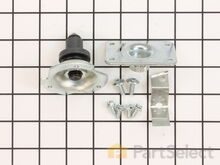
Hotpoint Dryer Rear Drum Bearing Kit
★★★★★
★★★★★
24 Reviews
PartSelect Number PS267529
Manufacturer Part Number WE25M40
This rear drum bearing kit includes a shaft, ground strap, bearing, seven screws, and installation instructions. The bearing plate comes with a slot in it for the ground strap. This part helps keep your dryer running as smoothly as possible with as little noise as possible by supporting the back of the dryer drum and reducing friction as the drum rotates. Over time, your drum bearing will wear out, cause your dryer to be noisy, and you will have to replace it. There may be some sharp internal parts, so be sure to wear work gloves during repair.
Fixes these symptoms
Installation Instructions
Michael from Warwick, RI
the rear drum bearing was worn the dryer became very noisy
i removed the scews just above thr opened dryer door, i was then able to swing the dryer top cover back. i then removed the lower front panel screws ,the the screws securing the front of the dryer ( where the door is ) and removed it. there are just 2 wires to disconnect. after the front is removed you gain full access for drum removal, remove the belt make sure the wires are not in the way and remove the drum.i also used a vacuume to clean the inside of the dryer. the front drum slides are very easy to replace only 2 screws each.remove old parts install new parts then just put the dryer back together in the reverse order i took it apart. after re-assembly i turned the dryer on it was so quiet running my wife and dogs were very happy. ps. i just want to thank the people at partselect for having all my parts in stock and for the speed in which i received them. other than having to repair my dryer it was a very pleasant experiance. Read more...
Your Price
$24.25
  In Stock
Hotpoint Dryer Drum Bearing Sleeve
★★★★★
★★★★★
7 Reviews
PartSelect Number PS266777
Manufacturer Part Number WE1M462
Sold individually.
Fixes these symptoms
Installation Instructions
Gary from Spring Hill, TN
Rubbing/Squealing Noise While Drying, especially during cold weather
This part arrived at our house two days after I ordered it. I was stunned by how quickly it arrived.

Our dryer was making a very annoying squeaking/rubbing noise while drying and it became worse as the outside temps dropped (it's winter)...colder air cooling the exhaust line, causing metal in dryer to contract more.

I called an appliance repair service and they said, "Honestly, your money is going to be better spent to just buy a new dryer. The bearings on these are a pain to replace."

Yeah, right.

I've never taken apart a dryer, but it took me less than 45 minutes to complete this repair and our dryer is back to normal. Total cost was $18, including shipping. A $300 savings versus buying a new dryer.

There is another description of the process for this part so I won't repeat it all.

I did it a little differently than most, namely I did not remove the dryer drum. I simply pulled it out about six inches (make sure and slide belt back as you inch out the drum). But first, unplug the dryer, then remove the top, then the front.

A Philips screwdriver will quickly remove the top of the dryer (two screws on inside front, where door closes) and the front face (two screws at top of front, inside face). Lift the front up about an inch and it is free. I had to disconnect a couple wires, just make sure you mark before you disconnect them.

With that done, the drum will pull straight toward you (out). Make sure and support the weight of the drum as you slide it out. I found no need to remove the drum.

At the rear inside of our drum, there are three Torx screws that hold the bearing assembly on. I have a pretty long reach so I just removed two of the Torx screws, then reached around the back of the drum while removing the third screw, to keep the bearing assembly from falling onto the floor behind the back of the drum.

This plastic bearing is held to the bearing shaft by a little o-ring. Just pull the o-ring off, slide off the old bearing, slide the new bearing on and replace the o-ring (if yours is broken, any home store will have one that will work as a replacement in their faucet repair department).

Reattach the bearing housing to the drum with the Torx screws (get all three started before you tighten any of them), slide the drum back in - make sure you slide the belt as you move the drum back in and support the weight of the drum so you don't bash the bearing assembly into the back of the dryer.

You're doing this part blind, but in a few seconds, you can guide the bearing back into the hole in the back wall of the dryer. It just slides into the hole, nothing fancy.

Put the front of the dryer back on. Then replace the top (I had to remove the five screws on top of the dial panel to give it some flex so the top would pop back into place without stressing the dial panel), plug the dryer back in, and fire it up.

45 minutes after this part arrived at our home, our dryer problems were gone. Now that I've done one, I could probably do it in 20 minutes the next time (it's that simple/easy). And we didn't need a new dryer. Makes me think I should have the appliance guy who told me we needed a new dryer to direct all of these "pain in the fanny" bearing replacements to me because I could charge someone $50 total for the repair and make good money.

Hope all this babble helps someone else who doesn't need a new dryer.
Read more...
Your Price
$21.08
  In Stock
Hotpoint Dryer Drum Slide
★★★★★
★★★★★
4 Reviews
PartSelect Number PS267877
Manufacturer Part Number WE3X87
This slide is sold individually. Some dryers require up to three of these slides . Be sure to check to make sure you order the necessary amount for your dryer.
Fixes these symptoms
Installation Instructions
Henery from Ramsey, NJ
Loud scraping noise when drum rotated
1. Opened door.
2. Using phillips head screwdriver. Removed two screws holding down top of machine.
3. Swung machine top lid back.
4. Disconnect two wires from door switch.
5. Using socket wrench removed two hex head machine screws holding front panel onto machine.
6. While reaching in through door to hold drum, Swung entire front panel down and away from machine and carefully rested drum on frame.
7. Using flat head screwdriver, pryed worn drum bearing off of front panel.
8. Removed Support Spanner (white flexible plastic piece approx 8" x 2") from old drum bearing and put on new drum bearing.
9. Put new teflon drum slides (this model takes 3) on replacement drum bearings.
10. Snapped new drum bearing in place on front panel.
11. Reverse step 1-6 above.
TIME: APPROX 20-30 MINUTES.
Read more...
Your Price
$18.73
  In Stock
Hotpoint Dryer Rear Drum Bearing
★★★★★
★★★★★
2 Reviews
PartSelect Number PS267865
Manufacturer Part Number WE3X75
This part is the rear dryer drum bearing only. This part helps keep your dryer running smoothly as possible with as little noise as possible.
Fixes these symptoms
Installation Instructions
Jeanne from Doylestown, PA
Loud, rhythmic squealing when dryer was running
Opened up machine per instructions.
After examining drum slides and rear drum bearing, determined that all should be replaced due to excessive wear. Drum slides were the chief cause of the squealing, and they were as simple to replace as removing 4 nut drive screws, pulling off the old parts, and replacing with new. The drum bearing had to be coaxed out by tapping with a screwdriver, but the old was just able to be pushed in. All parts came with instructions, so the repair was easy. And no more squealing!
Read more...
Your Price
$72.45
  In Stock
Hotpoint Dryer Front Drum Bearing
PartSelect Number PS267867
Manufacturer Part Number WE3X77
This front dryer drum bearing does not come with slides.
Fixes these symptoms
Installation Instructions
Henery from Ramsey, NJ
Loud scraping noise when drum rotated
1. Opened door.
2. Using phillips head screwdriver. Removed two screws holding down top of machine.
3. Swung machine top lid back.
4. Disconnect two wires from door switch.
5. Using socket wrench removed two hex head machine screws holding front panel onto machine.
6. While reaching in through door to hold drum, Swung entire front panel down and away from machine and carefully rested drum on frame.
7. Using flat head screwdriver, pryed worn drum bearing off of front panel.
8. Removed Support Spanner (white flexible plastic piece approx 8" x 2") from old drum bearing and put on new drum bearing.
9. Put new teflon drum slides (this model takes 3) on replacement drum bearings.
10. Snapped new drum bearing in place on front panel.
11. Reverse step 1-6 above.
TIME: APPROX 20-30 MINUTES.
Read more...
Your Price
$134.51
  In Stock
Hotpoint Dryer Rear Bearing Kit
★★★★★
★★★★★
7 Reviews
PartSelect Number PS267556
Manufacturer Part Number WE25X10001
This kit comes with the rear bearing, shaft support, lubricant and other items required for the installation.
Fixes these symptoms
Installation Instructions
Raul from Fountain, CO
Loud noise & clothes hanging in drum.
1. Remove power cord from wall outlet. Unlatched the top lid of the dryer by pushing a flat screwdriver under the R & L sides where a metal clip on each side holds the top down.
2. Removed the yellow clip screwed onto the top frame.
3. Removed the front frame of the dryer by unscrewing the two screws holding the front frame on – one on either side.
4. Mark w/ an (x) on same side of alignment for the 2 wiring connectors before separating them.
5. Removed the front panel by tilting it forward & lifted to unlatch it from the 2 clips at the bottom of dryer.
6. Unwound the belt encircling the drum by releasing the tension between the tensioner roller & drive pulley. (Its better to remove back access panel at this time & do this at the back since I found it necessary to do this anyway when re-installing the new belt).
7. W/ lifting motion, pulled the drum out from the plastic holder attached to the back of the dryer frame. Guided & completely removed the drum out of the dryer.
8. Unscrewed the 3 screws holding the old big bearing to the back of the drum.
8. Unscrewed the 2 screws & removed the plastic that had held the bearing at back of the frame.
8. Installed the new bearing by screwing it to the back of the drum with 3 screws. Be careful not to strip screws. Used help to hold new bearing in place & aligned w/ screws.
9. From the front, installed the plastic holder to the back of the frame by 2 screws and put the ball bearing in-between holder & the metal strip retainer coming from the back of dryer.
10. Used the grease that came with the kit on the plastic holder & the big bearing at the back of the drum.
11. Replaced w/ new belt then re-inserted the drum back into the body of the dryer frame, w/ lifting motion, re-inserted the bearing into the plastic holder.
12. Putting the belt into the drive & tension pulleys through the back access panel was easy but could be very hard to do if coming from the front.
13. Had to replace the front panel's top felt w/ glides that holds the drum at the front w/ a new one. Really important to pay attention to where the plastic glides excess portion is facing (towards front panel), otherwise the front panel might not fit when you snap it back to place.
14. Removed old felt remnants w/ blade scraper & sandpaper. Used adhesive that came w/ kit. Once tacky, put the new felt w/ glides on & used clamps to hold it in place.
15. Waited for 2 hrs. (watched a movie) then re-installed front panel. Make sure that the drum (front) lid rides on top of the plastic glides.
16. Latched bottom of front panel to the metal clips. Replace the 2 screws back into place holding the front panel.
17. Snapped the wiring connectors in place where the (x) marks align.
18. Lowered the top panel & snapped it back into place
Note: All parts came w/ fast delivery & OEM fit - very satisfied! Took my time & on every chance I cleaned & vacuumed all areas of lint & dirt since the dryer hasn't been serviced for more than 10 years...
Read more...
Your Price
$112.27
  On Order
Hotpoint Dryer Rear Bearing Shaft Support
PartSelect Number PS265828
Manufacturer Part Number WE13X10011
Fixes these symptoms
Installation Instructions
Alonso from MONTGOMRY VLG, MD
Rear bearing was broke
I like to fix , i have time and i just give me the chance to try , and i did it , i wish to pay less for the parts , but was a good feeling when the problem fixed Read more...
Your Price
$4.90
  Special Order
Hotpoint Dryer HINGE BUSHNG
★★★★★
★★★★★
1 Review
PartSelect Number PS266989
Manufacturer Part Number WE1X404
Fixes these symptoms
Installation Instructions
Carl from Montoursville, PA
Noisy dryer operation
Removed front panel and rear access panel of dryer. Removed drum just far enough to access old drum bushing and removed and replaced it. Removed pulley spring arm retainer bracket in back of dryer. Removed old pulley and nut and replaced them with new ones and new bushing. Only problem encountered is when my daughter's cat ate 2 of the bolts that hold the rear access cover. Dryer runs well and quiet and cat is fine. Read more...

Related Hotpoint Dryer Parts