Inglis Range Hardware

Inglis Appliance Parts

Popular Inglis Range Hardware

Your Price
$6.55
  In Stock
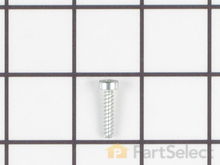
Inglis Range Torx Screw
PartSelect Number PS11741257
Manufacturer Part Number WP3368921
7-18 x 3/4" - sold individually.
Fixes these symptoms
  • Gas igniter glows, but will not light
  • Will Not Start
  • See more...
Installation Instructions
Michael from Dardanelle, AR
Ignitor switches shorted out
The ignitor switches are installed on top of the 4 gas valves for the range top. These switches control the electronic ignition. To replace the switch assembly the top of the range must be removed to gain access.

This was made more difficult by the fact that the screws that hold the burners to the range top were rusted and had to be drilled out so the the burners could be released from the top.

1. Disconnect the power to the range.
2. Open the top oven door.
3. Remove 2 - 1/4" sheet metal screws at the front corners of the range top assy. Remove the Burner knobs and the two Phillps screws that holds the gas valve assembly to the range top.
4. With a drill, remove the tops of the screws to release the burners from the range top. If the screws are in good condition and just unscrew them and the upper burners from the Orifice Holders. (I had to replace the orifice holders because the screws were stuck in them due to rust).
5. When the burners are free, lift the range top at the front and remove it from the range. Disconnect the ignitor wires from the ignitors on each holder.
6. To replace the Orifice Holders, disconnect the gas supply pipes from each holder by loosening the compression nut at the holder using an adjustable wrench. Secure the Orifice Holders when loosening the fittings, BE CAREFUL not to damage the aluminum gas supply pipes.
7. Note that there are 3 different Holders, be sure to use the holder that matches the specific location.
8. For LP gas fueled ranges ONLY, remove the small gas jets from the old holders and install them in place of the parts supplied with the new orifice holders. The new parts contain NATURAL GAS jets which are not compatible with LP gas. Each Different Orifice Holder uses a specific orifice or jet, make certain that the orifice matches the orifice holder. Check for leaks at the gas connections using soapy water.
9. Carefully raise the old ignitor switches (4) off the shafts of the gas valves. Note the top and bottom configuration of the switches
10. Carefully release the wires that come from the rear of the range from the rearmost switch. Press a suitable pin or other suitable tool in a the hole, beside the wire, just enough to release the wire. (Look at the NEW switch assemble to see how this works). Remove the wires from the NEW switch first to see how it is done. Repeat the process on the old switches. (you will re-use the wires that come up from the rear of the range.
11. Install the new switch assembly over the four (4) burner gas valves, take care to align the "D" shaped shafts with the holes in each valve.
12. Insert the wires in the two connections on the rearmost switch. CAUTION!!! Be sure to install the wires so that the color codes agree with the wires on the new switch assembly. Black to black and gray to gray.
13. Install the 4 clear plastic "shields" over the shafts and against the top of each switch.
14. Re-connect the ignitor wires to the burners and Re-Install the range top, in the reverse order of dis-assembly.
Read more...
Your Price
$7.97
  In Stock
Inglis Range Screw
★★★★★
★★★★★
1 Review
PartSelect Number PS11750186
Manufacturer Part Number WPW10200660
Installation Instructions
Judith from SALEM, OR
Replaced screw
By hand screwdriver Read more...
Your Price
$7.85
  In Stock
Inglis Range Screw, Igniter
★★★★★
★★★★★
3 Reviews
PartSelect Number PS11745563
Manufacturer Part Number WP8273062
This screw is sold individually.
Installation Instructions
Didier from LONE TREE, CO
Ignitor did not work
- Removed the cover.
- Removed te two Torx screws.
- Pulled the burner a couple of inches to be able to disconnect the wire.
- Spent a lot of time removing the small Philips screw holding the ignitor. Ended up breaking the ignitor with pliers to be able to put WD40 under the screw's head.
- Treated all screws with a high temperature copper paste to prevent oxidation.
Installed the new ignitor with the new screw.
- Reconnected the wire.
- Installed the two Torx screws.
- Voila, it works.
Read more...
Your Price
$5.37
  In Stock
Inglis Range Support Roller Clip
★★★★★
★★★★★
1 Review
PartSelect Number PS11746832
Manufacturer Part Number WP90296
Sold Individually.
Fixes these symptoms
Installation Instructions
randy from simi valley, CA
bad drum rooller bearing
took the top, sides and back removed the drum and replaced the roller roller shaft and drive belt and the belt tensioner Read more...
Your Price
$7.97
  In Stock
Inglis Range SCREW
★★★★★
★★★★★
2 Reviews
PartSelect Number PS11699801
Manufacturer Part Number W10777162
Sold individually.
Installation Instructions
Ernest from PALM BAY, FL
Range door would not close correctly. Spring loaded latch was bent.
Look up Whirlpool parts and was able to order parts thru PartSelect.
Item were deliver with in three day. I was able to watch the video provided my PartSelect on how to replace the spring loaded latch. The job was easy and I was able to install the range door. Thank you PartSelect.

I would recommend Whirlpool PartSelect for parts and service.

Ernest Martinez,
ernestmartinez918@gmail.com
Read more...
Your Price
$8.06
  In Stock
Inglis Range Screw
★★★★★
★★★★★
4 Reviews
PartSelect Number PS3651485
Manufacturer Part Number W10491985
Sold individually.
Installation Instructions
Quail Valley from Clive, IA
Glass broken on outside oven door
Checked to see that I had all the parts I needed.
Installed bottom door trim then side trim pieces.
Do not tighten screws. Install door handle with top
trim attached over glass. Tighten screws just snug
all around.
Read more...
Your Price
$10.85
  In Stock
Inglis Range Handle Spacer
PartSelect Number PS11740973
Manufacturer Part Number WP3196143
Sold individually. Must order quantity needed.
Your Price
$8.06
  In Stock
Inglis Range Screw
★★★★★
★★★★★
5 Reviews
PartSelect Number PS11738704
Manufacturer Part Number WP179051
Sold individually. Lock washers are used with screws when vibration from an appliance may cause the screw to loosen. Lock washers are also used in the electrical components of an appliance to ensure an electrical connection is not lost.
Installation Instructions
donna from baltimore, MD
missing screws for oven door
After searching on the internet for a very long time, we were almost ready to order the screws "blind" (no picture) from Sears for almost $10.oo per screw. Then I stumbled onto this website and found exactly what I was looking for, with a detailed description AND a picture!! Not to mention a price that was two thirds less than Sears..for TWO screws. Now the oven door is secure and we are no longer on our search for the right screws. Read more...
Your Price
$8.06
  In Stock
Inglis Range Screw
★★★★★
★★★★★
1 Review
PartSelect Number PS11740977
Manufacturer Part Number WP3196163
This screw is sold individually.
Your Price
$8.06
  In Stock
Inglis Range Screw
PartSelect Number PS11740982
Manufacturer Part Number WP3196175
This screw is sold individually. 8-18 x 3/8
Installation Instructions
J. Dawn from Key West, FL
replacing parts that were beginning to rust from outdoor exposure.
I had no problem. My husband is an engineer, so the repairs went well. The only problem I did have was that one of the parts did not arrive. come to find out that it was on backorder and arrived a day or two after I called. The person I spoke with when I inquired was most helpful and expeditious. All in all, my experience was excellent. Read more...

Related Inglis Range Parts