Models > MDB8959SFZ4 > Symptoms > Door latch failure

Parts That Fix Maytag Dishwasher MDB8959SFZ4 Door latch failure

Door latch failure is a commonly reported symptom for the MDB8959SFZ4 Maytag Dishwasher, and we have put together a full guide on how to fix this. This advice is based on feedback from people who own this exact appliance. We have listed the most common parts for your MDB8959SFZ4 Maytag Dishwasher that will fix Door latch failure. We have included repair instructions, and helpful step-by-step video tutorials. If you are experiencing this issue, not to worry, DIYers just like you have fixed this, and shared their experience to help you!

Fixes Symptom 85% of time
★★★★★
★★★★★
201 Reviews

Rated by 184 customers 


Easy 

15 - 30 mins 

Ratings submitted by customers like you who bought this part.   

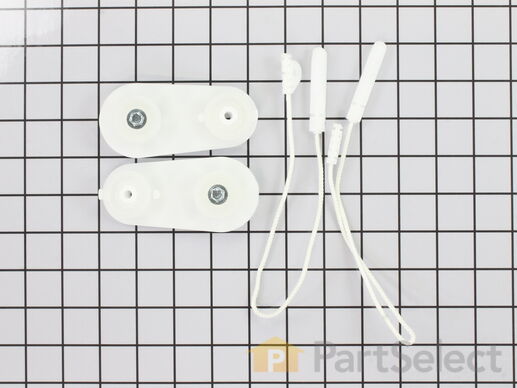
This part is a door balance link kit, also sometimes known as door cable or door spring cable kit, that helps support the door as it opens and closes by connecting to the dishwasher door hinges. The kit includes two door balance links and two door balance mounts with wheels, which will replace both the left and right sides. The only tool needed is a 5/16 nut driver. Before removing the existing kit, take note of how the door balance link kit is assembled for a smooth replacement process. It is recommended to check the door springs in case they need to be replaced as well.

$ 33.09
  In Stock
PartSelect Number PS972325
Manufacturer Part Number 8194001

Replacing your KitchenAid Dishwasher Door Balance Link Kit

Replacing your Door Balance Link Kit

Customer Repair Stories

Door spring link broken

1. Open the dishwasher and remove the two plastic grommets about halfway down on either side of the opening. Then remove the two screws under the grommets.

2. Remove the kick plate under the door. May have to lower unit by turning the feet using the adjustable wrench.

3. Make sure you have enough slack in the water input line and electrical wiring that you can pull the dishwasher out about 12 inches or more.

4. There is a spring and nylon rope link on both sides of the unit. Probably just one link is broken, but the replacement comes with two, so you can replace both or save one as a spare. Look at the good side and it should be pretty self explanatory how it attaches. I found it easiest to first thread the link around the lower pulley, then attach the link to the spring, then spring to the rear support, then the link to the door.

5. Reverse (2 to 1) to reinstall the dishwasher.
  • Sean from Ramona, CA
  • Difficulty Level:
    Easy
  • Total Repair Time:
    15 - 30 mins
  • Tools:
    Screw drivers, Wrench (Adjustable)
153 of 182 people found this instruction helpful.
Was this instruction helpful to you?
Thank you for voting!

Replaced Hinge Link

Pulled dishwasher from under counter, attached link to spring, hooked spring back into frame/chassis, threaded link through pulleys, attached other end of link onto door, reinstalled dishwasher under counter. All's well. Note-I purchased an extra link anticipating that the other one will fail. They're cheap enough.
  • Scott from Fort Lauderdale, FL
  • Difficulty Level:
    Easy
  • Total Repair Time:
    Less than 15 mins
  • Tools:
    Screw drivers
628 of 668 people found this instruction helpful.
Was this instruction helpful to you?
Thank you for voting!
Fixes Symptom 7% of time
★★★★★
★★★★★
10 Reviews

Rated by 5 customers 


Easy 

1- 2 hours 

Ratings submitted by customers like you who bought this part.   

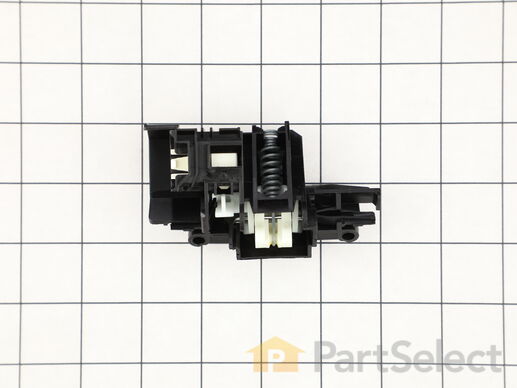
This is a door latch for various dishwashers. Door latches are designed to communicate with the control board of the dishwasher when the door is closed and latched shut. If your dishwasher is not latching shut properly, or if your dishwasher will not start when the door is shut, then this latch is likely broken or bad. To replace this door latch, you will need a screwdriver or drill, and a set of pliers. This latch is sold individually, and does not come with any securing screws or other parts.

$ 36.55
  In Stock
PartSelect Number PS11756967
Manufacturer Part Number WPW10653840

Replacing your Whirlpool Dishwasher Door Latch - Black

Replacing your Door Latch - Black

Customer Repair Stories

Door latch wouldn't close

Turned off power to the dishwasher. Removed the front panel via the screws on the inner wall of the door. Lifted and pulled out the front panel. Disconnected cable connections to fully remove the front panel. Pressed down on the latches to the left and right side of the door latch. Pulled out the door latch. Put in new door latch until it clicked into place. Reattached cable connections. Put the front panel back on with the screws. Turned back on power to the dishwasher.
  • Colin from Goffstown, NH
  • Difficulty Level:
    Easy
  • Total Repair Time:
    30 - 60 mins
  • Tools:
    Screw drivers
3 of 3 people found this instruction helpful.
Was this instruction helpful to you?
Thank you for voting!

Door would not latch shut

Following a utube video made it easy. Removed the outer cover of the door to expose latch. Two screws remove the latch, pay attention to how it was positioned and put the new one on and then replace the panel. But first turn off the electricity to the unit at the fuse box.
  • RONALD from PRESCOTT, AZ
  • Difficulty Level:
    Really Easy
  • Total Repair Time:
    30 - 60 mins
6 of 6 people found this instruction helpful.
Was this instruction helpful to you?
Thank you for voting!
Fixes Symptom 3% of time
★★★★★
★★★★★
13 Reviews

Rated by 5 customers 


Really Easy 

15 - 30 mins 

Ratings submitted by customers like you who bought this part.   

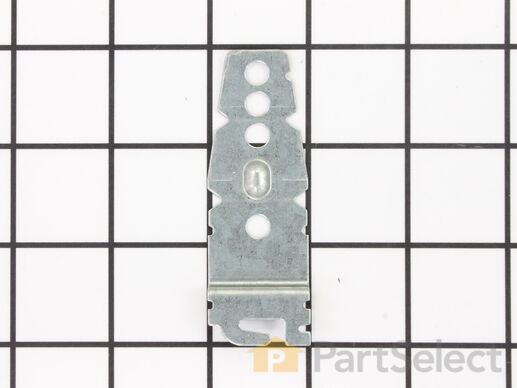
The mounting bracket is sold individually, without screws. This part secures the upper side of the dishwasher to the underside of the counter or cabinet to prevent the dishwasher from moving, shaking, or tilting forward. The bracket is made entirely of metal. It is recommended to check all brackets, if applicable, because they often wear at the same rate and both may need to be replaced. This is an OEM part that is sourced from the authentic manufacturer. Tools needed are a pair of needle nose pliers and a screwdriver.

$ 10.03
  In Stock
PartSelect Number PS11745496
Manufacturer Part Number WP8269145

Replacing your KitchenAid Dishwasher Mounting Bracket

Replacing your Mounting Bracket

Customer Repair Stories

Broken Mounting bracket

Removed old part and replaced with new part
  • Roy from HIGGINSVILLE, MO
  • Difficulty Level:
    Really Easy
  • Total Repair Time:
    15 - 30 mins
  • Tools:
    Screw drivers
8 of 13 people found this instruction helpful.
Was this instruction helpful to you?
Thank you for voting!

Lost dishwasher brackets

I called an experienced plumber, who balanced and installed my new dishwasher properly, using the brackets I ordered from Parts Select, after an INEXPERIENCED plumber had tossed the factory-provided mounting brackets out with the shipping carton. Relief!
  • Judith from Essex, MA
  • Difficulty Level:
    Easy
  • Total Repair Time:
    15 - 30 mins
  • Tools:
    Screw drivers
75 of 108 people found this instruction helpful.
Was this instruction helpful to you?
Thank you for voting!
Fixes Symptom 2% of time
★★★★★
★★★★★
4 Reviews

Rated by 9 customers 


Really Easy 

15 - 30 mins 

Ratings submitted by customers like you who bought this part.   

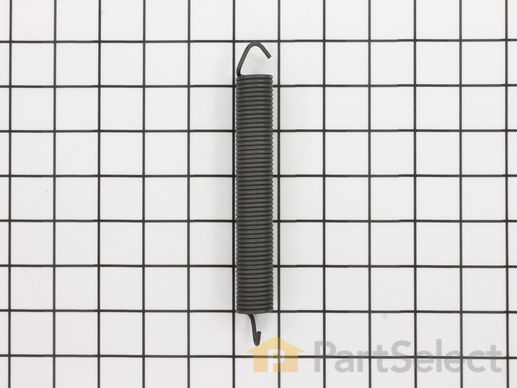
This dishwasher door spring is sold individually. It is recommended if you are replacing one side, to replace both.

$ 33.23
  In Stock
PartSelect Number PS11745526
Manufacturer Part Number WP8270020

Replacing your KitchenAid Dishwasher Door Spring

Replacing your Door Spring

Customer Repair Stories

Door spring broke-Door falls down

Remove the mounting screws that hold the dishwasher under the counter top. Remove dust cover plates at the bottom of the machine. The machine will have to be pulled out, so turn off the water to the machine. Usually under the kitchen sink. Disconnect water supply and push it out of the way so the dishwasher can be pulled out. Pull machine out enough so you have access to the door cables and springs. The door will have to be in the closed(up) position to do the repair. Usually only one side is broken. Start with the broken side and copy the working side when installing new parts. Then repair the working side. To get the working side apart just pull on the spring and disconnect it from the cable. Do the reverse to reinstall.
  • Peter from JERICHO, NY
  • Difficulty Level:
    Easy
  • Total Repair Time:
    15 - 30 mins
  • Tools:
    Screw drivers, Socket set, Wrench (Adjustable)
6 of 7 people found this instruction helpful.
Was this instruction helpful to you?
Thank you for voting!

The Door Just Falls Down

After unscrewing the dishwasher, I pulled out the washer, I saw that the springs were attached just by strings that were broken... I just used the strings from an old lanyard, retied everything, and did not need the springs! works well!
  • Neil from Winchester, VA
  • Difficulty Level:
    Easy
  • Total Repair Time:
    15 - 30 mins
  • Tools:
    Nutdriver, Screw drivers
52 of 83 people found this instruction helpful.
Was this instruction helpful to you?
Thank you for voting!
Fixes Symptom 1% of time
★★★★★
★★★★★
19 Reviews

Rated by 7 customers 


Really Easy 

30 - 60 mins 

Ratings submitted by customers like you who bought this part.   

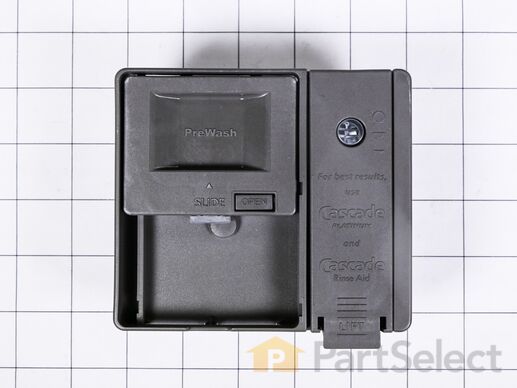
Detergent dispenser W10861000 is an original equipment manufacturer (OEM) part that fits some Whirlpool, KitchenAid, Maytag and Amana dishwashers. Detergent dispenser W10861000 attaches to the inner door panel and holds the dishwasher detergent and rinse aid in covered compartments. This dishwasher detergent dispenser measures approximately 5 inches wide and 4.5 inches high.

$ 96.36
  In Stock
PartSelect Number PS11731570
Manufacturer Part Number W10861000

Customer Repair Stories

Detergent dispenser latch broken

Replaced the detergent dispenser module by first unscrewing the front outer cover from the dishwasher and removing it, then by unplugging the old detergent dispenser, then by bending the metal latch clips outward to remove the old detergent dispenser, then by bending the metal latch clips inward before inserting the new detergent dispenser, plugging the new one into the wiring harness then re-securing the front outer cover of the dishwasher door.

This repair could be done in under 15 minutes but my dishwasher is so old that there was a lot of gunk built-up around the screws that hold the front cover on that I wanted to take my time cleaning up real nice.

The detergent dispenser is VITAL for getting dishes clean. Without it working properly, the detergent will be removed from the wash during the pre-wash/soak function and your dishes will not come out clean. I HIGHLY recommend doing this repair if your detergent dispenser is not working, and I had a great experience with www.PartSelect.com
  • Benjamin from KNOXVILLE, TN
  • Difficulty Level:
    Really Easy
  • Total Repair Time:
    30 - 60 mins
  • Tools:
    Screw drivers
6 of 7 people found this instruction helpful.
Was this instruction helpful to you?
Thank you for voting!

Detergent door was not locking closed

Super simple.
Remove all screws around the stainless metal shroud inside the door. DONT remove the hinge screws.
Torx bit required.

Unplug detergent dispenser and place outer door assembly aside. Dispenser has small clips holding it in, top, bottom and sides I believe. Push these in, dispenser falls out into dishwasher.

Insert new unit, reverse all steps. Done.
Dont for get to reattach the wires!
  • David from Swanzey, NH
  • Difficulty Level:
    Really Easy
  • Total Repair Time:
    15 - 30 mins
  • Tools:
    Nutdriver, Screw drivers
13 of 13 people found this instruction helpful.
Was this instruction helpful to you?
Thank you for voting!
Fixes Symptom 1% of time
★★★★★
★★★★★
34 Reviews

Rated by 15 customers 


Easy 

1- 2 hours 

Ratings submitted by customers like you who bought this part.   

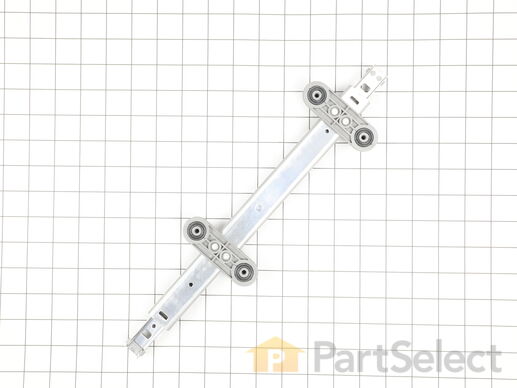
This is the dishrack slide track for the left side of various dishwashers. This track allows your upper dishrack to be supported and slide in and out of the dishwasher to place or remove dishes from the dishrack as necessary. If your left dishrack is currently broken or damaged, it needs to be replaced for your dishrack to be completely supported. Replacing this dishrack slide requires some disassembly of your dishwasher and will require a screwdriver to pull your dishwasher out from underneath your countertop, and remove the securing bolts from the slide track. This OEM dishrack slide track is sold individually and does not include the slide track for the right side of your dishwasher.

$ 84.18
  In Stock
PartSelect Number PS12584376
Manufacturer Part Number W11259785

Customer Repair Stories

basket rail repair

unplug, disconnect water, remove all screws holding the machine in the cabinet. slide out the machine to access the 4 bolts hold the rail. Have a prop to hold basket in place as you remove old rail> Plastic clips front and back, hold the basket to the rail. Be careful not to break, not include with the replacement rail. If you are not handy with tools and no insight...hire it done
  • JERRY from BUCYRUS, KS
  • Difficulty Level:
    A Bit Difficult
  • Total Repair Time:
    30 - 60 mins
3 of 3 people found this instruction helpful.
Was this instruction helpful to you?
Thank you for voting!

Left side dishrack track broke. Wanted to install new one.

Thought this would be much easier than it actually was. Long story short, ended up calling is an appliance professional to install the part.
  • Stacey from VESTAVIA, AL
  • Difficulty Level:
    Difficult
  • Total Repair Time:
    More than 2 hours
5 of 6 people found this instruction helpful.
Was this instruction helpful to you?
Thank you for voting!
Fixes Symptom 1% of time
★★★★★
★★★★★
333 Reviews

Rated by 28 customers 


Very Easy 

15 - 30 mins 

Ratings submitted by customers like you who bought this part.   

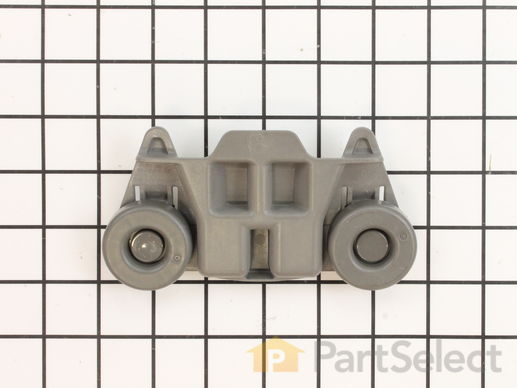
This OEM gray Dishwasher Lower Dishrack Wheel Assembly is a plastic kit that allows the rack to slide in and out of the dishwasher easily. If it breaks or becomes damaged. sliding will feel difficult. This can happen due to normal wear and tear, and the part should be replaced if this occurs. Check your model number and user manual to make sure this part is correct. It attaches directly to the dishrack. To repair, open the dishwasher door and pull out the lower dishrack. Next, push the tab from both sides and it should pop out. To install the new wheel assembly, place it on the rack and make sure the caps overlap the wire from the inside before you clip it in place by pushing the wheel. It measures roughly 3x6 inches.

$ 46.00
  In Stock
PartSelect Number PS3406971
Manufacturer Part Number W10195416

Replacing your KitchenAid Dishwasher Lower Dishrack Wheel

Replacing your Lower Dishrack Wheel

Customer Repair Stories

Wheel on lower shelf broke off

Simply snap the old one off and snap the new one on. Simple as that less than 15 seconds.
  • Dennis from OAKWOOD, IL
  • Difficulty Level:
    Very Easy
  • Total Repair Time:
    Less than 15 mins
30 of 36 people found this instruction helpful.
Was this instruction helpful to you?
Thank you for voting!

Broken wheel unit on the bottom dish rack

All you do is pop out the old wheel unit at two (2) points on the plastic wheel housing and pop in the new one. Easy fix. Less than a 5 minute fix.
  • Thomas from WEST OLIVE, MI
  • Difficulty Level:
    Very Easy
  • Total Repair Time:
    Less than 15 mins
92 of 106 people found this instruction helpful.
Was this instruction helpful to you?
Thank you for voting!
Fixes Symptom less than 1% of time
★★★★★
★★★★★
44 Reviews

Rated by 15 customers 


Easy 

30 - 60 mins 

Ratings submitted by customers like you who bought this part.   

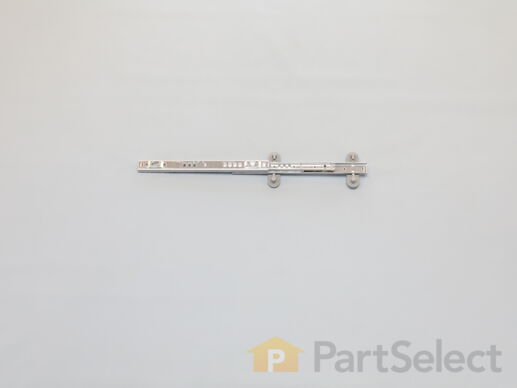
This dish rack slide rail is a genuine OEM replacement part that is compatible with various models of dishwasher. It is designed to fit on the right side of the dishwasher. The slide rail or track supports the upper dish rack and allows it to slide in and out of the dishwasher smoothly so that you can easily load and unload your dishes. It is made of stainless steel and can be found mounted to the side of the interior cavity of the dishwasher. If your dish rack is unstable and difficult to pull in and out, you will likely need to replace the slide rail. Mounting hardware is sold separately.

$ 71.74
  In Stock
PartSelect Number PS12584377
Manufacturer Part Number W11259786

Customer Repair Stories

Easy repair

Had to remove 2 screws fastening dishwasher to counter. Also removed bottom faceplate to expose the legs and to be able to lower them. Other sites recommended disconnecting the drain and water line but I did not have to do that, I had enough slack in the lines. I got the dishwasher about halfway out of the cabinet and then was able to remove the 4 screws holding the right track. Put the new track in and was good to go. Problem was that the left track broke and fell off a few days later. Still was an easy fix and thanks to PartSelect it was not very expensive.
  • Joseph from NAPLES, FL
  • Difficulty Level:
    Easy
  • Total Repair Time:
    30 - 60 mins
  • Tools:
    Socket set
3 of 4 people found this instruction helpful.
Was this instruction helpful to you?
Thank you for voting!

Upper rack ball bearing track failed

Not a difficult repair, but made more difficult than it should have been by KitchenAid's decision to attach the track from the outside,rather than the inside. Remove the top and bottom racks (top rack just lifts off its tracks). After turning off power, remove the trim panel below the door, then open the door and undo the screws holding the tabs at the top where the dw is attached to the underside of the countertop. Lower the adjustment legs at the bottom front with an adjustable or sized end wrench. Assuming enough slack in the supply and drain hoses and power supply line, just pull the dishwasher about halfway out which will give access to the bolts holding the track mounts. You'll have to pull back the insulation to access the bolts. Then with a nut driver or socket wrench remove the bolts, put the new track in place and bolt in. Actual replacement takes less than five minutes. All the prep work to get to the mounting bolts is most of the work. If you have to disconnect the hoses or power it's a bit more, but I didn't have to do that. I made the mistake of only ordering the one track that failed (outraged that I have to replace this after only 5 years or so and too cheap to buy both), but in retrospect, I can see that I should have bought both. The opposite side is not in great shape and will need to be replaced at some point.
Not a difficult repair-well within most people's skill level. But really KitchenAid - either design the track to last longer or make it easy to replace without pulling the dw out!
  • Daniel from WELLFLEET, MA
  • Difficulty Level:
    Easy
  • Total Repair Time:
    30 - 60 mins
  • Tools:
    Nutdriver, Screw drivers, Wrench (Adjustable), Wrench set
5 of 5 people found this instruction helpful.
Was this instruction helpful to you?
Thank you for voting!
Fixes Symptom less than 1% of time

Rated by 2 customers 


A Bit Difficult 

30 - 60 mins 

Ratings submitted by customers like you who bought this part.   

$ 129.67
  In Stock
PartSelect Number PS16875381
Manufacturer Part Number W11612302

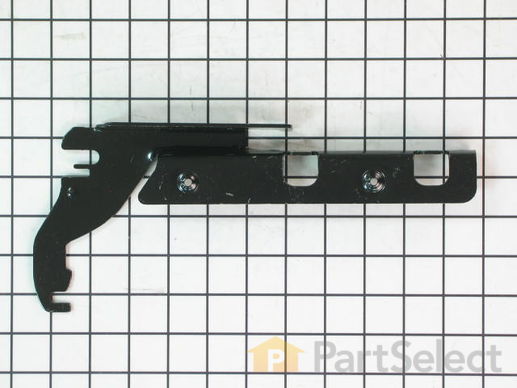
Replacing your KitchenAid Dishwasher HINGE-DOOR

Replacing your HINGE-DOOR
Fixes Symptom less than 1% of time

Rated by 2 customers 


A Bit Difficult 

30 - 60 mins 

Ratings submitted by customers like you who bought this part.   

$ 139.03
  In Stock
PartSelect Number PS11746183
Manufacturer Part Number WP8534853

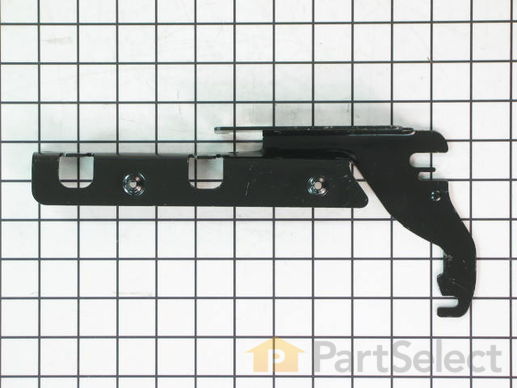
Replacing your KitchenAid Dishwasher Door Hinge - Right Side

Replacing your Door Hinge - Right Side