Understanding the F2 Error Code on a Whirlpool Range
A comprehensive guide to diagnosing and repairing Whirlpool ranges
Post
Pin It
Share
Subscribe
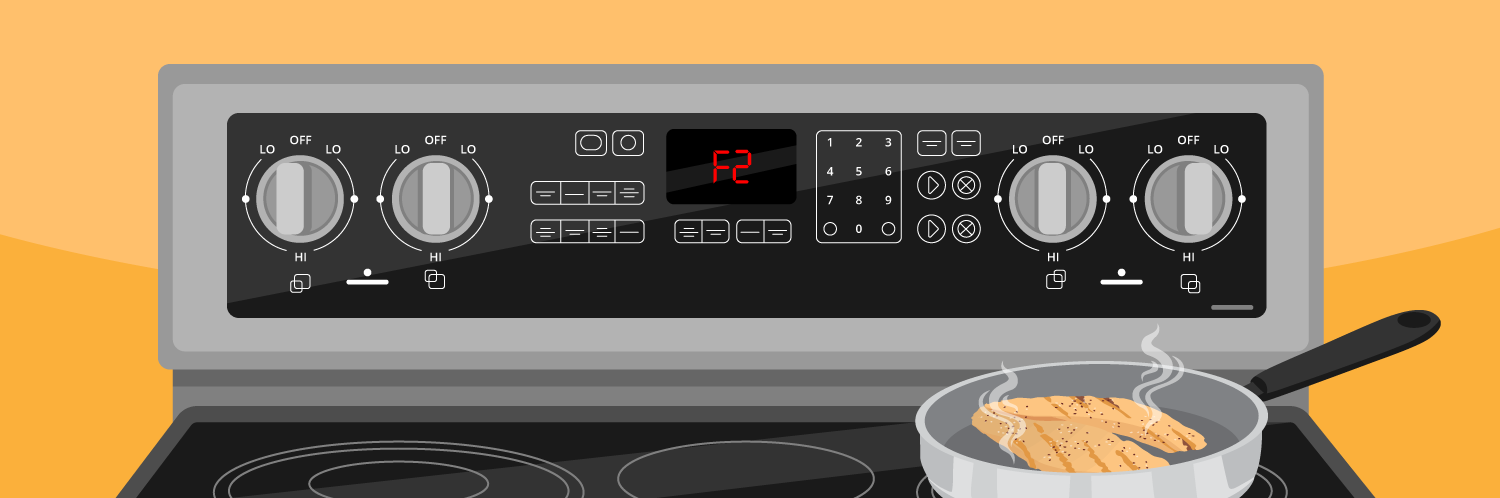
Your electric Whirlpool range has a digital display that provides essential information about the appliance's status and functions. When the screen displays error codes, it indicates a specific problem within the range and offers you a reference point for troubleshooting. This allows you to identify the problem without needing extensive technical knowledge, so you can promptly and effectively resolve it.
Cooking dinner can already be a test of patience, but when your Whirlpool range flashes an F2 error code, it feels like the oven just handed you a pop quiz. Before you throw in the (dish)towel and order takeout, let's break down this error and find a fix.
Whether you're new to DIY or an experienced pro, this guide will help you grasp the meaning of an F2 error code, identify the parts that need troubleshooting, learn how to repair them, and discover methods to prevent the code from coming up again in the future.
What Is An F2 Error Code?
When your range shows the F2 error, it typically points to a temperature-related issue. The oven's control board might detect an unusual resistance reading from the temperature sensor, or it could indicate that the internal temperature has exceeded a preset threshold. Your oven may feel too hot or too cold as a result.
What Signs Should You Look For?
The error code might be accompanied by these telltale signs:
You hear constant beeping
The control panel shows incorrect oven settings
The oven struggles to reach or hold the intended temperature
Food cooks or bakes unevenly due to temperature fluctuations
Food overheats or burns
Which Parts Are Affected?
Before you start unscrewing panels and tinkering with wires, it is crucial to understand the components most likely at fault:
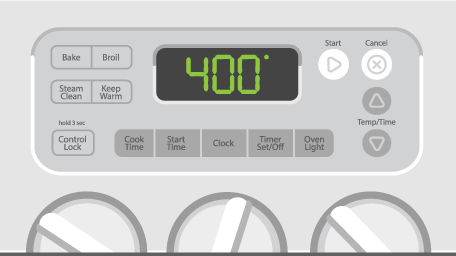
Control Board
Acting as the range's "brain," the control board oversees various oven functions, including cooking modes, temperature settings, and timers. In most cases, it resides behind the buttons and digital screen you interact with when setting your oven's temperature or cooking time. It looks like a small circuit board with a series of plug-in connectors where the different wires attach.
Temperature Sensor or Thermistor
Also called the thermistor, the temperature sensor is the oven’s thermometer. It measures the temperature inside the oven cavity and sends this information to the oven's control board. If the temperature is too high or low, the board adjusts power to the heating element accordingly. The thermistor can look like a slender rod or probe and is often found protruding from the oven's back wall. The probe is a metallic or ceramic tip attached to wires.
Wiring or Connection Problems
If the control board is the oven's "brain", the wiring in the temperature regulation system are the "nerves". The wiring is a set of colored insulated wires that run from the control board to the temperature sensor and to the heating element. They are crucial for relaying temperature data, allowing the sensor to send readings to the control board so it can adjust the heating and cooking temperatures. They are often bundled together and held in place with clips or ties.
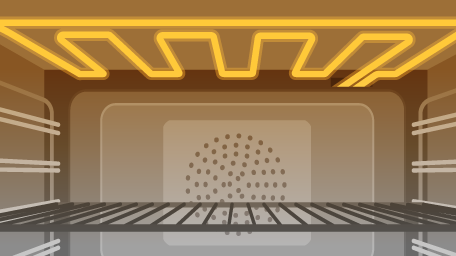
Heating Element
Responsible for heating the oven and the actual cooking process; it is usually a coil or a flat piece of metal that sits at the bottom of the oven. When you set the oven to bake or broil, it glows red-hot when electricity passes through it.
Possible Causes of the F2 Error Code
Knowing why these issues occur in the first place can help you prevent future ones:
Normal wear and tear: Components like sensors and wiring degrade over time with regular use.
High temperatures: Sensitive components may deteriorate when exposed to excessive heat.
Electrical surges: Sudden voltage spikes from lightning strikes or power outages can overwhelm the range's control system, damaging components or altering their resistance.
Moisture and humidity: High humidity levels can lead to condensation. Moisture build-up within the range can disrupt electrical pathways, leading to short circuits or irregular behavior.
Step-by-Step Troubleshooting Guide
Ready to roll up your sleeves and tackle this error code? Grab your tools and let's dive in!
Tools Needed to Fix the F2 Error Code
Screwdrivers (for removing panels and accessing components)
Multimeter (for testing the resistance or voltage of the components)
Pliers (for working with wiring and connections)
Replacement parts (if needed)
Safety Precautions
Always remember to switch off the range at the circuit breaker unless you're using your multimeter to check voltage. Then, give the range enough time to cool down. It's advisable to wear cut-resistant gloves, especially when dealing with sharp parts. Keep your user manual close at hand, as component locations can vary by model.
How to Troubleshoot the Control Board
After turning off the range at the circuit breaker, wait a few minutes before powering it back on; this is known as power cycling and helps reset the range's internal electronics. Sometimes, this is enough to clear the error code.
If this doesn't work, move on to testing the control board. Find it directly behind the control panel and inspect for visible issues like burn marks. Be cautious not to touch wires or components with your bare hands.
With a multimeter, you can test the board's voltage. Refer to your user manual to locate the power input connector and wires on the board. Set the meter to the voltage (volts AC) mode and attach the probes to the board's input terminals. A display around 120 volts is expected.
To replace a faulty board, remember to first unplug the power cord. Note the wire connections on the board before disconnecting them (taking a picture can help!). Remove the old board and install the new one by securing it in place and reconnecting its wires.
How to Troubleshoot the Temperature Sensor or Thermistor
If the control board is in working condition, your next suspect should be the temperature sensor, especially if the error code appears exclusively during cook and clean modes.
Consult your user guide to locate it—it’s typically in the rear panel of the oven. Access it by removing the screws on each side and gently raising and lowering the panel to reach the sensor. Disconnect the wire harness connector by pressing down on its tab. Check for corrosion or rust on the sensor's terminals.
When testing the sensor, ensure the oven has cooled to avoid affecting the multimeter reading. Set the multimeter to the resistance setting, then touch a terminal with each probe. If the reading deviates significantly from 1100 ohms at room temperature or shows no resistance, it is time to replace the sensor. If you suspect that it has shorted through the frame of the oven, conduct a continuity test from each terminal to the oven's metal body. If there's resistance, the sensor is shorted.
To replace the old sensor, unthread its mounting screws and free it from its opening. Install the new sensor by reconnecting it to the wiring harness. Finish the repair by reassembling the oven.
If the error persists, take a close look at all the wires connected to the control board, thermistor, and heating element. Examine the bake or broil relays for welded relay contacts. These look like two metal points that have melted or stuck together, instead of maintaining a small gap between them—if found, you will need to replace the control board.
Make sure the wires are not damaged or burnt. Tighten any loose connections you come across. Test the wires for continuity with your multimeter; it should either beep or show a value close to zero ohms. Replace any wires that fail the test.
When all else fails, consider checking the heating element. Remove the access panel specific to it, disconnect the wires from the element's terminals, and remove the oven racks. Take out any mounting screws holding the element to the interior panel. You can remove the old element from the oven and check it for signs like breaks, discoloration, or arcing. Make sure that the sensor is positioned centrally and isn't touching the sides of its hole or the oven interior, as that can lead to inaccurate readings.
If you're still uncertain, turn to your trusty multimeter. For analog models, set the range dial to the lowest ohms setting and calibrate the meter to zero. For digital models, use the lowest ohms setting or "resistance with tone," if available. A reading between zero and fifty ohms indicates continuity; otherwise, the element is likely burnt out.
To install the new element, insert its terminals through the rear panel slot and secure it with screws.
Just like a soufflé, your oven loves tender care! Regular maintenance is the key to avoiding annoying error codes.
Make it a habit to clean your oven and its parts regularly to stave off dust and debris buildup, which can affect temperature accuracy. For large families, consider cleaning your range once a month. Otherwise, a quarterly deep clean should suffice. It's not rocket science either—promise! All you need are cleaners, cleaning gloves, microfiber cloth rags, and a sponge:
Here are other little maintenance tips that go a long way:
Use the Oven Properly: Avoid slamming the oven door, as this can damage nearby components.
Use Oven Liners: Consider using oven liners or aluminum foil to catch spills and keep them from reaching sensitive parts. Just be sure not to block any vents or fans.
Avoid Overusing the Self-Cleaning Feature: Be careful when using the self-cleaning feature; reserve it for when needed as it can stress oven components.
Avoid Overheating: Refrain from running the oven at excessively high temperatures for prolonged periods, as this can result in component wear and tear.
The next time your Whirlpool range throws an F2 error code your way, don't let it throw a wrench in your dinner plans. Remember, a simple error code doesn't have to be a recipe for disaster – just a minor hiccup in your culinary journey.
The PartSelect Content Team has a passion for DIY and we pride ourselves on being a resource for quality, expert content to help you accomplish any DIY project. Alongside our expert repair technicians, our team of experienced technical writers works to provide safe and reliable information on all tasks and jobs around your home. We spend time learning about the problems and projects that our customers are working on, and we make it our job to answer key questions and provide resources for every step along the way. Repairs and DIY projects are what we do, and the PartSelect Content Team wants to help you do them, too.
With the Fix app, you can quickly and easily find information on your appliance, along with videos and articles to help you fix it.
"Like magic. I took a picture of the model number on my refrigerator, and the app identified it right away … Very convenient. I'm impressed." - Clever Jeff ★★★★★
You added 1 item to your cart
✖
$
Qty:
Total item(s) in cart:
Order Subtotal
$
*Taxes and shipping will be applied during checkout