Electrolux Stove Parts
- Search your model number to find:
- Genuine OEM parts guaranteed to fit
- Free manuals and guides
- Repair instructions and videos
Popular Electrolux Stove Parts
Your Price
$56.38
In Stock
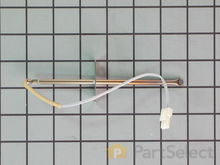
Electrolux Stove Temperature Sensor
PartSelect Number PS820208
Manufacturer Part Number 316217002
The oven temperature sensor for your range may also be called a probe. The quick connect on this part may differ than your original piece. If the temperature sensor does not fit you will have to cut off the quick connect, and then wire together with porcelain wire nuts. The function of the oven temperature sensor is to measure the temperature in the oven and signal the other heating components. Before you begin this repair make sure to disconnect the power to the range. The tools required for this installation include a number two Phillips screwdriver or a number two square head screwdriver, and maybe a pair of wire strippers and crimpers.
Fixes these symptoms
- Element will not heat
- Little to no heat when baking
- Little to no heat when broiling
- See more...
Installation Instructions
Dan from Bellevue, ID
Oven not heating to desired temperature
Replaced clock control by removing surface burner control knobs and plastic nuts, and then the cover over the oven control. Two screw hold the clock in place, after removal and disconnecting the plug-in you can reinstall the new clock control. The Heat Sensor inside the oven will also need to be replaced. It is located inside the oven and attached with two screws; the back of the oven will need to be removed to unplug. Reverse removal procedure and turn the power back on to the stove.
Read more...
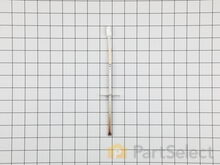
Electrolux Stove Temperature Sensor
Not be control panel so decided to try the temp sensor. Since replacing oven has worked properly. Read more...
PartSelect Number PS11758156
Manufacturer Part Number 5304504897
The temperature sensor, also known as an oven probe, helps measure the temperature within the oven cavity. If your oven is too hot, not heating evenly, has little to no heat when baking, or flashing F3/F4 error messages on your control board, you may need to replace this part. This part measures 6" long and is made of metal. Please make sure to disconnect the power to your oven range before starting this repair. This temperature sensor is a genuine OEM part.
Fixes these symptoms
- Element will not heat
- Little to no heat when baking
- Oven is too hot
- See more...
Installation Instructions
Ronald from NEVADA, MO
Top oven overheating
Have a double wall oven and the top oven would not shut off or broiler part would stay on and burn tops of food. Since bottom oven was not having any issues felt like it could Not be control panel so decided to try the temp sensor. Since replacing oven has worked properly. Read more...
Your Price
$78.52
In Stock
Electrolux Stove Glass
PartSelect Number PS11728351
Manufacturer Part Number 5304503232
This tempered glass is supplied by the original manufacturer and measures 20 inches by 13 inches. It is an inner door glass, designed for use in ranges/ovens and has several purposes which include providing heat insulation, acting as protective barrier, and providing an opening to monitor the cooking/heating process. Over time the glass can break or break from impact, thermal shock, or improper installation. If the glass is defective, it needs to be replaced promptly to avoid leaking, loss of insulation and potential harm to the user. Remove any fasteners or clips that secure the glass and carefully dispose of it. Position the new glass in the same position and secure it appropriately.
Installation Instructions
Mitch from Fernandina Beach, FL
Cracked oven door inner glass
Repair was quite easy, as long as you have the instructions for removing the door. The screws that hold the bottom of the door to the fixed hinge are placed into the side of the hinge assembly after removal; this holds the door at a 45 degree angle for easy removal. After that, just place the door on a flat surface and dismantle the door from the inside. The inner glass is contained in a metal frame with another piece of glass; this frame comes apart easily using the clips in each side. The door assembles easily after the glass is replaced; just take your time and give yourself enough room to lay out the parts as you go. Good luck!
Read more...
Your Price
$35.95
In Stock
Electrolux Stove Main Terminal Block Kit
PartSelect Number PS471605
Manufacturer Part Number 5304409888
Terminal block kits are also known as terminal boards, or terminal strips, and they are found in a wide variety of household appliances. Most often in ranges, wall ovens, and dryers. This kit attaches the power cord to the inner wiring of your appliance. If the terminal block is faulty, your appliance will not get the power it needs to operate properly. When removing the old block pay close attention to the wire placement, this will make installing your new part much easier. If you notice any of the wires or wire terminals are corroded or damaged they will also need to be replaced.
Fixes these symptoms
- Element will not heat
- Little to no heat when baking
- Little to no heat when broiling
- See more...
Installation Instructions
Timothy from Spring Valley, AL
Cord was not tightened enough by delivery crew.
PF alarm appeared on display. Noticed clicking when cord was moved. Had arced for some time and melted original block. New part slightly different. Only has 3 lugs, old one had six. Stack using washers provided. Take note of colors before disassembly. Use caution while working through access opening. The edges are sharp. Only tools needed are phillips screwdriver, deep socket for lug nuts. Nut driver optional. Hope this is helpful.
Read more...
Electrolux Stove Bake Element
PartSelect Number PS1992188
Manufacturer Part Number 318254906
This 3400-watt bake element has screw style connections. The bake element is located on the bottom of the oven cavity and supplies the heat for baking. If your oven is not heating evenly, element will not heat, or there is little to no heat when baking, you may need to replace the element. When replacing the element make sure to hold the wires forward so the wires do not fall back through the rear of the oven. This is a genuine OEM bake element. Please remember to disconnect the power to your range before you start your repair.
Fixes these symptoms
- Element will not heat
- Little to no heat when baking
- Oven not heating evenly
- See more...
Installation Instructions
Lynn from Denton, TX
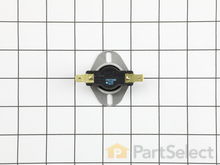
Electrolux Stove Limit Thermostat For Cooling Fan
PartSelect Number PS3409411
Manufacturer Part Number 318578506
This authentic OEM high-limit thermostat, also known as a limit switch or cooling fan thermostat, serves as a safety feature to prevent the oven from overheating. It monitors the temperature inside the oven and activates the cooling fan when the temperature exceeds a certain limit. The cooling fan helps dissipate heat and maintain a safe temperature. The high-limit thermostat is usually situated inside the top panel. If the high-limit thermostat is broken or faulty, the cooling fan may fail to turn on, leading to excessive heat buildup inside the oven. You might also notice that your food cooks unevenly since the oven struggles to maintain the desired temperature. In some cases, if the high-limit thermostat is completely non-functional, the oven may not heat up at all. You can test the sensor at room temperature by measuring the resistance between the two prongs at the end of the sensor connector. The resistance should read approximately 1080 - 1090 ohms at room temperature. To access the thermostat, refer to your user guide for detailed instructions. Generally, you need to ensure the power is disconnected at the breaker, lift the top panel on its hinges, remove the screws on the plate under the burners, take out the burners and plate, disconnect the wires from the old thermostat, and remove the mounting screws to release it. Please note that the replacement part is sold separately from the cooling fan.
Fixes these symptoms
- Element will not heat
- Little to no heat when baking
- See more...
Installation Instructions
Betty from OLIVE BRANCH, MS
Thermostat for oven cook elements. Cooling fan is a misnomer-the fan still worked!
First of all I am not Betty, I am her husband. Second I and a friend pulled the range out of the countertop (which was not necessary). The top can be raised on it hinges and the plate under the burners can be removed by taking out 8 to 19 screws and there is the thermostat looking at you. After doing this once and knowing where the thermostat is, the job could be done in less that an hour.. INSTRUCTIONS: Turn OFF the circuit breaker. Remove the burners. Remove the plate under the burners. Change the thermostat (making sure to place in correct direction as the one removed). Reassemble, turn on circuit breaker, test oven heat.
Read more...
Your Price
$33.95
In Stock
Electrolux Stove Convection Fan Blade
PartSelect Number PS3409337
Manufacturer Part Number 318398302
This convection fan blade is designed for use with various makes and models of range and oven and is sold as an individual part. Made of metal and measuring approximately 4.75-inches in diameter, this genuine OEM fan blade works with the convection motor to circulate and distribute heat evenly throughout the oven. If your oven is not getting hot enough or the heat is not circulating properly, or if the fan blade in your oven has become warped, damaged, or chipped, it needs to be replaced immediately. To replace the fan blade, disconnect your range from the power and locate the fan assembly. With the appropriate screwdriver and wrench, remove any assembly covers and the securing nut from the blade. Once the nut is removed, install the new blade and secure it and re-install the cover.
Installation Instructions
John from Stevensville, MD
replacing the fan on a convection oven (fan was making a vibration noise)
This was the first time replacing the fan. It is a lot easier to work in the oven compartment with the oven door removed, only two screws on the door and the hinges were released. I found that a couple of the screws were either rusted or stripped so I used a pair of pliers to remove the screws that were holding the diffuser in place. Once there was access to the fan I found that the fan was warped and that the blades were scraping against the back wall of the oven. The next challenge was to remove the retaining nut. I used a sheet metal screw to secure the warped fan to keep it from spinning. once I figured out that you have to turn the retaining nut to the right to loosen, it came off easily. 1/2" socket with extension. When I replace the fan I used two washers for spacers to make sure that the fan would not scrape the wall of the oven. Its been tested many times and the oven does not make that horrible sound anymore.
Read more...
Electrolux Stove Toe Panel Insulation
PartSelect Number PS5574152
Manufacturer Part Number 318372017
Electrolux Stove Bake Element
******You may not need to remove oven depending on how the framing under the oven is constructed.
**** Before you begin, disconnect power from the oven.
1.Remove two screws under oven, directly below rear of element door, and remove the metal piece the screws held in place. This will free up the back of the element access door panel.
2.Remove front trim strip on front bottom of oven, this will expose two screws directly behind trim strip. Remove the two screws behind the trim strip. This will free up the front of the element access door.
3. Lower element access door. If you can open the element door enough to disconnect the element wire leads and get the element out, you can swap out the element now and will not need to pull your oven out of the wall. If you can't open the access panel to fully access and replace element, slide the oven out until you can get the access door open and prop the front of the oven up on something sturdy you have laying around. In my case it was the good old yeti cooler. I would seriously consider removing the oven doors before you slide the oven out. It will make the oven alot less tippy by removing the weight from the front off the appliance. The element wires are short, you may need to disconnect them to get the element access door all the way open.
4. Install the new element and reassemble using these instructions in reverse order.
5. Reconnect power.
6. Make a batch of cookies. Read more...
PartSelect Number PS3655318
Manufacturer Part Number 318601604
Fixes these symptoms
- Element will not heat
- See more...
Installation Instructions
Heidi from RIDGWAY, PA
Lower oven would heat to temperature, but would not continue to maintain temperature.
Troubleshoot element by disconnecting the element leads from relay board and test for acceptable resistance across leads. In my case the element had tested open with no resistance.******You may not need to remove oven depending on how the framing under the oven is constructed.
**** Before you begin, disconnect power from the oven.
1.Remove two screws under oven, directly below rear of element door, and remove the metal piece the screws held in place. This will free up the back of the element access door panel.
2.Remove front trim strip on front bottom of oven, this will expose two screws directly behind trim strip. Remove the two screws behind the trim strip. This will free up the front of the element access door.
3. Lower element access door. If you can open the element door enough to disconnect the element wire leads and get the element out, you can swap out the element now and will not need to pull your oven out of the wall. If you can't open the access panel to fully access and replace element, slide the oven out until you can get the access door open and prop the front of the oven up on something sturdy you have laying around. In my case it was the good old yeti cooler. I would seriously consider removing the oven doors before you slide the oven out. It will make the oven alot less tippy by removing the weight from the front off the appliance. The element wires are short, you may need to disconnect them to get the element access door all the way open.
4. Install the new element and reassemble using these instructions in reverse order.
5. Reconnect power.
6. Make a batch of cookies. Read more...
Electrolux Stove Steel Washer
quick delivery and easy repair ... like new again .
would use you again Read more...
PartSelect Number PS436497
Manufacturer Part Number 316008401
This steel washer is also known as the range washer and is used on your oven door. The measurements for the steel washer are a three quarter inch outer diameter, and a one quarter inch inner diameter. This washer is an OEM part, made of steel, which is sourced directly from the manufacturer. This specific steel washer is used with your range, to secure the inner and outer door together and to secure the oven door handle back in place. Users have ranked this repair as a simple installation that should take you less than fifteen minutes to complete.
Installation Instructions
KELLY from LAKELAND, FL
Handle on oven door broke
called around and way to much money for repair man as well as parts from local appliance repair store. They wanted 10.00 for a screw that we got from you for $3.00 same as all the other parts saved over 70.00 dollars.quick delivery and easy repair ... like new again .
would use you again Read more...
Electrolux Stove Appliance Types
Popular Electrolux Stove Models
Below are the most popular Electrolux Stove models we have. Enter your model number in the search box to find your model.
- EI30EW35PSC WALL OVEN
- E30EW85EPS3 Built-in, Electric, Wall
- E30EW75EPS4 Built-in, Electric, Wall
- E30EW75ESS3 Built-in, Electric, Wall
- EW30EW55GS5
- EW27EW65GS3
- E30EW8CGPS6
- EW30EW65PSC WALL OVEN
- EI30EW45PSC ELECTRIC OVEN
- E30EW75DSS1 Built-in, Electric, Wall
- EW30EW65PSB WALL OVEN
- E30EW7CGPS4
- E30EW85GPS6
- E30EW85ESS1 Built-in, Electric, Wall
- E30EW85GPS1
- E30EW85ESS2 Built-in, Electric, Wall
- EW30EW55PSB WALL OVEN
- EW30EW55PSC WALL OVEN
- E30EW8CGPS1
- E30EW85PPSA WALL OVEN


