Oven Parts

Popular Oven Parts

Your Price
$45.72
   In Stock
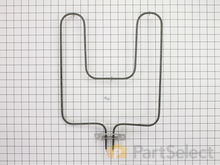
Oven Bake Element - 240V
★★★★★
★★★★★
113 Reviews
PartSelect Number PS249424
Manufacturer Part Number WB44X200
This is a 240 volt bake element for your oven or range. The kit comes with two installation screws and the element. The element functions by supplying heat from the bottom of the oven to bake or cook your food. You may need to replace the bake element if your oven is not heating properly. This is a black metal part (Width 13 inches, length 16.5 inches, depth 1-1/2 inches ) which can be installed onto your range with a screwdriver. Installation is rated as "medium" difficulty. This element is the part that heats to allow cooking, and if broken or missing you'll be unable to cook. This part attaches to the lower section of the range. Refer to your model number and user manual to ensure this part is right for you. Each screw gets screwed into each wire terminal with a Phillips screw driver. Hold the wires forward to make sure the wires do not fall back through the rear of the oven. Unplug your appliance or shut off your circuit breaker to the appliance before installing the new part.
Fixes these symptoms
  • Element will not heat
  • Little to no heat when baking
  • Little to no heat when broiling
  • See more...
Installation Instructions
Beth from Matthews, NC
Replacment of the bake unit
The hardest part was removing the old nuthead screws off the old bake burner. Once those were off installing the new bake element was simple. One screw in each wire terminal, two hex head screws to hold the unit in place. Works like a charm! Read more...
Your Price
$72.96
   In Stock
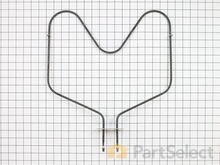
Oven Bake Element - 2600W 240V
★★★★★
★★★★★
87 Reviews
PartSelect Number PS11740695
Manufacturer Part Number WP308180
The bake element in your oven is the part that provides heat when cooking. If your oven is too hot, or not hot enough, or does not heat evenly, you may need to replace the bake element. This part is 2600 Watts and 240 Volts. It is a closed hinged style bake element which is 15-3/4 inches long and 16-5/8 inches wide. The terminal depth is three inches and they are 1-3/4 inches apart. This part is made of metal and is black in color. Be sure to disconnect power to the oven before completing this repair.
Fixes these symptoms
  • Element will not heat
  • Little to no heat when baking
  • Oven is too hot
  • See more...
Installation Instructions
Joe from Greeley, CO
oven wouldn't heat
First I removed the two screws that hold the element in place. I then pulled the element out about 3 inches and disconnected the two wires, then removed element and replaced with new
.
Read more...
Your Price
$38.48
   In Stock
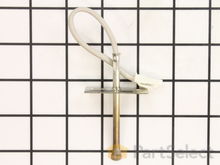
Oven Temperature Sensor
★★★★★
★★★★★
48 Reviews
PartSelect Number PS10059162
Manufacturer Part Number WB21X22134
The temperature sensor, also known as the oven temperature sensor assembly is usually found in the back of the oven. The function of the oven temperature sensor assembly is to measure the temperature inside your oven while it is on and send the temperature back up to the electronic control, which adjusts as necessary. If your oven is having difficulty achieving warmer temperatures and/or keeping warmer temperatures up, you may want to test your temperature sensor. Before you make this repair remember to unplug your range from the power source, and turn off the gas shut off valve.
Fixes these symptoms
  • Element will not heat
  • Little to no heat when baking
  • Little to no heat when broiling
  • See more...
Installation Instructions
Peter from stamford, CT
Oven would go in to a F2 Error
Removed six 1/4" hex nuts on rear of oven. Then through front/inside removed a single 1/4" hex nut to actually remove sensor. Unplug sensor connector, remove. Reversed steps, push oven back in place and plugged in. Tested oven function. Read more...
Your Price
$12.25
   In Stock
Oven FILTER,GREASE
★★★★★
★★★★★
31 Reviews
PartSelect Number PS12713651
Manufacturer Part Number 5230W1A012E
This is a single grease filter manufactured for a microwave. The microwave grease filter filters the exhaust air and traps any grease flowing out of the appliance. It is important to keep the filter clean and intact by cleaning it regularly and replacing it when needed. A clogged air filter can cause your appliance to run inefficiently and possibly alter the taste and smell of your food. This filter is approximately 7.5 inches wide and 5 inches deep. This part is sold separately. No tools are required for this repair, the filter simply slides in and out using the easy-pull tab on the filter.
Installation Instructions
David from Smithfield, VA
Grill Vent Broken Tabs
Piece of cake. Grill arrived quickly, was easily installed with a Phillips head screwdriver, needed for the two upper screws which most folks don't think about - Hence the need for this part, since the charcoal filter is behind the grill and most people don't think about replacing this. Easy installation of all filters. Thanks! Read more...
Your Price
$35.86
   In Stock
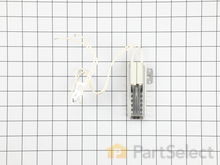
Oven Flat Style Igniter
★★★★★
★★★★★
49 Reviews
PartSelect Number PS470129
Manufacturer Part Number 5303935066
This is a flat style oven igniter used to light the oven burner in a gas range. When the element in this igniter glows white hot, the gas is released from the safety valves, which lights the oven burner. If your range is not heating properly, or not heating at all, it might indicate a problem with this part. If the element in the igniter is only glowing red or orange, or not glowing at all, it will need to be replaced. This is a shorter style igniter. It is 3.72 inches in length, and it features an 18-inch wire lead. This kit includes the igniter, an instruction sheet, a mounting bracket, and the two ceramic wire nuts needed for installation. This part has an amperage range of 3.2 to 3.6. Unplug your appliance before you start any repair work.
Fixes these symptoms
  • Element will not heat
  • Gas igniter glows, but will not light
  • Gas smell
  • See more...
Installation Instructions
John from Darlington, SC
Oven quit heating.
After reading up on the problem of the gas oven not lighting I decided I needed to install a new igniter. I had read where some people just pulled a panel off the back and installed a new one.. yeah, no such luck with this model so I had to crawl into the broiler drawer space [which I had to clean out first]. Note, if you wear trifocal glasses you might as well close your eyes and replace it by feel because there is no way to tilt your head back enough to see what you are doing and still get both arms and your chest in a broiler. Also be sure to remove all cats and dogs from the area before starting. They seem to think they can help or it's a game of hide and seek and they want to hide with you.. they were no help at all.
Other than that, it was quite easy.
Read more...
Your Price
$34.75
   In Stock
Oven Long Sensor
★★★★★
★★★★★
33 Reviews
PartSelect Number PS1570174
Manufacturer Part Number 12001656
This long oven sensor is also commonly known as a temperature sensor. It is designed for use with ovens and ranges. It is similar to a thermostat; it measures and regulates the internal temperature of your oven cavity. There is an adapter at one end, a probe at the other, and they are connected by an insulated wire. The probe is approximately 7 inches long. You can test the sensor with a multi-meter for functionality. You need to check the model-specific manual to determine what the proper resistance is for your specific appliance. This oven sensor comes with two wire harness adapters and a set of instructions.
Fixes these symptoms
  • Door won’t open after self cleaning cycle
  • Element will not heat
  • Little to no heat when baking
  • See more...
Installation Instructions
David from Westford, MA
Oven not holding 350 F, when cooling the coils did not reheat
Removed the oven door by opening slightly, then pic door up to remove. Remove 2 screws holding oven sensor in place, gently pull on sensor to remove, had to remove about 8 inches to get at plastic connector. Unplug connector, had to use an adapter cable supplied with the PartSelect kit to install new sensor, push cable back into opening, reinstall 2 screws. The oven works fine! Note that due to thermal lag the temperature overshoots to 370 degrees and undershoots to 340 degrees, this appears to be normal oven operation. Putting door back in place was easy. Read more...
Your Price
$70.38
   In Stock
Oven Bake Element
★★★★★
★★★★★
52 Reviews
PartSelect Number PS11750369
Manufacturer Part Number WPW10207397
The bake element is located at the bottom of the oven and gives off heat in order to bake evenly. If you notice that the element is not heating up or is not cooking evenly, it could be because it is broken or burnt out. All you need for this simple repair is a small screwdriver. To complete this repair, you will need to first turn the oven off (or shut off the house circuit breaker), remove the two screws that are holding the old element in place, remove the two wires from the old part, and then connect them to the new part and screw back into place.
Fixes these symptoms
  • Element will not heat
  • Little to no heat when baking
  • Oven not heating evenly
  • See more...
Installation Instructions
Daniel from Cheraw, SC
I broke the Bake Element while cleaning the oven.
I removed the two screws that held the bake element in place. Next I removed the Bake Element. I had to unscrew the oven to go behind it because when one piece off of the element broke, it slide back behind the oven. I pushed the wire back thru the piece holes, connected the Element, and pushed the element with the wires back through the holes. I rescrewed the element in place and the oven. PartSelect helped me to save this year's Christmas. Read more...
Your Price
$27.09
   In Stock
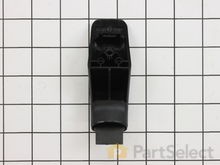
Oven Door Handle End Cap
★★★★★
★★★★★
40 Reviews
PartSelect Number PS256613
Manufacturer Part Number WB7X7183
This oven door handle end cap is used on both the left and right hand sides. Sold individually.
Fixes these symptoms
Installation Instructions
Harry from Thomasville, GA
The end caps broke on my oven door handle.
1st I opened the oven door and removed the 2 screws that hold the outside and inside of the door together. With the door separated I removed the 2 screws that hold the end caps in place, then removed the old end caps. I put the new end caps on the oven door handle, aligned the holes for the end cap screws and reinstalled the screws,then reinstalled the oven door screws,closed the oven door and started cooking. Read more...
Your Price
$230.56
   In Stock
Oven Wall Door Window Assembly
★★★★★
★★★★★
12 Reviews
PartSelect Number PS11766932
Manufacturer Part Number WB56X27480
The Door window assembly is the heat resistant glass and frame in the centre of the oven door.
Installation Instructions
Dean from LENEXA, KS
oven door inside glass shattered
watched repair video on disassembling oven door and replacing glass.
followed the video.
Read more...
Your Price
$50.31
   In Stock
Oven Temperature Sensor
★★★★★
★★★★★
16 Reviews
PartSelect Number PS820208
Manufacturer Part Number 316217002
The oven temperature sensor for your range may also be called a probe. The quick connect on this part may differ than your original piece. If the temperature sensor does not fit you will have to cut off the quick connect, and then wire together with porcelain wire nuts. The function of the oven temperature sensor is to measure the temperature in the oven and signal the other heating components. Before you begin this repair make sure to disconnect the power to the range. The tools required for this installation include a number two Phillips screwdriver or a number two square head screwdriver, and maybe a pair of wire strippers and crimpers.
Fixes these symptoms
  • Element will not heat
  • Little to no heat when baking
  • Oven is too hot
  • See more...
Installation Instructions
Dan from Bellevue, ID
Oven not heating to desired temperature
Replaced clock control by removing surface burner control knobs and plastic nuts, and then the cover over the oven control. Two screw hold the clock in place, after removal and disconnecting the plug-in you can reinstall the new clock control. The Heat Sensor inside the oven will also need to be replaced. It is located inside the oven and attached with two screws; the back of the oven will need to be removed to unplug. Reverse removal procedure and turn the power back on to the stove. Read more...

Oven Brands

Popular Oven Models

Below are the most popular Oven models we have. Enter your model number in the search box to find your model.