Inglis Dishwasher Hardware
Popular Inglis Dishwasher Hardware
Your Price
$16.71
In Stock
Inglis Dishwasher Wash Arm Retainer Nut
PartSelect Number PS11747063
Manufacturer Part Number WP9742945
Use this part to secure the lower spray arm of your dishwasher.
Fixes these symptoms
- Leaking
- Noisy
- Not cleaning dishes properly
- See more...
Installation Instructions
Kent from Matthews, NC
Water washing out under front door onto floor
The plastic parts on this spray arm assembly wear with time and the rotation wobble effect creates a wave action in the pool of water at the bottom of the dishwasher. This waves the water onto the front door and forces a leak outside the unit. Replace the lower arm assembly, washer, bearing and nut. They all wear. Also remember to tighten the screws on top of the pump assembly. They loosen and aid in the wobble. Good Luck!
Read more...
Inglis Dishwasher Retainer Clip - White
NOTE: the original pin was black. A black replacement part cost $29 plus shipping! A knock-off pin was only $6 plus shipping. I got the cheap one and colored it with a black Sharpee marker before installation. Read more...
PartSelect Number PS11755737
Manufacturer Part Number WPW10503549
This part is used to hold the access panel in place. Sold individually.
Installation Instructions
Todd from ROTONDA WEST, FL
A plastic retainer pin for the bottom kick panel was missing.
simply line up the new pin with the rectangular slot in the kick panel and metal panel behind, slide the pin in and turn it with a flat blade screw driver. NOTE: the original pin was black. A black replacement part cost $29 plus shipping! A knock-off pin was only $6 plus shipping. I got the cheap one and colored it with a black Sharpee marker before installation. Read more...
Your Price
$7.75
In Stock
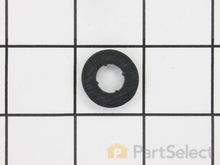
Inglis Dishwasher Rubber Washer
PartSelect Number PS11743934
Manufacturer Part Number WP717273
The rubber washer is a part which is specific to dishwashers and should not be substituted by a similar part. It works with the heating element to seal the receptacle opening where the heating element is attached. The rubber washer is used to prevent water leaking from your dishwasher during its cycle. Before making any repairs to your dishwasher make sure that you disconnect the power by finding the breaker for the dishwasher, and turning it off. The tools you will need to complete this repair include an adjustable wrench, and a 1/4 inch nut driver. This specific rubber washer is sold individually.
Fixes these symptoms
- Leaking
- Not cleaning dishes properly
- Not drying dishes properly
- See more...
Installation Instructions
PAUL from ESTES PARK, CO
Unit Wouldn't Work. "Clean" Light Blinking
The unit had power, but the controls would not work. The "clean" light was blinking. I first replaced the control unit, no help. I then used the "just ask" and was told the problem was the heating element and/or the hi-temp thermostat. I replaced both those and used the re-set code pushing the "hi-temp/air dry, hi-temp/air dry" buttons. That did it. Easy parts to locate and replace. It took longer pulling the unit out and putting it back than it did to replace the parts.
Read more...
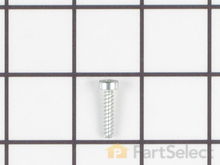
Inglis Dishwasher Torx Screw
This was made more difficult by the fact that the screws that hold the burners to the range top were rusted and had to be drilled out so the the burners could be released from the top.
1. Disconnect the power to the range.
2. Open the top oven door.
3. Remove 2 - 1/4" sheet metal screws at the front corners of the range top assy. Remove the Burner knobs and the two Phillps screws that holds the gas valve assembly to the range top.
4. With a drill, remove the tops of the screws to release the burners from the range top. If the screws are in good condition and just unscrew them and the upper burners from the Orifice Holders. (I had to replace the orifice holders because the screws were stuck in them due to rust).
5. When the burners are free, lift the range top at the front and remove it from the range. Disconnect the ignitor wires from the ignitors on each holder.
6. To replace the Orifice Holders, disconnect the gas supply pipes from each holder by loosening the compression nut at the holder using an adjustable wrench. Secure the Orifice Holders when loosening the fittings, BE CAREFUL not to damage the aluminum gas supply pipes.
7. Note that there are 3 different Holders, be sure to use the holder that matches the specific location.
8. For LP gas fueled ranges ONLY, remove the small gas jets from the old holders and install them in place of the parts supplied with the new orifice holders. The new parts contain NATURAL GAS jets which are not compatible with LP gas. Each Different Orifice Holder uses a specific orifice or jet, make certain that the orifice matches the orifice holder. Check for leaks at the gas connections using soapy water.
9. Carefully raise the old ignitor switches (4) off the shafts of the gas valves. Note the top and bottom configuration of the switches
10. Carefully release the wires that come from the rear of the range from the rearmost switch. Press a suitable pin or other suitable tool in a the hole, beside the wire, just enough to release the wire. (Look at the NEW switch assemble to see how this works). Remove the wires from the NEW switch first to see how it is done. Repeat the process on the old switches. (you will re-use the wires that come up from the rear of the range.
11. Install the new switch assembly over the four (4) burner gas valves, take care to align the "D" shaped shafts with the holes in each valve.
12. Insert the wires in the two connections on the rearmost switch. CAUTION!!! Be sure to install the wires so that the color codes agree with the wires on the new switch assembly. Black to black and gray to gray.
13. Install the 4 clear plastic "shields" over the shafts and against the top of each switch.
14. Re-connect the ignitor wires to the burners and Re-Install the range top, in the reverse order of dis-assembly. Read more...
PartSelect Number PS11741257
Manufacturer Part Number WP3368921
7-18 x 3/4-Inch - sold individually.
Fixes these symptoms
- Gas igniter glows, but will not light
- Will Not Start
- See more...
Installation Instructions
Michael from Dardanelle, AR
Ignitor switches shorted out
The ignitor switches are installed on top of the 4 gas valves for the range top. These switches control the electronic ignition. To replace the switch assembly the top of the range must be removed to gain access. This was made more difficult by the fact that the screws that hold the burners to the range top were rusted and had to be drilled out so the the burners could be released from the top.
1. Disconnect the power to the range.
2. Open the top oven door.
3. Remove 2 - 1/4" sheet metal screws at the front corners of the range top assy. Remove the Burner knobs and the two Phillps screws that holds the gas valve assembly to the range top.
4. With a drill, remove the tops of the screws to release the burners from the range top. If the screws are in good condition and just unscrew them and the upper burners from the Orifice Holders. (I had to replace the orifice holders because the screws were stuck in them due to rust).
5. When the burners are free, lift the range top at the front and remove it from the range. Disconnect the ignitor wires from the ignitors on each holder.
6. To replace the Orifice Holders, disconnect the gas supply pipes from each holder by loosening the compression nut at the holder using an adjustable wrench. Secure the Orifice Holders when loosening the fittings, BE CAREFUL not to damage the aluminum gas supply pipes.
7. Note that there are 3 different Holders, be sure to use the holder that matches the specific location.
8. For LP gas fueled ranges ONLY, remove the small gas jets from the old holders and install them in place of the parts supplied with the new orifice holders. The new parts contain NATURAL GAS jets which are not compatible with LP gas. Each Different Orifice Holder uses a specific orifice or jet, make certain that the orifice matches the orifice holder. Check for leaks at the gas connections using soapy water.
9. Carefully raise the old ignitor switches (4) off the shafts of the gas valves. Note the top and bottom configuration of the switches
10. Carefully release the wires that come from the rear of the range from the rearmost switch. Press a suitable pin or other suitable tool in a the hole, beside the wire, just enough to release the wire. (Look at the NEW switch assemble to see how this works). Remove the wires from the NEW switch first to see how it is done. Repeat the process on the old switches. (you will re-use the wires that come up from the rear of the range.
11. Install the new switch assembly over the four (4) burner gas valves, take care to align the "D" shaped shafts with the holes in each valve.
12. Insert the wires in the two connections on the rearmost switch. CAUTION!!! Be sure to install the wires so that the color codes agree with the wires on the new switch assembly. Black to black and gray to gray.
13. Install the 4 clear plastic "shields" over the shafts and against the top of each switch.
14. Re-connect the ignitor wires to the burners and Re-Install the range top, in the reverse order of dis-assembly. Read more...
Inglis Dishwasher Grommet
PartSelect Number PS11756098
Manufacturer Part Number WPW10538166
This pump inlet grommet is a genuine OEM replacement part that is compatible with various models of dishwashers. It is made of rubber and has a diameter of approximately 2.5 inches. The grommet is used to create a watertight seal in the area between the inlet hose and the circulation pump. This prevents the dishwasher from leaking, and it also helps to absorb minor shocks and vibrations that occur while the dishwasher is running. It is normal for the grommet to wear down over time or become damaged from exposure to water, heat, and chemicals.
Fixes these symptoms
- Leaking
- Not cleaning dishes properly
- See more...
Installation Instructions
Monica from PITTSFORD, NY
WARNING!!! This is NOT the grommet that goes on the "pump stem" in the center
I purchased this misguided by the official response to "Doug" on April 17, 2018, which at the time was labeled as "most helpful". This is NOT the little grommet in the center. This is a big grommet that goes no the supply pump. This is #14 in the diagram. (#15 is actually the clamp that holds it). If you are looking for the little grommet that goes on that stem on the central recirculation pump, that part is not available, it only comes fused on the sump, and for replacing the sump you have to disassemble the whole bottom part of the dishwasher, pumps, sensors, valves, hose...even this big grommet. A lot of work, and since you are at it, you might want to replace both grommets. If you need THIS big grommet (#14) only, then it is not so much work, just take out one clamp, one connected cable, and the grommet to replace. But check if your machine has reusable clamps, because if not, you might want to order a new clamp. Good luck!
Read more...
Inglis Dishwasher Cover Screw
A licensed electrician had also moved the power line over to the new location and left a wire sticking out of the bottom of the wall to hardwire the dishwasher in again. We decided to convert the dishwasher to be able to be plugged into a standard 20amp wall outlet instead. We had already purchased a kit with a nice long cord and strain-relief snap on plastic fitting that snapped onto the metal incoming power box on the bottom front of the dishwasher. Using the supplied wire nuts, etc., we connected the wires and ground wire to the proper wires from the dishwasher and ground lug. We put the dishwasher aside and then went to work on converting the power wire coming out of the bottom of the wall, to a conventional outlet. I am mentioning all this because in our first attempt we unfortunately put the receptacle a bit high off the floor and the new power cord plug end, stuck out and hit the back of the dishwasher so it would not go all the way in and was sticking out from under the counter top. I tried using one of those flat adapter cables, but even that still stuck out to far. So we ended up relocating the outlet box as low as we could on the wall and this allowed the plug to stick out into the opening area at the bottom rear area of the dishwasher so it could now be slid all the way in under the kitchen counter properly. I hope that bit of trial and error will save you some time if you ever decide to go the pluggable route too.
The new installation required the use of the dishwasher side mount brackets, so we had to purchase a replacement set of those, complete with the hardware to screw them down.
This project took a bit longer than planned due to the power plug problem, one which we will remember for any other similar appliance relocation projects, as well as the time to get our new parts in that we had to order, but other than that the rest went smoothly and the dishwasher was relocated successfully. Read more...
PartSelect Number PS11740701
Manufacturer Part Number WP308685
Sold individually.
Installation Instructions
Curtis from PALM BAY, FL
Relocating dishwasher into the new kitchen layout
In this case the dishwasher had already been installed for a few years. After removing it, we inspected it and saw it needed a bit of TLC. The transport wheels on the back were missing, making it harder to move around without scratching the tile and some of the original hardware was rusted or broken off. I looked up the parts easily here on PartsSelect using their parts breakdown diagrams and was glad to see what I needed was still available. We had a licensed plumber relocate the hot water line and drain for us to make things a bit easier.A licensed electrician had also moved the power line over to the new location and left a wire sticking out of the bottom of the wall to hardwire the dishwasher in again. We decided to convert the dishwasher to be able to be plugged into a standard 20amp wall outlet instead. We had already purchased a kit with a nice long cord and strain-relief snap on plastic fitting that snapped onto the metal incoming power box on the bottom front of the dishwasher. Using the supplied wire nuts, etc., we connected the wires and ground wire to the proper wires from the dishwasher and ground lug. We put the dishwasher aside and then went to work on converting the power wire coming out of the bottom of the wall, to a conventional outlet. I am mentioning all this because in our first attempt we unfortunately put the receptacle a bit high off the floor and the new power cord plug end, stuck out and hit the back of the dishwasher so it would not go all the way in and was sticking out from under the counter top. I tried using one of those flat adapter cables, but even that still stuck out to far. So we ended up relocating the outlet box as low as we could on the wall and this allowed the plug to stick out into the opening area at the bottom rear area of the dishwasher so it could now be slid all the way in under the kitchen counter properly. I hope that bit of trial and error will save you some time if you ever decide to go the pluggable route too.
The new installation required the use of the dishwasher side mount brackets, so we had to purchase a replacement set of those, complete with the hardware to screw them down.
This project took a bit longer than planned due to the power plug problem, one which we will remember for any other similar appliance relocation projects, as well as the time to get our new parts in that we had to order, but other than that the rest went smoothly and the dishwasher was relocated successfully. Read more...
Your Price
$11.77
In Stock
Inglis Dishwasher Hose Clamp
PartSelect Number PS11743008
Manufacturer Part Number WP596669
This hose clamp is used in a wide variety of household appliances. Most often it is found in washers, dishwashers, refrigerators, freezers, dehumidifiers, garbage disposals, or air conditioners. This clamp is used to securely attach a hose to another part of your appliance, which helps prevent leaks from those connections. Depending on the appliance, it can attach hoses to drain pumps, water inlet valves, pressure switches, and injector nozzles. We recommend you refer to model-specific diagrams for appropriate uses and exact placement. This hose clamp is made of metal, and is sold individually. To access and replace this part you will need a nut driver, pliers, and screwdrivers. Before you begin any repair work, make sure you have unplugged your appliance, and shut off the water supply if applicable.
Fixes these symptoms
- Leaking
- See more...
Installation Instructions
jeff from lindenhurst, IL
Washing Machine was leaking water
Loosened the hose clamp, removed the injector valve and injector nozzle assembly, replaced both and tightened with new hose clamp. Fixed the problem for less than $20!! Washing machine is 20 years old and this was the first problem--hopefully it is now good for another 20 years!
Read more...
Inglis Dishwasher Screw
PartSelect Number PS11753384
Manufacturer Part Number WPW10348409
Sold individually.
Installation Instructions
REBECCA from GREENFIELD TWP., PA
My son broke the door handle off the Refrigerator
I removed two screws that were holding on broken handle. I put new handle in place and attached it with new screws. Ordering parts on line and receving them in mail a few days later was awsome. I did not need my husbands help at all .
Read more...
Your Price
$11.09
In Stock
Inglis Dishwasher Hose Clamp
PartSelect Number PS11740613
Manufacturer Part Number WP285655
The hose clamp is used to hold the water hose in place which will prevent the hose from leaking water. Sometimes the clamp may lose its ability to latch on, causing a leaking washer. For the installation, you will need a flat head screw driver to replace the clamp and a drill to access the screws to remove the front of the washer. Be careful if you do not have specific clamp pliers as the clamp could fly off. Once the front of the washer has been removed, take a quick look for water damage or any obvious signs of where the leak is coming from. If it is not obvious, run water to test.
Fixes these symptoms
- Leaking
- Will not drain
- See more...
Installation Instructions
Stephen from Laveen, AZ
Drive Pump Leaked
It took some trial and error but overall not a difficult project. 1. Take the front covers off. 2. Undo the pully spring to loosen belt 3. Remove belt off idler pulley wheel and free up belt from the large wheel. 4. Disconect the wiring harness and the hoses. 5. Undo the motor mounting bolts (4) 6. Take motor out of washer and remove the 3 screws holding the pump to the motor. 7. The pump had melted to the shaft and required I chisel the pump off of the shaft. 8. Attach new pump paying attention to where the belt is positioned. 9. Reattach the motor bolts, hoses, and wiring harnes. 10. Attach the belt and test the pump. 11. Put the front back on.
Read more...
Inglis Dishwasher Screw - 8-18 x 1/2
I had to unplug an electronic tape from the inside of the beige control panel and plug the same tape back into the black control panel. I also had to remove the beige handle that was on the inside of the control panel, attached to the door, and replace it with the new black one I'd received. I then installed the black control panel and reattached it with screws and finished replacing the rest of the screws I had removed from the inside of the door.
I tested the handle to make sure it opened the door and locked it like it should and then went outside and turned the breaker back on. Came in and turned on the dishwasher and did a load of dishes. It looks awesome, matches the rest of my black appliances and I am very proud to have done it myself. I also wanted to thank the customer service lady who was so great to work with on the phone. I would shop with you again. Read more...
PartSelect Number PS11740645
Manufacturer Part Number WP302868
Sold Individually.
Installation Instructions
Margaret from San Diego, CA
Wanted to change beige dishwasher front to black.
First , I went outside and turned the breaker for the dishwasher off. Next,I removed the screws that held the bottom 2 pieces, that rest on the floo,r in place. Then removed the two beige metal pcs. . Next I replaced them with the 2 black pieces I had ordered and secured them with the 2 black screws I had received as part of my order. Then I removed the scews from the inside of the door of my KitchenAid Dishwasher. This released both the front bottom panel and the control panel. . I took the beige bottom door panel off and moved the insulation piece from the back of thebeige panel to the back of the black panel. Then I intalled the new black panel I ordered and resecured it with two screws until I had finished with the control panel switch out.I had to unplug an electronic tape from the inside of the beige control panel and plug the same tape back into the black control panel. I also had to remove the beige handle that was on the inside of the control panel, attached to the door, and replace it with the new black one I'd received. I then installed the black control panel and reattached it with screws and finished replacing the rest of the screws I had removed from the inside of the door.
I tested the handle to make sure it opened the door and locked it like it should and then went outside and turned the breaker back on. Came in and turned on the dishwasher and did a load of dishes. It looks awesome, matches the rest of my black appliances and I am very proud to have done it myself. I also wanted to thank the customer service lady who was so great to work with on the phone. I would shop with you again. Read more...