Make sure you haven't got the discount earlier.
Appliance Parts
- Accessories
- Dishwasher
- Dryer
- Stove / Oven
- Microwave
- Refrigerator
- Washer
- See more... See less...
Lawn Equipment Parts
- Lawn Mower
- Chainsaw
- Blower
- Generator
- Air Compressor
- Lawn Tractor
- Pressure Washer
- See more... See less...
How To Replace a Washer Coupler (Whirlpool or Maytag)
By Steve Ash
What you'll need:
- Putty knife
- 1/4 inch nut driver or socket
- Phillips screwdriver
- Flat tip screwdriver
- Hammer and piece of pipe
- Container for screws
Before attempting any appliance repair, be certain you have unplugged the appliance and completely disconnected it from any power source.

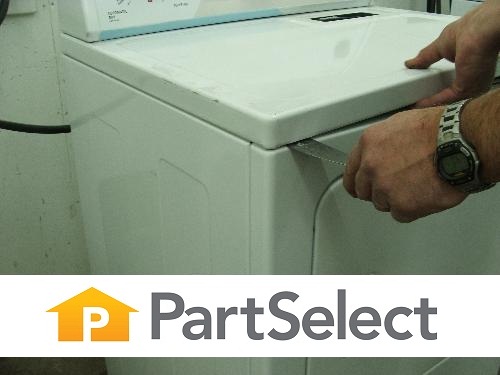
To begin you must remove the control panel. For some Whirlpool models, you will need to remove two screws from the back of the unit. If there are no screws on the upper back part of the unit, then you will have to remove the end caps to the control panel to expose the screws. For Maytag models, slide a putty knife under the control panel on the extreme left (so you do not damage the lid switch) and pop it up. Repeat this on the far right. Using a flat tip screwdriver, pop out the brass springs holding the control panel to the cabinet and the control panel should be released from the unit and you can flip it up away from you. and the control panel should be released from the unit and you can flip it up away from you. Disconnect the lid switch and make sure not to let it fall in between the dryer and the control panel.
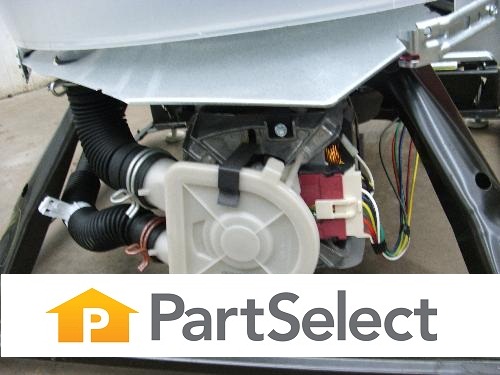
With the lid open and your hands on the inside, grasp the cabinet and tilt it forward and lift upward at the same time to release it. Place it out of the way. The pump and motor will be located at the bottom on the front.

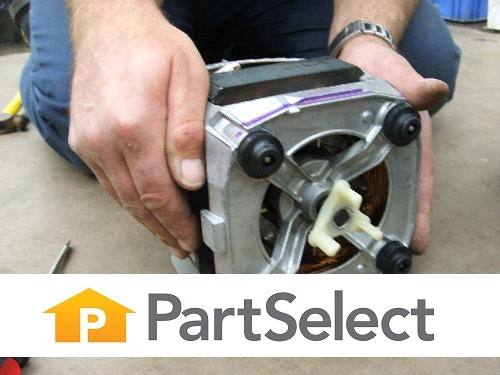
You will need to start by releasing the two clips holding the pump to the motor and swinging it out of the way. You don't need to remove any of the hoses to do this. Next, disconnect the wiring harness located on the right side of the motor and remove the two brackets and screws holding the motor in place. Now, you should be able to pull out the motor and see the coupler. Part of the coupler will be on the motor and part of it will be still on the transmission that is now exposed. Remove the old coupler and start by replacing the half on the transmission shaft. You may need a hammer and a piece of pipe to secure this piece. Replace the rest of the coupler on the motor and put the motor back on. Replace the motor brackets and screws and reconnect the wiring harness. Next, replace the pump and pump brackets.

Now you are ready to place the cabinet back on. Make sure the small holes on the cabinet bottom line up with the tabs. Finally, flip the control panel back over and replace spring clips and screws if necessary.
- Search your model number to find:
- Genuine OEM parts guaranteed to fit
- Free manuals and guides
- Repair instructions and videos


