Your coupon for will be reflected when you check out!
✖
Your coupon for
✖
Hello!
You're visiting the PartSelect site in U.S.
Would you like to shop on the Canadian site?
Stay on this site
Go to Canadian site
✖
Model Number Locations
1Select Category Type
Select Category Type
2Select Product Type
Select Product Type
3Select {MODEL} Type
Select {MODEL} Type
Sample Model Number Tags
Model numbers can be made up of numbers (1005400, for example) or a combination of letters and numbers (LAT1000AAE). The model number will most likely appear on either a paper sticker or a metal plate. Your appliance's model number tag may look similar to the sample model number tags shown here (model number highlighted in yellow):
Model has been saved to My Models. If you're not signed in, your lists are available on this device and will expire within 30 days.
Model has been saved to My Models.
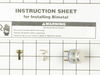
If you have ice building up in your freezer, or if your freezer is getting too warm during the defrost cycle you may need to replace the bi-metal defrost thermostat. The function of the defrost bi-met...
$33.95
In Stock
Order within the next 7 hrs and your part ships today!
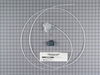
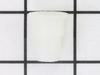
This light bulb is a 120 volt, 25 watt incandescent appliance light bulb with a small base screw-in that fits in a variety of appliances such as microwaves, refrigerators, freezers, cooktops, or stove...
$15.69
In Stock
Order within the next 7 hrs and your part ships today!
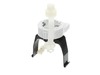
In this kit you will find the support, the ice door, spring, and delay. The heater ribbon is no longer needed and therefore will not be included with this part. This kit works in the dispenser chute t...
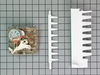
This set of two electronic control boards contains both the emitter and the receiver. These boards tells the icemaker when it's full and that it has to dump the ice, and it also tells the icemaker whe...
$239.99
In Stock
Order within the next 7 hrs and your part ships today!
This part is also known as a shelf frame. This drawer cover is for refrigerators.
Drawer cover has rail brackets under the cover that hold the drawer and allow the drawer to slide in and out on th...
$123.92
In Stock
Order within the next 7 hrs and your part ships today!
First, I tested the ice maker "switch" that actually just covers the beam that regulates the ice maker. In the "off" position, it still made ice. Then, I removed the three screws on the cover over the transmitter and disconnected the circuit board at the wire connector. It stopped. After ordering and receiving the new transmitter and rece
... Read moreiver boards, I replaced both boards. They are located on either side of the freezer compartment under panels held in place by three screws. Probably saved 150 to 200 bucks.
WARNING: REPLACING THIS PART REQUIRES CUTTING AND SPLICING ELECTRICAL WIRES. RISK OF ELECTRICAL SHOCK OR FIRE. DO NOT ATTEMPT THIS REPAIR IF YOU ARE NOT EXPERIENCED WITH ELECTRICAL WIRING.
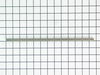
Part Info: The bi-metal strip is clipped onto the evaporator coils and is designed to regulate the defrost coil temperature. If it is n
... Read moreot functioning properly you may notice ice buildup preventing air flow (and preventing proper refrigeration), or more rarely the freezer side may get too warm during the defrost cycle.
1: UNPLUG THE FRIDGE! If there is ice buildup, wait until the ice has melted. A box fan blowing at the ice will help melt it more quickly.
2: Remove the panel covering the evaporator coils. It's located inside the fridge, on the freezer side.
3: Un-clip the bi-metal strip from the evaporator coils.
4: Unplug the wires from the evaporator fan, defrost coil and bi-metal strip, then disconnect the main connector that is plugged into the rear wall.
5: Clip both wires to the old ( bad ) bi-metal strip. Cut close to the casing of the bi-metal strip so there are long wires to splice onto.
6: Strip 1/4 to 1/2 inches of insulation off of the ends of the wires ( depending on the size of the wire-nuts you use). Twist the bare wires slightly to prevent fraying.
7: Do the same for the ends of the wires on the (new) bi-metal strip.
8: Take the ends of the wires belonging to the (new) bi-metal strip and the wires coming from the main plug. Take the like-colored wires, and twist the bare metal ends together.
9: Twist on wire nuts, for both sets of wires. Make sure they are snug, with no bare wire showing.
10: Tape over the wire nuts with electrical tape. Tape over the wires nuts in a spiral fashion, completely covering the nut and both wires that are now spliced together. This will prevent accidental shorting.
11: Plug the main plug back into the rear wall of the fridge. Also re-connect the connectors to the evaporator fan and defrost coil. Make sure the clips on the connectors are snug to ensure a good connection.
12: Clip the new bi-metal strip onto the coils, in the same spot as before. ( Usually just after the small incoming copper tubing that connects to the coils, known as the expansion valve. That is usually the coldest spot on the coils during operation).
13: Replace the panel that covers the coils.
14: Plug the fridge back in... Now you fridge should defrost correctly. If it does not, your defrost coil could be burned out, or the control board could be faulty.
Removed the face plate. Removed a few screws and unpluged a few electrical connectors and pulled apart. Removed the holding bracket and clear tubing from door. Cut new tubing at an angle to push through conduit. Reinstalled new bracket and re-installed electrical connectors. Snapped face trim on and bleed air out of system. . W
... Read moreater ran great.


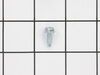
 – Part Number: WP2260518B")


 – Part Number: WP2206670B")


")


