Parts That Fix Kenmore Refrigerator 10651133213 Fridge too warm
If you have ice building up in your freezer, or if your freezer is getting too warm during the defrost cycle you may need to replace the bi-metal defrost thermostat. The function of the defrost bi-metal thermostat is to clip onto the evaporator and protect your evaporator from overheating during the defrost cycle. If your refrigerator does not defrost properly you can test both the thermostat and the heater to figure out which part is at fault. For this repair, you will need a Phillips screwdriver, a 1/4 inch nut driver, a flat blade screwdriver, a pair of wire strippers, a roll of electrical tape, and a few butt splice connectors.
Replacing your Whirlpool Refrigerator Refrigerator Bimetal Defrost Thermostat

Customer Repair Stories
-James
-
James from Ringoes, NJ
-
Difficulty Level:Easy
-
Total Repair Time:15 - 30 mins
-
Tools:Nutdriver, Screw drivers
Part Info:
The bi-metal strip is clipped onto the evaporator coils and is designed to regulate the defrost coil temperature. If it is n ... Read more ot functioning properly you may notice ice buildup preventing air flow (and preventing proper refrigeration), or more rarely the freezer side may get too warm during the defrost cycle.
Materials:
* Replacement bi-metal strip
* Wire cutters
* Wire strippers
* Wire nuts
* Electrical tape
* 10MM socket
Steps:
1: UNPLUG THE FRIDGE! If there is ice buildup, wait until the ice has melted. A box fan blowing at the ice will help melt it more quickly.
2: Remove the panel covering the evaporator coils. It's located inside the fridge, on the freezer side.
3: Un-clip the bi-metal strip from the evaporator coils.
4: Unplug the wires from the evaporator fan, defrost coil and bi-metal strip, then disconnect the main connector that is plugged into the rear wall.
5: Clip both wires to the old ( bad ) bi-metal strip. Cut close to the casing of the bi-metal strip so there are long wires to splice onto.
6: Strip 1/4 to 1/2 inches of insulation off of the ends of the wires ( depending on the size of the wire-nuts you use). Twist the bare wires slightly to prevent fraying.
7: Do the same for the ends of the wires on the (new) bi-metal strip.
8: Take the ends of the wires belonging to the (new) bi-metal strip and the wires coming from the main plug. Take the like-colored wires, and twist the bare metal ends together.
9: Twist on wire nuts, for both sets of wires. Make sure they are snug, with no bare wire showing.
10: Tape over the wire nuts with electrical tape. Tape over the wires nuts in a spiral fashion, completely covering the nut and both wires that are now spliced together. This will prevent accidental shorting.
11: Plug the main plug back into the rear wall of the fridge. Also re-connect the connectors to the evaporator fan and defrost coil. Make sure the clips on the connectors are snug to ensure a good connection.
12: Clip the new bi-metal strip onto the coils, in the same spot as before. ( Usually just after the small incoming copper tubing that connects to the coils, known as the expansion valve. That is usually the coldest spot on the coils during operation).
13: Replace the panel that covers the coils.
14: Plug the fridge back in... Now you fridge should defrost correctly. If it does not, your defrost coil could be burned out, or the control board could be faulty.
-
Cathy from Winter Park, FL
-
Difficulty Level:A Bit Difficult
-
Total Repair Time:15 - 30 mins
-
Tools:Nutdriver
If your refrigerator or freezer is too warm, or making noises, you may need to replace the fan blade. The fan blade attaches to the evaporator motor, which is in the freezer section, to help circulate the cold air into the refrigerator and freezer sections. The fan blade is white in color and made from plastic. This is a genuine OEM part. Please be sure to disconnect the power to your refrigerator before starting your repair.
Replacing your Whirlpool Refrigerator Freezer Fan Blade

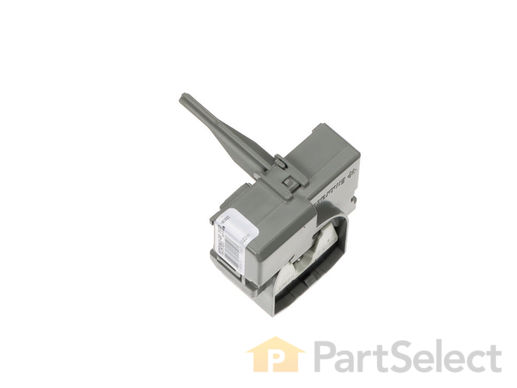
This compressor start relay is for refrigerators. The compressor start relay attaches to the compressor and helps start the compressor motor. Safely store any food that could deteriorate while the power is off and unplug the refrigerator before installing this part.
Replacing your Whirlpool Refrigerator Refrigerator Compressor Start Relay

This Refrigerator Air Filter is a white 1.8x3.2" plastic filter which neutralizes odor and bacteria in the air. It should be replaced every six months at a minimum. Refer to your user manual and model number to see if this filter is right for your fridge. Location for storage of the air filter may vary from model to model, but generally, you will find a small cover on the back-middle-top of your fridge, which can be popped off to reveal the air filter, which can be easily changed out from there. This part does not come sold with the indicator; it is the filter only. Sold individually.
Replacing your Whirlpool Refrigerator Refrigerator Air Filter

Customer Repair Stories
-
David from Dublin, NH
-
Difficulty Level:Very Easy
-
Total Repair Time:Less than 15 mins
-
Tom from LONGMONT, CO
-
Difficulty Level:Very Easy
-
Total Repair Time:Less than 15 mins
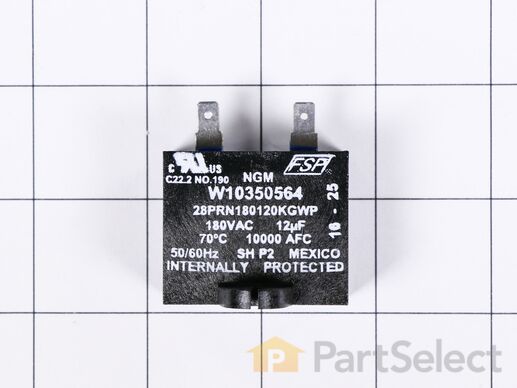
The compressor run capacitor helps keep the motor running smoothly in refrigerators. It works with various models and is a genuine replacement part. Always unplug the refrigerator before installing the capacitor, and check the part number for compatibility with your model.
Customer Repair Stories
-
J. David from BRENTWOOD, TN
-
Difficulty Level:Easy
-
Total Repair Time:30 - 60 mins
-
Tools:Pliers, Screw drivers
-
Glen from PT CHARLOTTE, FL
-
Difficulty Level:Really Easy
-
Total Repair Time:15 - 30 mins
-
Tools:Nutdriver
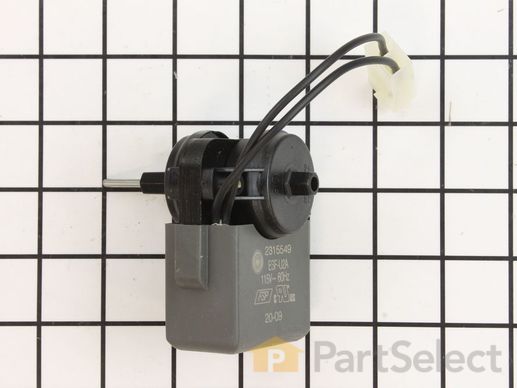
This fan motor circulates the air through the refrigerator grille and cools the compressor and condenser coils. It also helps to evaporate extra water in the drain pan. Please note: If the original fan motor has 3 terminals please order part number W10204250, otherwise order this part (WP2188874).
Replacing your Whirlpool Refrigerator Condenser Fan Motor

Customer Repair Stories
My big problem was getting the right parts. Don't ever order refrigerator parts using the refrigerator model number. I did ... Read more and got the wrong part, sent it back and talked to the parts lady and ordered again describing the error, the needed parts shape etc and she sent me the exact part I had sent back. I sent it back and removed the fan motor to get the part number, called and ordered by number and got the right one. Hallelujah!
-
Earl from PIMA, AZ
-
Difficulty Level:Easy
-
Total Repair Time:30 - 60 mins
-
Tools:Nutdriver, Pliers
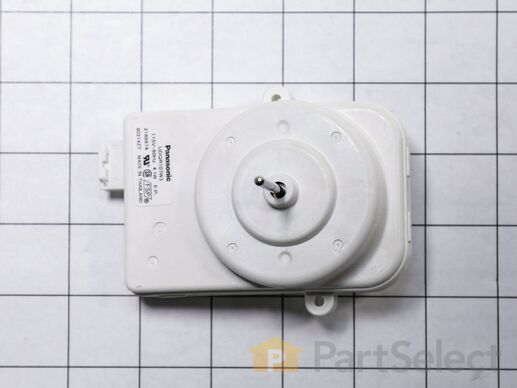
This evaporator fan motor is located in the back of the freezer, and circulates air over the refrigerator coils. These coils will convert the heat into cool air, which is then circulated.
Customer Repair Stories
-
John from PLAIN CITY, UT
-
Difficulty Level:Easy
-
Total Repair Time:15 - 30 mins
-
Tools:Nutdriver, Screw drivers
Sold Individually - Appliance originally takes 2.
Customer Repair Stories
-
Richard from HOLLISTER, CA
-
Difficulty Level:Really Easy
-
Total Repair Time:30 - 60 mins
-
Tools:Screw drivers
-
Richard from CONYERS, GA
-
Difficulty Level:Really Easy
-
Total Repair Time:1- 2 hours
-
Tools:Screw drivers


