


1456 - Overview
Models starting with 1456
Click on the best match to narrow your results.
- 1456*0A Roper Range (SLIDE-IN RANGE)
- 1456*1A Roper Range (SLIDE-IN RANGE)
- 1456*2A Roper Range (SLIDE-IN RANGE)
- 1456-0 Briggs and Stratton Pressure Washer (2,400 PSI Pressure Washer)
- 1456^0A Whirlpool Range
- 1456^1A Whirlpool Range
- 1456^2A Whirlpool Range
- 14560-1 General Electric Range
- 14560-2 General Electric Range
- 14560-3 General Electric Range
- 14561-1 General Electric Range
- 14561-2 General Electric Range
- 14561-3 General Electric Range
- 1456W2A Roper Range (Slide-in, Gas)
- 1456X0A Roper Range (Slide-in, Gas)
- 1456X1A Roper Range (Slide-in, Gas)
Keep searches simple, eg. "belt" or "pump".

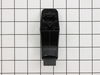
Door Handle End Cap
PartSelect #: PS256613
Manufacturer #: WB7X7183
This oven door handle end cap is used on both the left and right hand sides. Sold individually.
$33.85
In Stock

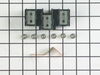
Range Surface Burner Plug-In Block Kit
PartSelect #: PS340571
Manufacturer #: 330031
The surface burner plug-in block kit features a newer-style terminal block. This kit is designed for use with ranges and cooktops. This terminal block is how the coil element on your stove connects to...
$15.65
In Stock

Door Handle End Cap
PartSelect #: PS256619
Manufacturer #: WB7X7189
This end cap can be used for either the left or right side.
$32.86
In Stock

Burner Bowl - 8 Inch
PartSelect #: PS244397
Manufacturer #: WB31T10013
This burner bowl or drip pan is found beneath the heating element on your cooktop or range. This part measures 8 inches in diameter, and should not be confused with the smaller pan, which measures 6 i...
$35.85
In Stock

Drip Bowl - 6 Inch
PartSelect #: PS244396
Manufacturer #: WB31T10012
This gray drip bowl is sold individually.
$36.85
In Stock

Light Cover
PartSelect #: PS247415
Manufacturer #: WB36X192
This light bulb lens covers the interior light bulb in an oven, range, or stove. No tools are necessary to replace this part. Simply slide off the wire bracket to remove the existing light bulb lens. ...
$21.89
In Stock

Bottom Trim - White
PartSelect #: PS2321159
Manufacturer #: WB07K10250
Screws not included.
$27.87
In Stock

Terminal Block Kit
PartSelect #: PS953027
Manufacturer #: WB17T10011
This part provides a way of connecting individual electrical wires and offers protection of the device from electrical surges (voltages and/or currents).
$56.22
In Stock

Screws - Package of 12
PartSelect #: PS234746
Manufacturer #: WB1X500D
These are replacement screws designed to fit your range. They are made of metal and are approximately ¼ inch long. They come in a package of 12. These are OEM parts sourced directly from the manufacturer.
$12.91
In Stock

Range Hex Nut
PartSelect #: PS11738304
Manufacturer #: WP112432
This 10-32-inch hex nut works with multiple appliances in your home as a fastener. This specific model is sold individually. Hex nuts usually have 6 even sides and together they are used with bolts an...
$7.93
In Stock


Exact Part matches for your search term
[Viewing 1 of 1]
O Ring
This part number matches the current model number 1456
PartSelect #: PS8866629
Manufacturer #: 1456
No Longer Available
Common Symptoms of models starting with 1456
[Viewing 3 of 3]Element will not heat
Fixed by
these parts
these parts

Show All
Will Not Start
Fixed by
these parts
these parts
Show All
Door won’t close
Fixed by
these parts
these parts
Show All

Keep searches simple. Use keywords, e.g. "leaking", "pump", "broken" or "fit".
The end caps broke on my oven door handle.
1st I opened the oven door and removed the 2 screws that hold the outside and inside of the door together. With the door separated I removed the 2 screws that hold the end caps in place, then removed the old end caps. I put the new end caps on the oven door handle, aligned the holes for the end cap screws and reinstalled the screws,then
... Read more
reinstalled the oven door screws,closed the oven door and started cooking.
Read less
Parts Used:
-
Harry from Thomasville, GA
-
Difficulty Level:Easy
-
Total Repair Time:15 - 30 mins
-
Tools:Screw drivers
45 of 46 people
found this instruction helpful.
Was this instruction helpful to you?
Thank you for voting!
terminal block melted
The existing terminal block on my Ge oven/Range had melted due to a loose wire causing sparking and starting the plastic casing of the terminal block on fire and melting it, Part select made the part easy to find and had it at my house in 2 days. All I had to do was remove six screws to take the back sheet metal cover off of the oven. U
... Read more
nscrew the terminal connections remove two mounting screws that held the terminal on to the oven body. This was a little trickier than it should have been because the melted plastic had reformed making it very hard to access the mounting screws. i then mounted the new piece and plugged the oven in, it took 15 minutes and was very easy. definitely saved me at-least a $100 for the service call i would have made if finding the part wasn't so convenient
Read less
Parts Used:

-
jonathan from willow springs, IL
-
Difficulty Level:Easy
-
Total Repair Time:Less than 15 mins
-
Tools:Nutdriver, Screw drivers
54 of 73 people
found this instruction helpful.
Was this instruction helpful to you?
Thank you for voting!
One burner didn't work all the time the other would go red hot
I unplugged the stove from the outlet, then removed the two burners I was going to be working on and the drip pans. Then I raised the top part of the stove and removed the screws holding the plug-in blocks to the stove. Then I cut the two wires going to the old plug-in block and stripped the wires back to match the new wire parts. Then I
... Read more
placed the sleeves over the new wires, then I placed the new wire beside the wire I stripped on the stove and screw on the wire cap making sure it was tight. I repeated this three more times, once I had all four wires connected I then placed the sleeves over the connections and heated them up until they were formed around the connection. Once I had all the connections done I placed one wire at a time into the plug-in block until it locked into place ( I looked at my old plug-in blocks first to make sure I placed the new wires in the correct way ).I then used the metal mounting bracket that matched my old ones and snapped the correct one onto each plug-in block. Before mounting them onto the stove I compared them to my old ones to make sure they were correct. Then I used the new screws to mount them to the stove. I took a second look at everything I had done before closing the top cover of my stove. After lowering the cover back into place I put both the drip covers in place and then installed the burners.I then plugged the stove back into the outlet and tried the burners. This was very simple and the video on the web site shows this very well which made my job very simple.
Read less
Parts Used:
-
Phillip from Pekin, IL
-
Difficulty Level:Really Easy
-
Total Repair Time:15 - 30 mins
-
Tools:Screw drivers
14 of 15 people
found this instruction helpful.
Was this instruction helpful to you?
Thank you for voting!