Your coupon for will be reflected when you check out!
✖
Your coupon for
✖
Hello!
You're visiting the PartSelect site in U.S.
Would you like to shop on the Canadian site?
Stay on this site
Go to Canadian site
✖
Model Number Locations
1Select Category Type
Select Category Type
2Select Product Type
Select Product Type
3Select {MODEL} Type
Select {MODEL} Type
Sample Model Number Tags
Model numbers can be made up of numbers (1005400, for example) or a combination of letters and numbers (LAT1000AAE). The model number will most likely appear on either a paper sticker or a metal plate. Your appliance's model number tag may look similar to the sample model number tags shown here (model number highlighted in yellow):
Model has been saved to My Models. If you're not signed in, your lists are available on this device and will expire within 30 days.
Model has been saved to My Models.
This filter is made of metal and is intended for use with ranges and cooktops. Grease filters are an important but often neglected part of ranges. If the filter is full, your extractor fan will become...
$24.06
In Stock
Order now and your part arrives in 2-3 business days!
Upgrade your cooktop with this easy-to-install electric coil cartridge, perfect for replacing worn-out burners and restoring consistent heat. The sleek stainless steel housing holds two coil burners—o...
$233.14
In Stock
Order now and your part arrives in 2-3 business days!
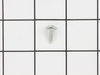
This is a multi-use and multi-appliance screw. It can be used on a microwave, refrigerator, range/oven, air conditioner, dehumidifier, washer, or dryer. The measurements of this screw are 8 x 1/2 inch...
$20.89
In Stock
Order now and your part arrives in 2-3 business days!
This stove cartridge assembly, also known as a cooktop module, is a manufacturer-approved replacement part for your stove. It is black in color and comes complete with burner elements. Make sure to sh...
$251.74
In Stock
Order now and your part arrives in 2-3 business days!
The hinges control the rate that the oven door opens and closes, and allows the door to stay open at an angle. This hinge can be used on either the left or right hand side of your oven, and is approxi...
$109.33
In Stock
Order now and your part arrives in 2-3 business days!
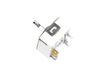
This surface burner switch, also known as an infinite switch, controls and regulates the heat output of the burners on a stovetop. The user simply adjusts the knob on the user interface panel, which i...
$70.45
In Stock
Order now and your part arrives in 2-3 business days!
This black radiant element cartridge is a genuine replacement module designed for use with select cooktops and ranges. Featuring an Ultra Quick-Start radiant heating element beneath a sleek glass-cera...
$612.06
In Stock
Order now and your part arrives in 2-3 business days!
This electric oven bake element with screw in wire terminals is 19 inches wide. It has a terminal depth of three inches and a total element length of nineteen inches. This element is intended for use ...
$87.75
In Stock
Order now and your part arrives in 2-3 business days!
This cooktop burner module assembly is designed to replace two burners on compatible ranges, offering a reliable and efficient cooking solution. Housed in a sleek black frame, it contains the necessar...
$367.48
In Stock
Order now and your part arrives in 2-3 business days!
Most of the repair was obvious as I took the blower apart before ordering the parts. Unfortunately the new motor was significantly larger than the original motor so I had to um. Adjust the position of some of the other parts to fit it in. There was a sheet metal flange that was installed on the other side of the blower from the motor whi
... Read morech was designed to focus the air flow into the blower. I used a hammer to ajust the angle of flange so it no longer extended as far into the blower housing.
It works just fine although its a bit louder than the old motor was.
1. Killed power and removed the regulator's knob, noted the position of the old control. 2. Took off the cover for the center vent and loosened the two screw holding the housing in place--the screws didn't have to come out completely as it is a U-shaped friction hold. 3. Unscrewed the two screws holding the old control switch in
... Read more place--lifted the housing enough to get at the old switch and carefully pulled it loose--it was a front burner so the control switch was about as far back as it could be but still wasn't that hard to get at. 4. Turned the new switch to orient the wire connectors, then, using a needle-nose pliers, removed each friction connector, one at a time, and fitted them on the new switch (note: one of the wires fitted best if it went under as opposed to around the base of the new switch). 5. Replaced the control back through the housing and screwed it in place, making sure the orientation of the control matched the way it looked originally. 6. Slide the housing back over the two screws and tightened, replace vent. 7. Replaced the knob and turned on the power.
(The above took me about twice as long to write as it did to make the repair and I write professionally but am not a professional electrician.)
Also, I bought a second control switch because, given the age of the unit, I'm sure another one will go. The second one will assure that it won't happen :-).


 – Part Number: WPY04100019")