Back
Back
Keep typing for more specific results...
Models > 2661532412 > Symptoms > Noisy

Parts That Fix Kenmore Washer Dryer Combo 2661532412 Noisy

Noisy is a commonly reported symptom for the 2661532412 Kenmore Washer Dryer Combo, and we have put together a full guide on how to fix this. This advice is based on feedback from people who own this exact appliance. We have listed the most common parts for your 2661532412 Kenmore Washer Dryer Combo that will fix Noisy. We have included repair instructions, and helpful step-by-step video tutorials. If you are experiencing this issue, not to worry, DIYers just like you have fixed this, and shared their experience to help you!
Fixes Symptom 44% of time

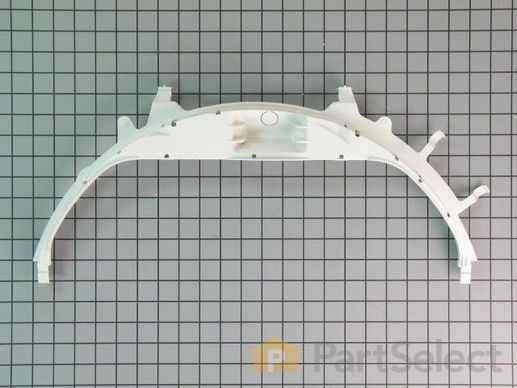
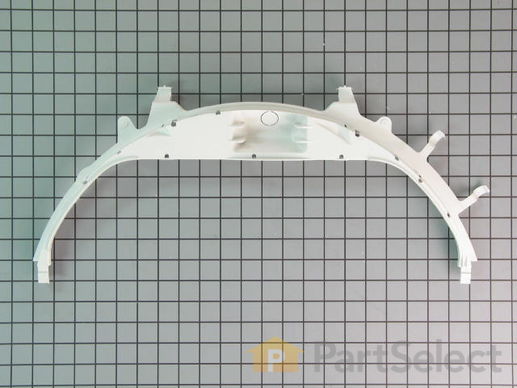
This authentic, white Drum Bearing Slide, also known as the bearing drum slide, glide, or pad, is a plastic, easy-to-install part for your dryer. It replaces the dryer's front drum slide to allow for easier movement. You'll know if this part is an issue if your dryer is unable to tumble properly or is very noisy. Damage can come from regular use. The part attaches to the outermost side of the bearing. Check both slides for signs of wear, because they often wear at the same rate, and should be replaced at the same time; there are 2 of these particular slides per dryer. This part is sold individually, so you'll need to purchase multiple parts if replacing both at the same time.

$ 15.95
  In Stock
PartSelect Number PS17137205
Manufacturer Part Number WE03X37318

Customer Repair Stories

Replaced Drum Bearing Front And Rear
Pulled the unit all apart to replace the rear drum bearing. Also replaced the front bearing. Works like brand new. Easier then I thought
  • philip from pickens, SC
  • Difficulty Level:
    Easy
  • Total Repair Time:
    1- 2 hours
  • Tools:
    Nutdriver, Screw drivers, Socket set
5 of 6 people found this instruction helpful.
Was this instruction helpful to you?
Thank you for voting!
The Front Drum Glides wore out
I first unplugged the unit, opened the top, disconnected and took off the control panel, took off the front panel to determine the source of the squeaking noise coming from the Dryer. I saw that 3 of the 4 Front Drum Glides were gone and the drum had worn away significant amounts of plastic from the Top Bearing Assembly. I purchased the Top Bearing Assembly and a set of 4 Front Drum Glides. Disassembled the damaged parts and reassembled with the new replacement parts. The reassembly took less than 20 minutes. I plugged in the Dryer and viola! It works as good as new.
  • Al from Elmhurst, IL
  • Difficulty Level:
    Really Easy
  • Total Repair Time:
    15 - 30 mins
  • Tools:
    Screw drivers
6 of 6 people found this instruction helpful.
Was this instruction helpful to you?
Thank you for voting!
Fixes Symptom 38% of time

This original equipment manufacturer Drum Bearing Slide is a plastic, green, easy-to-install part for your dryer. It replaces the dryer's front drum slide to allow for easier movement. You'll know if this part is an issue if your dryer is unable to tumble properly or is very noisy. Damage can come from regular use. As the slides start to break down it may cause your dryer to make noise or not dry clothes in the usual amount of time. You will need to purchase two for both sides of your dryer. They attach to the outer-most sides of the bearing. The manufacturer recommends replacing both slides at the same time. Take this opportunity to clean out the lint and dust in the dryer, to keep it running smoothly. This is a genuine replacement part that comes directly from the manufacturer. This item is sold individually. The part attaches to the outermost side of the bearing. Although this part is denoted as being "Green" in its title, many users and technicians have noted that its true colour is closer to a dark gray or black.

$ 28.95
  In Stock
PartSelect Number PS17137203
Manufacturer Part Number WE03X37317

Customer Repair Stories

Squealing as drum rotated
Removed the star bit screws on the top of the control panel then removed the front by opening the door and removing the screws in the upper corners of the door jam. I then removed the top which exposed the drum slides. NOTE: This model requires 4 drum slides and NOT two as specified in the video.
  • Bill from COMSTOCK PARK, MI
  • Difficulty Level:
    Really Easy
  • Total Repair Time:
    15 - 30 mins
  • Tools:
    Screw drivers
2 of 2 people found this instruction helpful.
Was this instruction helpful to you?
Thank you for voting!
Dryer starts squeaking while operating
Open the dryer door and remove the two screws in the top of the door opening that hold the top of the dryer on, and then remove the dryer top. On the inside of the dryer, there are two screws that hold the front of the dryer on. Remove one screw from each side of the dryer near the top, and the front of the dryer will fall away. The drum slides are visible when you lean the front panel of the dryer out away from the drum. You can replace the drum slides without even removing the front of the dryer completely. Pull out the old drum slides and insert the new slides. Lift the drum slighly from the inside through the dryer door as you tilt the front back into place. Reinsert the screws holding the front of the dryer on and tighten. BE CAREFUL not to drop the screws or you may have to disassemble the dryer to get at the dropped screws. Reinstall the top of the dryer. It is a difficult fit which requres inserting into 3 tabs and sliding the top into place. Check that the top is flush before inserting and tightening the screws in the top of the door opening.
  • David from Littleton, CO
  • Difficulty Level:
    Easy
  • Total Repair Time:
    15 - 30 mins
  • Tools:
    Screw drivers
10 of 13 people found this instruction helpful.
Was this instruction helpful to you?
Thank you for voting!
Fixes Symptom 10% of time

This rear drum bearing kit includes a shaft, ground strap, bearing, seven screws, and installation instructions. The bearing plate comes with a slot in it for the ground strap. This part helps keep your dryer running as smoothly as possible with as little noise as possible by supporting the back of the dryer drum and reducing friction as the drum rotates. Over time, your drum bearing will wear out, cause your dryer to be noisy, and you will have to replace it. There may be some sharp internal parts, so be sure to wear work gloves during repair.

$ 74.43
  In Stock
PartSelect Number PS267529
Manufacturer Part Number WE25M40

Replacing your General Electric Dryer Dryer Rear Drum Bearing Kit

Replacing your Dryer Rear Drum Bearing Kit

Customer Repair Stories

Dryer squeaked when running
Everything is cleaned as it is removed.

Remove the two screws holding the top down.
Disconnect two wires from door switch.
Remove the two hex screws holding the front on.
Remove the 4 screws holding the access panel on the back and disengage idler pulley to loosen the belt.
Remove the drum.
Label the wires then remove the heating element.
Check orientation of ground strap before disassembling rear bearing.
Remove four screws holding rear bearing to back of heating element.
Install rear bearing and ground strap on to heating element.
Reinstall heating element.
Reconnect wires.

Most Important : Get help putting parts back on drum! I didn't and that's why it took over 2 hours.
I will describe how I did it.

Unscrew bearing from inside of drum.
Wrap screwdriver with tape to a little larger than the screw hole.
Use small screwdriver to line up the drum, shim and deflector.
Don't forget the brass shim. It wasn't on the parts diagram.
Start two screws don't tighten them yet.
Remove Screwdriver and start third screw. Tighten all three down.
Put belt on drum.
Install drum and belt.
Reverse disassembly.
When putting the front on make sure drum rests in the felt.

I rated this a bit difficult because I did it myself. With help this is a fairly easy repair.
  • Mark from Garrett, IN
  • Difficulty Level:
    A Bit Difficult
  • Total Repair Time:
    More than 2 hours
  • Tools:
    Nutdriver, Screw drivers, Socket set
30 of 39 people found this instruction helpful.
Was this instruction helpful to you?
Thank you for voting!
Squeaking Dryer - Rear Drum bearing gone bad
First, I loosened the the top control panel and then loosened the top flat roof panel which allowed me access to the inside of the dryer. Then, I removed the front panel which allowed access to the drum. I was amazed at the amount of lint that was inside the dryer itself. Most of my time was spent in the disassembly and cleaning of the internal cavity around the drum. I reached below the drum and removed the belt from the pulley wheels and then unscrewed the drum (from the inside) from the back of the dryer and bearing kit. I removed the diffuser and cleaned it thoroughly. Then I replaced the entire drum bearing kit - the old one was almost completely dissentigrated. I probably should have applied some kind of non-flammable lubricant to the new bearing kit - the instructions did not include this step but after about 3 loads a slight squeak (different). I put everything back together - applying the new drum kit will require 2 sets of hands (my 9-year old daughter did great at this). I re-assembled the dryer and it works great, again except for the slight squeak that's still there. I may disassemble it again and apply some lubricant but I do not know what kind to get; I need to check that out.
  • Jason from Cary, NC
  • Difficulty Level:
    A Bit Difficult
  • Total Repair Time:
    More than 2 hours
  • Tools:
    Screw drivers, Socket set
32 of 35 people found this instruction helpful.
Was this instruction helpful to you?
Thank you for voting!
Fixes Symptom 7% of time

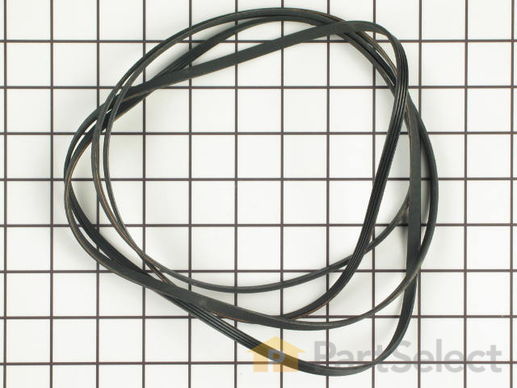
This Drive Belt is 89.5" long and comes in black, featuring four ribs on the inside for a better grip. This is a long belt that wraps all the way around the dryer drum, around a tension pulley, and then around the drive motor pulley, allowing all the parts to work together, spinning the drum as the motor rotates. If the drum will not turn when the dryer is turned on the belt is likely broken. It is common for belts to stretch or become brittle over time, which is what leads to the breakage. If broken, it should be replaced; the drum simply cannot spin without this belt. Refer to your model number and user manual to check if this part is right for you. Ensure you use work gloves to protect your hands from sharp internal parts during this repair. Please note: When comparing the length of your old belt to the length of the belt as stated here, remember that a small amount of stretching and contortion may occur with belts over time for a range of different reasons. Unless your belt is drastically different in length, this belt is what you are looking for despite any small inaccuracies. You will need to remove power to your appliance, remove the main panel, and access the motor drive to slip your new belt back into place.

$ 49.95
  In Stock
PartSelect Number PS16542496
Manufacturer Part Number WE03X29897

Replacing your General Electric Dryer Drive Belt

Replacing your Drive Belt

Customer Repair Stories

Broken Dryer Belt
I had to take most of the dryer apart because there is no rear access to the motor. It turned out to be easy to dissasembel the dryer. The only problem that I had was that I could not figure out how to route the belt around the motor and the idol pullies. I could not find anywhere that gave instructions on how to properly tension the belt. I finally figured out that the idoler pulley needs to be locked in place on the right side of the engie mount. Then the belt needs to be routed over idoler pulley and under the motor pulley. Finally release the idoler pully from the locked postion to put tension on the belt. It really turned out to be pretty easy.
  • Richard from Ashton, MD
  • Difficulty Level:
    Easy
  • Total Repair Time:
    1- 2 hours
  • Tools:
    Nutdriver, Screw drivers
70 of 107 people found this instruction helpful.
Was this instruction helpful to you?
Thank you for voting!
Drum belt broke
Removed the front Dryer panel. Left drum in place and lifted it up slightly to get access to motor drive. Slipped belt in place and put panel back on.
This was a first attempt ever at fixing an appliance and it was no big deal.
  • Adrian from Middletown, MD
  • Difficulty Level:
    A Bit Difficult
  • Total Repair Time:
    30 - 60 mins
  • Tools:
    Screw drivers
199 of 291 people found this instruction helpful.
Was this instruction helpful to you?
Thank you for voting!
Fixes Symptom 1% of time

Note: The drum slides should also be replaced when your replacing the drum bearing. Slides are NOT included. This part helps your dryer operate as quietly as possible.

$ 57.37
  In Stock
PartSelect Number PS12342893
Manufacturer Part Number WE03X25079

Replacing your General Electric Dryer TOP BEARING

Replacing your TOP BEARING
Fixes Symptom less than 1% of time

This Genuine OEM drum bearing is a manufacturer-sourced replacement part designed for use with a variety of GE dryers. Engineered to support the rear of the dryer drum, this component plays a key role in reducing friction and noise during operation, helping your appliance run as quietly and efficiently as possible. Constructed from durable materials and sold individually, this part is essential for maintaining smooth drum rotation and overall dryer performance. When replacing the drum bearing, it is strongly recommended to also replace the drum slides, which are sold separately. Worn slides can contribute to excessive noise and uneven drum movement. Installation requires basic tools including a Torx screwdriver, flathead screwdriver, Phillips screwdriver, and pliers. Always consult your model’s manual for specific repair instructions and safety guidelines. Note: Drum slides are not included with this part and must be purchased separately.

$ 43.95
  In Stock
PartSelect Number PS12703118
Manufacturer Part Number WE03X27679

Replacing your General Electric Washer Dryer Combo TOP BEARING ASSEMBLY 27 Inch

Replacing your TOP BEARING ASSEMBLY 27 Inch