


36261028894 Kenmore Range - Overview
Sections of the 36261028894
[Viewing 4 of 4]
Keep searches simple, eg. "belt" or "pump".

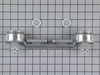
Double Burner Assembly
PartSelect #: PS232404
Manufacturer #: WB16K10026
Both burners are mounted on the same bracket.
$56.38
In Stock


Natural Gas Orifice
PartSelect #: PS240693
Manufacturer #: WB28K10033
Sold individually.
$28.95
In Stock

Screw
PartSelect #: PS221932
Manufacturer #: WB01K10002
Size: 8-32 inch Sold individually.
$31.95
In Stock


Burner Grate
PartSelect #: PS244178
Manufacturer #: WB31K10012
This black grate is sold individually.
$71.95
In Stock

 – Part Number: WB03K10006")

 – Part Number: WB28K10009")
Manuals & Care Guides for 36261028894
Click to downloadQuestions And Answers for 36261028894
We're sorry, but our Q&A experts are temporarily unavailable.
Please check back later if you still haven't found the answer you need.
Common Symptoms of the 36261028894
[Viewing 4 of 4]Gas igniter glows, but will not light
Fixed by
these parts
these parts
Show All
Will Not Start
Fixed by
these parts
these parts
Show All
Element will not heat
Fixed by
these parts
these parts
Show All
Gas smell
Fixed by
these parts
these parts
Show All

Keep searches simple. Use keywords, e.g. "leaking", "pump", "broken" or "fit".
My old burners were beyond the point of coming clean and made my stove top look bad.
My husband and I simply took the burner units out of the packing, took the old ones off, put the new ones in. The new units needed to be leveled, but the leveling nuts included fit perfectly, and the entire repair took less than 15 minutes.
Parts Used:
-
Helen from Flemington, NJ
-
Difficulty Level:Easy
-
Total Repair Time:Less than 15 mins
23 of 30 people
found this instruction helpful.
Was this instruction helpful to you?
Thank you for voting!
Pies Boiled Over And Baked On Oven Bottom
Removed the two screws put the heat shield off the old one onto the new one put new bottom in and tightened two screws. Done #38. 69 Cost of part with shipping cost included.
Parts Used:
-
Marjorie from Yucca Valley, CA
-
Difficulty Level:Really Easy
-
Total Repair Time:Less than 15 mins
-
Tools:Screw drivers
18 of 23 people
found this instruction helpful.
Was this instruction helpful to you?
Thank you for voting!
Burners were burning the pans and flames coming out at all different angles of the burner
The toughest part of the repair was the preparation to remove the old burners. As a result of the burning there was a carbon residue on the burners, on the gas outlet feed to the burners. This took some scrubbing and removing the carbon residue. Bits had burned onto the outlet and had to be scrapped off. Once all cleaned, replacing th
... Read more
e burners was easy just had to place the balancing nuts in place and put on the burners. One problem arose the hood of the stove did not go back in place after replacing the burners so I then removed the balancing nuts put back on the burners stove top hood fit back in place and burners operated properly. This part of the repair took five minutes.
Read less
Parts Used:
-
ANNE from HICKSVILLE, NY
-
Difficulty Level:Easy
-
Total Repair Time:15 - 30 mins
13 of 15 people
found this instruction helpful.
Was this instruction helpful to you?
Thank you for voting!