Your coupon for will be reflected when you check out!
✖
Your coupon for
✖
Hello!
You're visiting the PartSelect site in U.S.
Would you like to shop on the Canadian site?
Stay on this site
Go to Canadian site
✖
Model Number Locations
1Select Category Type
Select Category Type
2Select Product Type
Select Product Type
3Select {MODEL} Type
Select {MODEL} Type
Sample Model Number Tags
Model numbers can be made up of numbers (1005400, for example) or a combination of letters and numbers (LAT1000AAE). The model number will most likely appear on either a paper sticker or a metal plate. Your appliance's model number tag may look similar to the sample model number tags shown here (model number highlighted in yellow):
Model has been saved to My Models. If you're not signed in, your lists are available on this device and will expire within 30 days.
Model has been saved to My Models.
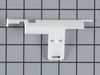
This “Dispenser Door Assembly” (Door Recess Assembly, Ice Door Assembly, Dispenser Door, Refrigerator Dispenser Ice Chute Door Kit, Dispenser Door Flap, Ice Chute Door, Flapper) keeps the room air fro...
$22.95
In Stock
Order within the next 7 hrs and your part ships today!
This part is the replacement water line for your refrigerator. It is a long plastic tube, which is 5/16 of an inch in diameter. If your refrigerator is leaking, or will not dispense water or ice, you ...
$35.95
In Stock
Order within the next 7 hrs and your part ships today!
This in-refrigerator dispenser water reservoir tank comes with tubing. This tank stores water until the water actuator is activated and water is requested.
$110.69
In Stock
Order within the next 7 hrs and your part ships today!
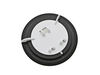
Improve the efficiency of your refrigerator with this genuine OEM GE Ice Bucket Assembly. Designed for fit and function with 20 & 22 cubic foot refrigerator models, this assembly includes a quality au...
$247.12
In Stock
Order within the next 7 hrs and your part ships today!
This is a quarter tubing nut and is sold individually. The tubing nut works in conjunction with your refrigerator/freezer and is made entirely of plastic. The function of this part is to connect the l...
$13.95
In Stock
Order within the next 7 hrs and your part ships today!
Symptom: Door did not close automatically. Also had found small chunks of black plastic on the floor. Refrigerator door was slightly lower than the freezer door.
One false start because I did not realize both of the door-closing cams had disintegrated and I had only ordered the cam without the hinge.
Purchased part
... Read more290199 Hinge Assembly. It came with matching door-closing cam. (Had not known so I also purchased the cam 297995 separately). Next time I will know to only purchase the Hinge Assembly.
Replacement procedure took about 20 minutes including removing and replacing door shelves and their contents. Two people involved.
1. Remove all door shelves with contents and other contents on door.
2. Remove the top Phillips head screw holding the decorative plastic on the top.
3. Remove the two top hinge screws on top of refrigerator using metric #8 socket wrench. Second person made sure door did not fall off.
4. Lift the door off the bottom hinge pin. Second person holds door on it’s side.
5. Take off the bottom refrigerator cover
6. Remove the bottom hinge assembly screws using metric #8 socket wrench.
7. Mount the replacement bottom hinge assembly and tighten the two screws.
8. On the door bottom, remove the outer screw and loosen the inner screw using metric #8 socket wrench.
9. Replace the door-closing cam (or what is left of it) with the cam in line with the door and cam bumps away from the door.
10. Place the door back on the hinge pin (one person holds while the other person maneuvers the door bottom).
11. Replace the top hinge and reinsert the screws on top of the refrigerator. Dress the door so that it does not press hard on the rubber door gaskets (or the door will fail to shut automatically). Tighten the screws.
12. Replace the decorative plastic over the top hinge.
13. Open the door and replace the bottom refrigerator cover.
Removed the ice bin and maker, then removed cover from the rear that covered the solenoid that controls the dispensing mechanism. Replace solenoid. The tricky part here is that there is a styrofoam cover around the solenoid pin that needs to be superglued into place and oriented properly during replacement. All electrical feeds snap ou
... Read moret neatly and are easily replaced. Reassemble ice dispenser and bin, and viola, your back in business.
The problem is the common issue that the proximity of the plastic water lines that leave the electrically controlled valve near the compressor in the bottom back corner of the fridge, means they become brittle and crack/break. Both the line leaving to the ice-maker that runs diagonally across the outside back of the fridge, and the line t
... Read morehat runs under the fridge to feed the water dispenser failed at the valve, breaking off just where they start at the valve.
The result was I noticed a big puddle coming out from under the fridge (too late for the poor wood floor).
The solution, replace the parts. For the ice maker line, it is one thin line - its easy to replace other than taking care to uncrimp and recrimp the connection up at the entry to the freezer.
For the thicker tube, the one that goes to the water dispenser, you replace the reservoir tank that sits inside the fridge. It has the two lines leaving it permanently attached to the tank, hence you replace the whole thing. There are separate lines and a splice/union that can be used to replace just the last 6 inches near the compressor, but I chose to replace the whole unit. This describes replacing that water chill tank unit.
The tank sits behind the bottom 2 drawers in the fridge.. you see it when you pull out the drawers. It has two lines permanently attached, one runs out of one hole in the bottom of the fridge and to the back of the fridge where it attaches to the exit on the electrical valve. The other runs out of the other hole in the bottom of the fridge and runs along the side, then along the front from the fridge to the freezer side. There is a union that connects that line to another line that then runs up the freezer door. Remove the front cover under the fridge to see this line and the union.
To replace the tank, you have to disconnect it from both ends, where its held in by plastic nuts/unions. Water remaining in the lines will drain out when you disconnect them. I unscrewed the valve assembly from the fridge body and then unplugged the plugs to the valves to do the work (but left the fridge plugged in).
To do this work, I needed to raise the fridge side edge of the appliance, since the hoses route along the underside of the fridge. After you disconnect the two ends (at the union on the freezer side bottom front egdge, and back side at the valve) you can pull the hoses up into the fridge. Routing the new hoses will require you have at least that one side off the floor to get your hands under it. I got two 6" tall 4x4 wood blocks and tipped the fridge slightly, raising the right (fridge) side off the ground and slid the blocks under the fridge rollers.
To remove the tank, before you raise the edge of the fridge, there are two screws that you need to remove (top side and left side) from the storage tank.
I recommend that in addition to removing the bottom two drawers, you remove all the bins hanging in the fridge door, since you need to work in there with gravity wanting to shut the door on you. Once you have the tank unscrewed (and the hose ends disconnected) note which hose(based on where it connects to the tank) goes to which hole in the bottom of the fridge. Pull up the hoses from the inside the fridge. The tank is free..go put it in the sink and drain the water out.
Installing the new tank, remove any hose end caps and route the hoses back through the lower drawer support frame you pulled them out of, and feed the correct hoses back through the holes in the bottom of the fridge. I found it better to feed the longer one first, which leads to the water dispenser/front. I could then pull that one up front from under the raised fridge and clip it in place and then route the other hose fully though its hole and route it to the back of the fridge to the valve. This way I ensured I was sending the right hose to the right destination.
You will likely have to trim the hoses once the tank is reattached as they are slightly long. Be sure