


3638594786 Kenmore Refrigerator - Overview
Sections of the 3638594786
[Viewing 10 of 10]
Keep searches simple, eg. "belt" or "pump".

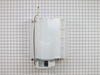
Refrigerator Ice Maker
PartSelect #: PS1993870
Manufacturer #: WR30X10093
This 10 by 5 inch ice maker (Electromechanical Icemaker Kit, Ice Maker Assembly) produces ice. This particular model will produce seven crescent shaped cubes every cycle. It is constructed of plastic ...
$173.95
In Stock

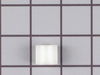
Refrigerator Door Closing Cam
PartSelect #: PS297995
Manufacturer #: WR2X4901
This single door closure cam is mounted on the door, not the hinge.
$29.95
In Stock
 – Part Number: 40A15")
Light Bulb (40W)
PartSelect #: PS217532
Manufacturer #: 40A15
This 40-Watt light bulb is sold individually and is a genuine OEM replacement option for your home appliances. It is specially designed to withstand extreme temperatures, so this bulb is compatible wi...
$19.10
In Stock

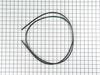
Drawer Slide Rail - Left Side
PartSelect #: PS306913
Manufacturer #: WR72X209
The drawer slide rail in your refrigerator allows the door bin to slide in and out efficiently. If the slide rail is broken or missing it will need to be replaced. This slide rail is sold individually...
No Longer Available

Defrost Timer - 120V 60Hz
PartSelect #: PS310869
Manufacturer #: WR9X502
This defrost timer will cycle for 25 minutes after every six hours of run time. The timer itself is made of plastic, and its terminals are bent, the leads are internal, and the label is orange. If you...
$70.24
In Stock

Refrigerator Door Shelf Retainer Bar End Cap Left Or Right Side
PartSelect #: PS298758
Manufacturer #: WR2X7975
This end cap can be used for the right or left side of the refrigerator door shelf or the freezer door shelf.
$42.95
In Stock

Refrigerator Auger And Ice Bucket Assembly
PartSelect #: PS294039
Manufacturer #: WR17X4312
This auger and bucket assembly is used on 25 cubic feet and 27 cubic feet side by side models.
$198.39
In Stock

Ice Bucket Auger Kit
PartSelect #: PS292776
Manufacturer #: WR17X2740
This ice bucket auger kit come with an auger and a blade. Please note: As per manufacture the part shown in the picture is no longer available. The updated helix coil is now approximately 5". If you c...
No Longer Available


1/4 Tubing Nut
PartSelect #: PS304401
Manufacturer #: WR57X57
This is a quarter tubing nut and is sold individually. The tubing nut works in conjunction with your refrigerator/freezer and is made entirely of plastic. The function of this part is to connect the l...
$13.95
In Stock

Questions And Answers for 3638594786
We're sorry, but our Q&A experts are temporarily unavailable.
Please check back later if you still haven't found the answer you need.
Common Symptoms of the 3638594786
[Viewing 17 of 17]Ice maker not making ice
Fixed by
these parts
these parts


Show All
Door won’t open or close
Fixed by
these parts
these parts

Show All
Leaking
Fixed by
these parts
these parts
Show All
Fridge too warm
Fixed by
these parts
these parts


Show All
Ice maker won’t dispense ice
Fixed by
these parts
these parts
Show All
Freezer section too warm
Fixed by
these parts
these parts
Show All
Freezer not defrosting
Fixed by
these parts
these parts
Show All
Door Sweating
Fixed by
these parts
these parts
Show All
Fridge runs too long
Fixed by
these parts
these parts
Show All
Fridge and Freezer are too warm
Fixed by
these parts
these parts
Show All
Noisy
Fixed by
these parts
these parts
Show All
Ice maker dispenses too little ice
Fixed by
these parts
these parts
Show All
Ice maker dispenses too much ice
Fixed by
these parts
these parts
Show All
Will Not Start
Fixed by
these parts
these parts
Show All
Won’t start
Fixed by
these parts
these parts
Show All
Clicking sound
Fixed by
these parts
these parts
Show All
Freezer too cold
Fixed by
these parts
these parts
Show All


Keep searches simple. Use keywords, e.g. "leaking", "pump", "broken" or "fit".
Door would not automatically close.
Symptom: Door did not close automatically. Also had found small chunks of black plastic on the floor. Refrigerator door was slightly lower than the freezer door.
One false start because I did not realize both of the door-closing cams had disintegrated and I had only ordered the cam without the hinge.
Purchased part ... Read more 290199 Hinge Assembly. It came with matching door-closing cam. (Had not known so I also purchased the cam 297995 separately). Next time I will know to only purchase the Hinge Assembly.
Replacement procedure took about 20 minutes including removing and replacing door shelves and their contents. Two people involved.
1. Remove all door shelves with contents and other contents on door.
2. Remove the top Phillips head screw holding the decorative plastic on the top.
3. Remove the two top hinge screws on top of refrigerator using metric #8 socket wrench. Second person made sure door did not fall off.
4. Lift the door off the bottom hinge pin. Second person holds door on it’s side.
5. Take off the bottom refrigerator cover
6. Remove the bottom hinge assembly screws using metric #8 socket wrench.
7. Mount the replacement bottom hinge assembly and tighten the two screws.
8. On the door bottom, remove the outer screw and loosen the inner screw using metric #8 socket wrench.
9. Replace the door-closing cam (or what is left of it) with the cam in line with the door and cam bumps away from the door.
10. Place the door back on the hinge pin (one person holds while the other person maneuvers the door bottom).
11. Replace the top hinge and reinsert the screws on top of the refrigerator. Dress the door so that it does not press hard on the rubber door gaskets (or the door will fail to shut automatically). Tighten the screws.
12. Replace the decorative plastic over the top hinge.
13. Open the door and replace the bottom refrigerator cover.
14. Replace the door shelves and all contents.
15 Close the door.
Read less
Parts Used:
-
Gary from North eastham, AL
-
Difficulty Level:Really Easy
-
Total Repair Time:15 - 30 mins
-
Tools:Screw drivers, Socket set
178 of 192 people
found this instruction helpful.
Was this instruction helpful to you?
Thank you for voting!
refrigerator was not cooling but the freezer worked fine.
My husband put on the defrost timer. At first I thought the part was not going to fix the problem. After about 5 hours my refrigerator was still warm. I went to work and when I got home that evening my refrigerator was cooling and down to 28 degrees. So if you replace this part wait at least 12-24 hours. Give it time to stablize.
... Read more
My husband says it has to go through its cycle. It works on a 24 hour timer. My refrigerator is working fine and this has saved me alot of money. My husband says, once you put on the timer you may have to use a flat screwdriver and turn the small dial clockwise one click to start it. He removed the kick grill and replaced the part. Dont forget to shut breaker off to replace this part. Turn power back on and start the timer. We are so happy that we now have a working refrigerator.
Read less
Parts Used:
-
Wanda from Cabins, WV
-
Difficulty Level:Really Easy
-
Total Repair Time:15 - 30 mins
-
Tools:Nutdriver, Screw drivers
92 of 109 people
found this instruction helpful.
Was this instruction helpful to you?
Thank you for voting!
ice stalactites were drooling out of the icemaker and gumming up the cubes in the receiving tray.
I first shut off water flow to the fridge. Examination of the package (which was not exact in appearance to the original) demonstrated that the electrical connectors were well-insulated so I arrogantly and successfully proceded without disconnecting the power. My fridge is old enough that the model doesn't appear exactly on anyone's list
... Read more
so I wasn't alarmed that it took an extra 10 minutes or so to noodle out how to adapt the slightly different inlet cowling and electrical cord with extension, but the device is pretty simple.
Soon I loosened the two mounting screws with a nut driver, used a screwdriver to pry away the plastic snap-in housing over the electrical socket on the fridge inner wall and pulled away the electrical plug. The original water fill tube remained in its cavity, ready for re-use.
The new unit's mounting points matched the original screw locations perfectly, as did the fill cowling - which on the replacement icemaker has two possible attachment points. The new unit's electrical connector required an extension pigtail to adapt to my socket, but it was included in the package. The extra cable posed a minor cosmetic issue because it hangs in the collection basket a bit, but that will soon be remedied with a tie wrap.
After the water was restored and an anxious wait of a few hours, we had well-formed ice cubes that weren't all stuck together and the stalactites haven't reappeared.
Read less
Parts Used:
-
Gerald from Benicia, CA
-
Difficulty Level:Easy
-
Total Repair Time:15 - 30 mins
-
Tools:Nutdriver, Screw drivers
91 of 128 people
found this instruction helpful.
Was this instruction helpful to you?
Thank you for voting!