EasyApplianceParts is now PartSelect! We've merged our sites to provide a better shopping experience for you.   Full Details
Back
Back
Keep typing for more specific results...
Models > 4GWTW3000FW0 > Symptoms > Will not agitate

Parts That Fix Whirlpool Washer 4GWTW3000FW0 Will not agitate

Will not agitate is a commonly reported symptom for the 4GWTW3000FW0 Whirlpool Washer, and we have put together a full guide on how to fix this. This advice is based on feedback from people who own this exact appliance. We have listed the most common parts for your 4GWTW3000FW0 Whirlpool Washer that will fix Will not agitate. We have included repair instructions, and helpful step-by-step video tutorials. If you are experiencing this issue, not to worry, DIYers just like you have fixed this, and shared their experience to help you!
Fixes Symptom 33% of time

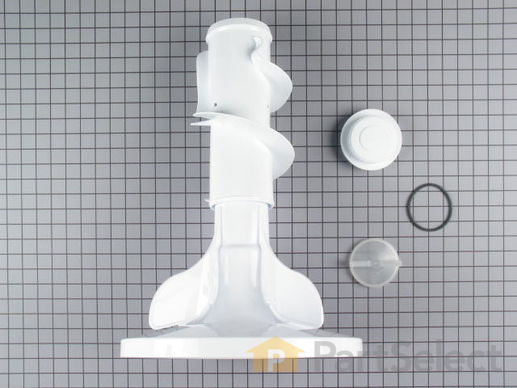
This agitator kit does NOT include the fabric softener dispenser (part 8575076A). That must be ordered separately.

$ 140.95
  In Stock
PartSelect Number PS334557
Manufacturer Part Number 285565

Customer Repair Stories

Top portion of the agitator finally quit working. Cams that engage the action wore down.
Repair was simple, after finding the correct part from Partselect. Exact match. Old part out with removal of one bolt, new agitator assembly installed in five minutes. Works great and saved me from buying a new washer. Cost of repair about $80.00, replace washing machine, about $600.00.
  • Edwin from Plainfield, IL
  • Difficulty Level:
    A Bit Difficult
  • Total Repair Time:
    15 - 30 mins
  • Tools:
    Socket set
34 of 39 people found this instruction helpful.
Was this instruction helpful to you?
Thank you for voting!
Top section of agirtator not working
Removed top cap and one nut from agirtator then removed complete assembly. Replaced new assembly nut and cap.
  • Vincent from York, ME
  • Difficulty Level:
    Really Easy
  • Total Repair Time:
    15 - 30 mins
  • Tools:
    Socket set
38 of 47 people found this instruction helpful.
Was this instruction helpful to you?
Thank you for voting!
Fixes Symptom 25% of time

This is an inner cap seal, but may also be known as an O-ring, and it is a part for your washing machine. Some symptoms replacing this part will fix include: leaking from your appliance, uncontrollable shaking and moving, loud noise, pumps but will not spin, or if your appliance will not agitate. This model is off-black in color and 3 inches in diameter. You will find this part inside the agitator in the middle of your washing machine. It is recommended to wipe down the barrier before putting the new seal on.

$ 10.45
  In Stock
PartSelect Number PS11748108
Manufacturer Part Number WPW10072840

Replacing your Whirlpool Washer Washer Inner Cap Seal

Replacing your Washer Inner Cap Seal

Customer Repair Stories

The seal in the upper agitator cap broke
I just unscrewed the top agitator cap and slid the o-ring on and put it back. Done in seconds.
  • Veronica L from Junction City, KS
  • Difficulty Level:
    Really Easy
  • Total Repair Time:
    Less than 15 mins
1 of 3 people found this instruction helpful.
Was this instruction helpful to you?
Thank you for voting!
The cap thingy seal broke and splattered fabric softener.
I pulled out the old cap with my hands and jammed the new thingy into place. The lady of house did the repair. Easy
  • Diane from Corvallis, OR
  • Difficulty Level:
    Really Easy
  • Total Repair Time:
    Less than 15 mins
1 person found this instruction helpful.
Was this instruction helpful to you?
Thank you for voting!
Fixes Symptom 17% of time

The O-Ring is included with this cap. It can be purchased separately as Part #WPW10072840.

$ 16.74
  In Stock
PartSelect Number PS11748113
Manufacturer Part Number WPW10074580

Replacing your Whirlpool Washer Washer Agitator Cap Barrier w/Seal

Replacing your Washer Agitator Cap Barrier w/Seal

Customer Repair Stories

Seal Was Broken
Pulled the top off and placed the cap in place with seal in place.
  • JANET from BUFFALO, MN
  • Difficulty Level:
    Really Easy
  • Total Repair Time:
    Less than 15 mins
0 of 1 people found this instruction helpful.
Was this instruction helpful to you?
Thank you for voting!
Found seal had split on agitator cap
I clean out the fabric softner dispenser on my machine on a regular basis and found the seal split. After looking at several sites to try and find this part, I found this one. Ordering couldn't have been easier and repair only required pulling up the cup for the softner and installing the cap.

Thanks for making finding part so easy . . . .
  • Kim from Cleveland, OH
  • Difficulty Level:
    Really Easy
  • Total Repair Time:
    Less than 15 mins
3 of 4 people found this instruction helpful.
Was this instruction helpful to you?
Thank you for voting!
Fixes Symptom 9% of time

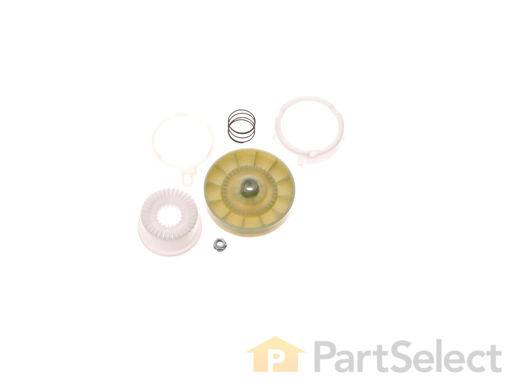
This is a replacement clutch assembly or cam kit for your washer. The clutch assembly is mounted on the drive shaft on the bottom of your washer. You may need to replace the clutch assembly if the splines on the clutch assembly are stripped and the washer is making noise, or if you are having problems with the wash and spin cycles. You will need to access the bottom of the washer for this repair. It is easiest to if you disconnect your washer from both the water and power source, and lay it on its back. The clutch assembly contains 6 parts, and all are included with the kit. It is also important to change out the entire assembly, rather than individual pieces.

$ 37.76
  In Stock
PartSelect Number PS10057144
Manufacturer Part Number W10721967

Replacing your Whirlpool Washer Washer Drive Pulley

Replacing your Washer Drive Pulley

Customer Repair Stories

Making loud noises.
The video you sent me was very helpful told me the exact tools I needed and how to do it.
Thank you
  • Roy from BROOKLYN, NY
  • Difficulty Level:
    Really Easy
  • Total Repair Time:
    30 - 60 mins
  • Tools:
    Nutdriver, Pliers, Screw drivers, Socket set
15 of 21 people found this instruction helpful.
Was this instruction helpful to you?
Thank you for voting!
Noise, grinding sounds. Wash tub stopped turning but motor and cycles kept functioning. Process of elimination, must be the clutch assembly.
Easy, just followed the repair video. Recommend also ordering the drive belt. Bought one locally during my repair.
  • David from BLOOMINGTON, IN
  • Difficulty Level:
    Easy
  • Total Repair Time:
    30 - 60 mins
  • Tools:
    Screw drivers, Socket set
58 of 81 people found this instruction helpful.
Was this instruction helpful to you?
Thank you for voting!
Fixes Symptom 9% of time

This part goes on the agitator retaining bolt.

$ 12.58
  In Stock
PartSelect Number PS11742027
Manufacturer Part Number WP3949550

Replacing your Whirlpool Washer Washer Washer

Replacing your Washer Washer

Customer Repair Stories

agitator broke
very easy to repair , instructions very clear , parts person very good to talk to, parts got here fast
  • Joseph from Kalkaska, MI
  • Difficulty Level:
    Really Easy
  • Total Repair Time:
    Less than 15 mins
  • Tools:
    Socket set
1 of 2 people found this instruction helpful.
Was this instruction helpful to you?
Thank you for voting!
Fixes Symptom 4% of time

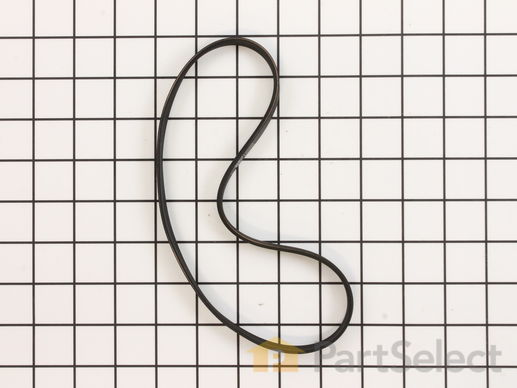
The main drive belt is designed to ride on the pulley until the basket gets up to speed.

$ 28.33
  In Stock
PartSelect Number PS11747978
Manufacturer Part Number WPW10006384

Replacing your Whirlpool Washer Washer Drive Belt

Replacing your Washer Drive Belt

Customer Repair Stories

squeal and chirping while in risne / spin mode
Removed belt cover from bottom of the transmission , remove old belt, clean the pulleys ,and re install new belt. The new belt fits tighter so it did a few time to get the belt fully seated. Re install belt cover.
  • Thomas from GRAIN VALLEY, MO
  • Difficulty Level:
    Really Easy
  • Total Repair Time:
    30 - 60 mins
  • Tools:
    Nutdriver
10 of 10 people found this instruction helpful.
Was this instruction helpful to you?
Thank you for voting!
Smelled a burning odor occasionally
First, I checked the belt before ordering and then decided to order the belt, capacitor, and clutch assembly (if I needed to replace). I replaced the belt noticing the older belt came right off and new one was tighter going on. I replaced the capacitor since I had it handy and it can be known to cause this smell also. After setting washer back up and started a cycle I noticed the spin cycle would not start properly so I thought maybe the capacitor (new one) was faulty or just not the exact match even though it was said to be. I replaced my older capacitor back on and again ran cycle and it ran great. Thus I decided to send the parts which were not used. I would recommend this site as I have used them in the past before on other items. They ship fast and have a great return policy if parts not used.
  • Paul from E NORTHPORT, NY
  • Difficulty Level:
    Very Easy
  • Total Repair Time:
    15 - 30 mins
  • Tools:
    Nutdriver, Socket set, Wrench (Adjustable)
16 of 22 people found this instruction helpful.
Was this instruction helpful to you?
Thank you for voting!
Fixes Symptom 2% of time

Sold individually.

$ 6.95
  In Stock
PartSelect Number PS10067065
Manufacturer Part Number W10772621

Customer Repair Stories

washer not agitating
This was a learning experience but it appears to have worked out in the end. Our 3 1/2 year old washer was not agitating much and I attributed that to a loose bolt. I would tighten the bolt and it would work ok for a load or two and then stop agitating. I would find that the bolt was loose again. I took a number of steps to try to get the bolt to stay on tight - threadlock, a new bolt, more threadlock, and applying progressively more force on the bolt, with no better results. Yet the repair guys on you tube were saying the bolt only needs to be snug, not super tight - something was amiss. I even went so far as to secure the basket with a rope so I could use two hands on the socket wrench (please don't do this). But when I tried the washer again there was no agitation at all! I observed the agitation output in manual test mode and the bolt was turning in lock step with the shaft but the agitator wasn't turning at all. That's when I suspected that the problem was actually a worn lower agitator. Trouble was that now I couldn't seem to get the bolt off. Turning the wrench caused the shaft itself to rotate so I couldn't loosen the bolt from the shaft. I thought I broke the washer. Then I considered that maybe the shaft was rotating because the washer was in an agitation mode when I turned it off. I went back into manual test mode, made the washer spin, then turned it off. Fortunately, this worked. The shaft was again stationary and, albeit with great difficulty, I got the bolt off.

I removed the agitator, and as a pro would have figured out long before, the ridges inside the top of the lower agitator were almost completely worn down. I realized then that the contact between these ridges and the splines on the shaft is what is supposed to cause the lower agitator to move with the shaft. The purpose of the bolt is just to keep the agitator in the correct position and from coming off the shaft. I had been trying to compensate for the worn agitator ridges by over-tightening the bolt, creating some contact at the top of the shaft. This would work for a little while, then the agitator would start slipping, and the slipping agitator was acting just like a wrench loosening the bolt (until my stupid rope trick, that is.)

So I ordered a new agitator (only the lower agitator was bad, but the price of an entire agitator isn't a lot more than just the lower part and I was reading that the upper agitator parts will wear over time) and another new bolt (because my repeated attempts to over-tighten the first one I ordered had split the rubber gasket apart and worn the bolt head).

The new agitator fit snugly on the splines of the shaft so I sensed no need to use excessive force on the bolt. Just an easy one-handed snug tightening with the socket wrench, using the other hand to hold the lower agitator. The washer is now working again.
  • David from EAST AMHERST, NY
  • Difficulty Level:
    Easy
  • Total Repair Time:
    15 - 30 mins
  • Tools:
    Socket set
17 of 17 people found this instruction helpful.
Was this instruction helpful to you?
Thank you for voting!
Fixes Symptom 1% of time

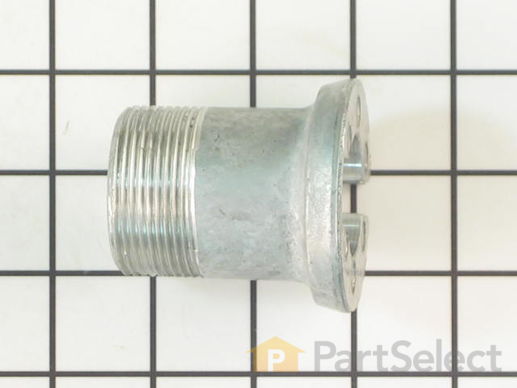
This part is for large capacity belt drive and direct drive appliances.

$ 18.95
  In Stock
PartSelect Number PS11741977
Manufacturer Part Number WP389140

Replacing your Kenmore Washer Washer Drive Block 2 5/16 High

Replacing your Washer Drive Block 2 5/16 High

Customer Repair Stories

Loud Banging Sound At The End Of Spin Cycle
First I removed the two screws on the back of the control console( at the bottom, phillips head). Flip that up and out of the way. Then you could remove the 2 big clips that hold the back of the washer to the cabinet. Disconnect the lid switch and flip the cabinet forward and out of the way. Remember when putting the cabinet back on, line up the slots on the bottom of the cabinet with the toungues on the base. Next pull off the fabric softner dispenser, then reach down in there and pull out the bottom seal of that to expose the bolt that hold the agitator on. Remove that bolt and pull off the agitator. Remove that little clip and the plastic piece above the spanner nut. I didn't have a spanner wrench so I hade to use a small extension from my socket set and a hammer to loosen it. Once that is removed then you could remove the ring around the top of the tub, and pull the tub off. Now you could see the block and probably all the metal shavings it's been creating. If the two ears that stick up and fit in to the block are worn, you should replace that too. I think you hve to replace that from the bottom. Now just put it all back together. Print out the exploded diagram from the web sit so you have it right there. Good luck!
  • John from Hawley, PA
  • Difficulty Level:
    Easy
  • Total Repair Time:
    30 - 60 mins
  • Tools:
    Pliers, Screw drivers, Socket set
133 of 541 people found this instruction helpful.
Was this instruction helpful to you?
Thank you for voting!
My washer was making a loud noise and moving about a foot.
Removerd the drum. Replaced the driver block. Removed and replaced the suspension rods. Reassembled the drum and agitator.
  • George from Leesburg, FL
  • Difficulty Level:
    Very Easy
  • Total Repair Time:
    1- 2 hours
  • Tools:
    Pliers, Screw drivers, Socket set, Wrench (Adjustable)
2 of 3 people found this instruction helpful.
Was this instruction helpful to you?
Thank you for voting!