


62925 Toro Leaf Blower / Vacuum - Overview
Models starting with 62925
Click on the best match to narrow your results.
- 62925 (290000001-290999999 - 2009) Toro Leaf Blower / Vacuum (Blower-Vacuum)
- 62925 (280000001-280999999 - 2008) Toro Leaf Blower / Vacuum (Blower-Vacuum)
- 62925 (270000001-270999999 - 2007) Toro Leaf Blower / Vacuum (Blower-Vacuum)
- 62925 (260000001-260999999 - 2006) Toro Leaf Blower / Vacuum (Blower-Vacuum)
- 62925 (250000001-250999999 - 2005) Toro Leaf Blower / Vacuum (Blower-Vacuum)
- 62925 (240000001-240999999 - 2004) Toro Leaf Blower / Vacuum (Blower-Vacuum)
- 62925 (230000001-230999999 - 2003) Toro Leaf Blower / Vacuum (Blower-Vacuum)
- 62925 (220000001-220999999 - 2002) Toro Leaf Blower / Vacuum (Blower-Vacuum)
- 62925 (210000001-210999999 - 2001) Toro Leaf Blower / Vacuum (Blower-Vacuum)
- 62925 (310000001-310999999) Toro Leaf Blower / Vacuum (Blower-Vacuum)
Keep searches simple, eg. "belt" or "pump".

Snow Blower Screw
PartSelect #: PS9942372
Manufacturer #: 321-10
This is a replacement screw, also known as a shear pin that is used in several pieces of outdoor power equipment. It is made of metal and is approximately 2 inches in length. It is a hex head screw an...
$3.99
In Stock

Snow Blower Lock Nut
PartSelect #: PS8953555
Manufacturer #: 3296-42
This Ni Nut-Lock, or Nylock Nut, is a Silver 1/4 x 20 metal nut. Sold individually, it can be adjusted using a wrench or socket and torque wrench to the manufacturer specfications, and is used to secu...
$5.95
In Stock

Engine Ratchet Pawl
PartSelect #: PS8942598
Manufacturer #: 281505S
The manufacturer-approved Ratchet Pawl (Starter Pawl) comes in a set of two (2). This part attaches inside the recoil assembly, and is used to engage the flywheel. if broken due to wear/damage it will...
$3.99
In Stock

Engine Float Valve Kit
PartSelect #: PS8963322
Manufacturer #: 398188
This needle and seat kit, also known as a float valve, is found in many types of liquid-fueled lawn equipment, such as carburetors. The valve regulates the flow of fuel into the float bowl. The needle...
$6.97
In Stock


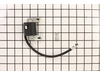
Engine Fuel Tank
PartSelect #: PS9141053
Manufacturer #: 799863
This genuine fuel tank assembly is sourced directly from the original equipment manufacturer and is specifically designed for use with Briggs & Stratton engines on lawn and garden equipment. It serves...
$98.07
In Stock

Engine Oil Seal
PartSelect #: PS8948679
Manufacturer #: 299819S
This OEM Oil Seal is an individually sold rubber part which is attached around the axis shaft on the crankcase housing to provide a proper seal. A broken seal will lead to a leak, and the part should ...
$5.99
In Stock

Exact Part matches for your search term
[Viewing 3 of 3]
Spiral Sawtooth Cutter, 3"4-Blade Cutter, 1 3/4
This part number matches the current model number 62925
PartSelect #: PS11868781
Manufacturer #: 62925
$88.41
Special Order

SVC SPILL PROTECTOR LEFT
This part number matches the current model number 62925
PartSelect #: PS17506709
Manufacturer #: DE81-06506A
No Longer Available
Bushing
This part number matches the current model number 62925
PartSelect #: PS18310878
Manufacturer #: 62925
No Longer Available
Common Symptoms of models starting with 62925
[Viewing 1 of 1]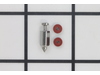
Keep searches simple. Use keywords, e.g. "leaking", "pump", "broken" or "fit".
Mistreated Briggs & Stratton 206 CC Engine on MTD Chipper
Removed tank and drained old gas.
Removed and disassembled carb. Needed new gaskets and seals, and had to clean corn syrup glaze (separated ethanol) from bowl and everywhere else with carb cleaner.
Throttle linkage was de-plating/rusty. Steel wool and WD40 got it moving again.
Cleaned spark plug electrode.
Reassemble ... Read more d, poured Sea Foam in the bottom of the tank and gave it a few pulls.
Let Sea Foam sit for a while, then filled the tank with Premium.
Blew white smoke for a minute then ran like new. Shredded for a while, then changed the oil.
Read less
Parts Used:

-
Dana from HAMMOND, IN
-
Difficulty Level:A Bit Difficult
-
Total Repair Time:1- 2 hours
-
Tools:Nutdriver, Pliers, Screw drivers, Socket set
7 of 11 people
found this instruction helpful.
Was this instruction helpful to you?
Thank you for voting!
Parts fit like a glove
Removed pull start assembly down to the crank. Installed motor housing, motor fan & rewind assembly. All went real good.
Parts Used:


-
Wayne from OOLTEWAH, TN
-
Difficulty Level:Really Easy
-
Total Repair Time:30 - 60 mins
-
Tools:Nutdriver, Socket set
2 of 3 people
found this instruction helpful.
Was this instruction helpful to you?
Thank you for voting!
Needed to replace muffler
Using a socket wrench with extension and a T20 star socket (you can use the appropriate hex head socket also) i removed to two bolts holding the muffler on. They are right on top of the engine and very accessible. Your model may have a heat shield that needs to be removed. Once the muffler is off remove the old gasket. It may be stuck to
... Read more
the muffler or exhaust opening on the engine. It should just pry of with a little effort. I did make sure there were no gasket pieces left behind. I placed the bolts through the flange of the new muffler and then slid the new gasket over the bolts. You can use a exhaust gasket sealant just hold it place while you place the flange in place and not have to worry about gasket dropping off. I just held it until I got the flange in place. I started the bolts by hand using the socket and extension. I alternated from each bolt until I had tighted it down. You can look up torque specs. I just used my grunt meter. It is good as new. Parts were OEM replacement. Not knock off almost right parts. I got very lucky when I found this company and will use them again.
Read less
Parts Used:


-
Philip from LINEVILLE, AL
-
Difficulty Level:Really Easy
-
Total Repair Time:15 - 30 mins
-
Tools:Socket set
1 person
found this instruction helpful.
Was this instruction helpful to you?
Thank you for voting!