


66222 LG Microwave - Overview
Sections of the 66222
[Viewing 1 of 1]
Keep searches simple, eg. "belt" or "pump".

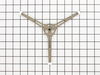
Microwave Turntable Assembly
PartSelect #: PS12115010
Manufacturer #: AJS73149201
The turntable support assembly is also known as a roller guide, fits under the cooking tray and is used to support the tray and to engage the rotating coupler. If your cooking tray will not turn, or r...
$30.40
In Stock

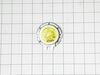
Motor Synchronous
PartSelect #: PS3529208
Manufacturer #: 6549W1S011B
This AC synchronous motor is a genuine OEM replacement part specially made for microwaves. It operates on an alternating current, and it is responsible for rotating the turntable to ensure even heatin...
$37.89
In Stock

Microwave Glass Cooking Tray
PartSelect #: PS3518835
Manufacturer #: 3390W1A044B
This tray rotates in your microwave ensuring more even temperatures.
$34.58
In Stock

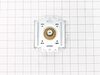
Magnetron
PartSelect #: PS3529034
Manufacturer #: 6324W1A001L
This magnetron in your microwave creates the radiation needed for cooking or warming your food. It is located inside the main cavity, typically near the transformer or waveguide. When the magnetron be...
$129.10
In Stock

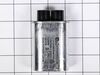
Capacitor
PartSelect #: PS3517241
Manufacturer #: 0CZZW1H004B
Discover the essential part for your LG microwave oven: the High Voltage Capacitor. This genuine OEM item from LG is specifically designed for certain models of microwave ovens. The high-quality capac...
$40.86
In Stock

Exact Part matches for your search term
[Viewing 4 of 4]
THERMOSTAT GASKET
This part number matches the current model number 66222
PartSelect #: PS659542
Manufacturer #: 66222
No Longer Available
Cover
This part number matches the current model number 66222
PartSelect #: PS11869220
Manufacturer #: 66222
$62.07
Special Order
TRIM TOP REAR FRAME PLAT 3B GEN 17
This part number matches the current model number 66222
PartSelect #: PS16392411
Manufacturer #: 66222
$42.72
Special Order
SVC-HOOD DUCT;66222,PMOR30B
This part number matches the current model number 66222
PartSelect #: PS16632727
Manufacturer #: DE81-10232A
$118.75
Special Order
Questions And Answers for 66222
We're sorry, but our Q&A experts are temporarily unavailable.
Please check back later if you still haven't found the answer you need.
Common Symptoms of the 66222
[Viewing 3 of 3]Tray won’t turn
Fixed by
these parts
these parts
Show All
No heat
Fixed by
these parts
these parts
Show All
Noisy
Fixed by
these parts
these parts
Show All
Keep searches simple. Use keywords, e.g. "leaking", "pump", "broken" or "fit".
Motor Burned Out On Turntable
My 8 year old daughter cleaned the inside of the microwave with enough water to rival a tsunami. Resulted in a clean microwave with a fried out motor that no longer revolved. Part came quickly. Took cover and bottom off to get to the part. One screw held it on and a plug. Removed those, put on new part and she was good to go. No tri
... Read more
p to home depot today.
Read less
Parts Used:
-
Steven from Oak Forest, IL
-
Difficulty Level:Really Easy
-
Total Repair Time:15 - 30 mins
-
Tools:Screw drivers
37 of 48 people
found this instruction helpful.
Was this instruction helpful to you?
Thank you for voting!
Magnitron failed
Over the stove microwave installed in top cabinet row.
1. Unplug device.
2. Two people to remove from wall/cabinet (remove two, large, top mounting screws and rotate entire microwave down and off the wall mount). Should be some wood spacers between top of device and bottom of cabinet.
3. Remove screws from sheet metal cover ... Read more .
4. Remove one screw holding blowers in place and rotate out of the way, in order to gain access to 2 of 5 screws that hold the magnetron in place.
5. Unplug magnetron and remove the 5 screws.
6. Drop in new magnetron and re-assemble microwave in reverse order (steps 5-3).
7. Two people restore micro to wall/cabinet. Replace wood spacers, re-install two, large mounting screws (finger-tight). Test device. Secure the two large screws.
Read less
Parts Used:
-
Joseph from WILTON, NH
-
Difficulty Level:A Bit Difficult
-
Total Repair Time:1- 2 hours
-
Tools:Screw drivers
8 of 13 people
found this instruction helpful.
Was this instruction helpful to you?
Thank you for voting!
Arcing had caused burned turntable and melted connection to sec. motor.
Note: also had to replace turntable. Removed top cover using secure driver set. Placed microwave on it's front, using a soft towel. Removed edge screws from bottom plate (leaving 4 screws in center attached to heavy transformer). Separated bottom plate from body of microwave (leaving transformer wires still attached) exposing Synchrono
... Read more
us motor. Removed two screws holding motor and electrical plug. Swapped new motor in its place. Re-attached bottom plate with its screws. Placed microwave onto it normal position. Re-attached top cover with its secure screws. Installed new turntable inside.
Read less
Parts Used:
-
John from MOUNTAIN VIEW, CA
-
Difficulty Level:Easy
-
Total Repair Time:15 - 30 mins
-
Tools:Screw drivers
5 of 6 people
found this instruction helpful.
Was this instruction helpful to you?
Thank you for voting!