Your coupon for will be reflected when you check out!
✖
Your coupon for
✖
Hello!
You're visiting the PartSelect site in U.S.
Would you like to shop on the Canadian site?
Stay on this site
Go to Canadian site
✖
Model Number Locations
1Select Category Type
Select Category Type
2Select Product Type
Select Product Type
3Select {MODEL} Type
Select {MODEL} Type
Sample Model Number Tags
Model numbers can be made up of numbers (1005400, for example) or a combination of letters and numbers (LAT1000AAE). The model number will most likely appear on either a paper sticker or a metal plate. Your appliance's model number tag may look similar to the sample model number tags shown here (model number highlighted in yellow):
Model has been saved to My Models. If you're not signed in, your lists are available on this device and will expire within 30 days.
Model has been saved to My Models.
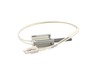
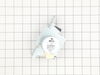
This is a flat style oven igniter used to light the oven burner in a gas range. When the element in this igniter glows white hot, the gas is released from the safety valves, which lights the oven burn...
51% OFF
$19.99
$40.69
In Stock
Order now and your part arrives in 2-3 business days!
This OEM 40 watt appliance light bulb is used for some ranges, refrigerators, freezers, and microwaves. Simply locate the existing bulb, unscrew it from its socket, and replace with new light bulb. If...
$23.95
In Stock
Order now and your part arrives in 2-3 business days!
This handle mounting screw works with your oven or range, and bolts the door handle to the door. It is approximately 2 inches in length and is an OEM part sourced directly from the manufacturer. If yo...
$22.95
In Stock
Order now and your part arrives in 2-3 business days!
The temperature sensor detects the temperature within the oven cavity. If there is a limited amount of heat, it is not heating evenly, or the oven will not start, this might indicate that your tempera...
$56.38
In Stock
Order now and your part arrives in 2-3 business days!
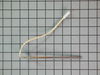
The Frigidaire light bulb lens covers the interior light bulb in an oven. No tools are necessary to replace this item. After unplugging the appliance, slide off the wire bracket to remove the existing...
$22.95
In Stock
Order now and your part arrives in 2-3 business days!
This rear drawer glide, also known as a storage drawer glide, is used in ranges. This helps hold the front side of the storage drawer and allows the drawer to easily slide in and out of the range. If ...
$15.95
In Stock
Order now and your part arrives in 2-3 business days!
Introducing the Frigidaire Range Front Drawer Glide, an authentic OEM part that enhances the function of your stove, oven, or range! Compatible with certain models of Frigidaire, Electrolux, White Wes...
$19.95
In Stock
Order now and your part arrives in 2-3 business days!
This is white touch up paint for refrigerators, microwaves, ranges, dryers, and freezers. It is used to cover, or touch up, nicks and scratches on the appliance from wear and tear. It is an 18ml bottl...
$22.95
In Stock
Order now and your part arrives in 2-3 business days!
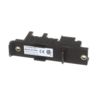
This igniter and orifice assembly is a legitimate OEM replacement part for your gas stove, and includes the igniter, orifice assembly, and gas tube. This part may need replacing if the igniter fails o...
$84.23
In Stock
Order now and your part arrives in 2-3 business days!
After reading up on the problem of the gas oven not lighting I decided I needed to install a new igniter. I had read where some people just pulled a panel off the back and installed a new one.. yeah, no such luck with this model so I had to crawl into the broiler drawer space [which I had to clean out first]. Note, if you wear trifocal g
... Read morelasses you might as well close your eyes and replace it by feel because there is no way to tilt your head back enough to see what you are doing and still get both arms and your chest in a broiler. Also be sure to remove all cats and dogs from the area before starting. They seem to think they can help or it's a game of hide and seek and they want to hide with you.. they were no help at all. Other than that, it was quite easy.
1. Turned off circuit breaker to stove 2. Removed the two screws holding down the floor of the oven (screws are at back.), and then lifted it out. 3. Removed the nut holding down the flame guard, and lifted it off. 4. Opened the bottom drawer. 5. Removed the protective cover in the back left of the oven at the bottom,
... Read more first removing the one screw at the bottom that holds it. This reveals a white plug, presumably going to a fuse. 6. Disconnected the white plastic connector, lifting its front tab to release it. 7. The igniter wires go to two lugs that attach at the floor of the oven at the back (one goes via the now free white connector). Slide back the plastic lug covers and use pliers to pull off the lugs. Note that the wider one (on the right) goes to the top of the igniter, while the narrower one (on the left) goes to the bottom of the igniter via the white plastic connector. 8. Removed the two bolts holding the igniter. 9. At this point, the igniter comes out. Nice, since it means you can work on the wires in comfort. 10. Slide the flame retardant sleeves away from the igniter. I found in-line connections about 1.5 inches from the igniter, and cut the wires next to these (on the side away from the igniter, of course.), and stripped the final 3/8 inch. Shorten the wires on the replacement igniter so that they are 3 or 4 inches long, slide on the flame retardant sleeves, then strip the final 3/8ths inch. Use the provided caps to connect the wires. Bottom wire goes to the plastic connector, top wire goes to the wide lug. 11. Install the new igniter by connecting the lugs, sliding on their protective plastic sleeves, reconnecting the white plastic connector, screwing in the two igniter mounting screws, and reinstalling the corner cover. Put back the flame shield and floor of the oven. Turn on the circuit breaker, and it works!
It was the week before Thanksgiving and we didn't know what to do without an oven. I did some research on Google and of all the websites out there, I found a decent price here at Parts Select and ordered it on Friday. I was shocked when FEDEX pulled up to the door on Saturday afternoon. I went online to youtube and found a step by step
... Read more video specifically for this part. It's posted by the Repair Clinic. http://www.youtube.com/watch?v=cLxKoF16gac. I was able to fix the part and probably saved at least $150.00 for a service call and repair time. The part cost about $90 and I was done in less than 15 minutes. We just got this stove about 2 years ago and I'm thinking maybe we could have saved my old stove since it had the same problem. Great job Parts Select - I got just what I needed and saved a ton of money in the process. Thanks also for their great informative video online. We had a great Thanksgiving and were very thankful for all our hot food fresh from the oven.