Your coupon for will be reflected when you check out!
✖
Your coupon for
✖
Hello!
You're visiting the PartSelect site in U.S.
Would you like to shop on the Canadian site?
Stay on this site
Go to Canadian site
✖
Model Number Locations
1Select Category Type
Select Category Type
2Select Product Type
Select Product Type
3Select {MODEL} Type
Select {MODEL} Type
Sample Model Number Tags
Model numbers can be made up of numbers (1005400, for example) or a combination of letters and numbers (LAT1000AAE). The model number will most likely appear on either a paper sticker or a metal plate. Your appliance's model number tag may look similar to the sample model number tags shown here (model number highlighted in yellow):
Model has been saved to My Models. If you're not signed in, your lists are available on this device and will expire within 30 days.
Model has been saved to My Models.
This light bulb is a 40 watt, 130-volt clear appliance light bulb that is manufactured to fit microwaves with small-base light bulb sockets. The light bulb illuminates the inside of the microwave whil...
$20.95
In Stock
Order within the next 7 hrs and your part ships today!
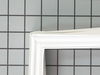
Discover the pure genuineness and outstanding quality of the Frigidaire White Door Gasket. This essential OEM part works flawlessly with certain models of Frigidaire appliances, ensuring an excellent ...
$123.14
In Stock
Order within the next 7 hrs and your part ships today!
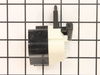
This OEM drain plug in your freezer is a small white circular part located at the bottom. Its purpose is to seal the front hole of the cabinet, which is used to drain water during defrosting. If you n...
At first I tried to use pliers to unscrew the base,very uncomfortable working position,upside down and backwards(the microwave is installed over the range top)very limited space for your body and arms to manuver and you really cant see the base,all of this took place after the breaker was turned off ofcourse,finally figured out that you c
... Read morean drop the entire bottom housing of the microwave by unscrewing 6 screws and the light sockets are easily accessable once you lower it,take out 1 retaining screw ,remove the entire socket and unscrewed the broken base and replaced the bulbs,I said bulbs,there is no sense in having to replace another bulb in who knows how long since only one had burned out but they were both the same age
UNPLUG REFRIGERATOR. Carefully remove relay from the side of the compressor. You shouldn't need a tool to do this, if it is hard you can gently pry the edge with a flat head screw driver just to loosen. Unplug white and red wires from relay, noting that the white wire goes in the hole with a #2 stamped beside it. Shake old relay, if it r
... Read moreattles like a baby rattler then it's most likely the problem. Replace wires into the new relay and plug back into the compressor.
I removed all of the expandable pins that held the gasket and the inner door panel, and removed the old gasket from the inner door panel. The new gasket was then placed around the edges of the inner panel. While holding the gasket and panel in the proper location, the expandable pins were inserted into the mounting holes, finishing the
... Read moreinstallation.