Back
Back
Keep typing for more specific results...
Models > 88370 > Symptoms > Element will not heat

Parts That Fix Jenn-Air Range 88370 Element will not heat

Element will not heat is a commonly reported symptom for the 88370 Jenn-Air Range, and we have put together a full guide on how to fix this. This advice is based on feedback from people who own this exact appliance. We have listed the most common parts for your 88370 Jenn-Air Range that will fix Element will not heat. We have included repair instructions, and helpful step-by-step video tutorials. If you are experiencing this issue, not to worry, DIYers just like you have fixed this, and shared their experience to help you!
Fixes Symptom 58% of time

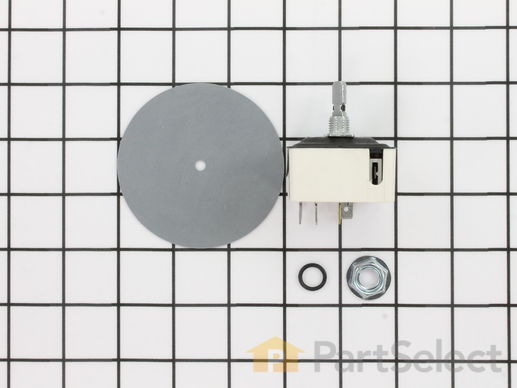
This is a push-and-turn switch. This kit includes all necessary hardware to install the part. Switch comes with a D-shaped shaft.

$ 80.23
  In Stock
PartSelect Number PS2076107
Manufacturer Part Number 700855K

Customer Repair Stories

Old switch had burned out and needed to be replaced
Turned off electricity at the circuit box. Removed four screws from panel cover that housed the switch. disconected the wires from the old switch and replaced the old switch with the new one reconected the wires put the panel cover back on. voila done.
  • Jeannine from Twentynine Palms, CA
  • Difficulty Level:
    Easy
  • Total Repair Time:
    Less than 15 mins
  • Tools:
    Screw drivers
9 of 9 people found this instruction helpful.
Was this instruction helpful to you?
Thank you for voting!
Burner had no temperature control other that full on.
Locate and open appropriate breaker to kill power to the range. (very important if you intend to see tomorrow).

Pull off the control knob.

Remove 2 screws that hold in control pannel.

Lift out the control pannel to the extent that the wires will let you. (2-3 inches)

Remove the nut that holds the switch/controller in the pannel.

Remove the wires one at a time and reconnect them to the new switch. Make sure to connect them the same way on the new switch.

Re-install the switch in the pannel.

Re-install the pannel in the stove.

Close breaker and test burner contol.
  • Eric from North Andover, MA
  • Difficulty Level:
    Easy
  • Total Repair Time:
    15 - 30 mins
  • Tools:
    Pliers, Screw drivers
62 of 71 people found this instruction helpful.
Was this instruction helpful to you?
Thank you for voting!
Fixes Symptom 14% of time

This is a five prong element carrying 240 volts

$ 162.19
  In Stock
PartSelect Number PS11742861
Manufacturer Part Number WP5700M426-60

Customer Repair Stories

Element failed
Simple plug in.
  • Andrew from Salem, IN
  • Difficulty Level:
    Really Easy
  • Total Repair Time:
    Less than 15 mins
4 of 7 people found this instruction helpful.
Was this instruction helpful to you?
Thank you for voting!
the element plugged in, stove was woking right away.
The element plugged in to the cook- top.The cook -top was working moments after i unpacked the element. thank you.

Jim B.
  • James from Frederick, MD
  • Difficulty Level:
    Really Easy
  • Total Repair Time:
    Less than 15 mins
5 of 5 people found this instruction helpful.
Was this instruction helpful to you?
Thank you for voting!
Fixes Symptom 9% of time

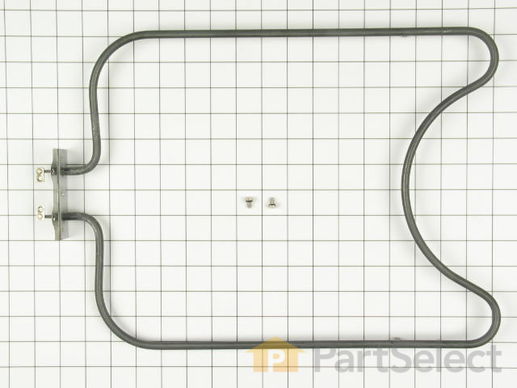
This bake element is eighteen inches long. Its terminal depth is less than an inch long, and it comes with two screws.

$ 77.91
  In Stock
PartSelect Number PS11743929
Manufacturer Part Number WP715269

Customer Repair Stories

Oven would not heat at bottom
First I removed the two screws that hold the element in place. I then pulled the element out about 3 inches and disconnected the two wires. I did a continuity test and determined the old element was bad - ordered the new one and put back the screws. All done!
  • Wayne from Conifer, CO
  • Difficulty Level:
    Really Easy
  • Total Repair Time:
    Less than 15 mins
  • Tools:
    Pliers, Screw drivers
3 of 3 people found this instruction helpful.
Was this instruction helpful to you?
Thank you for voting!
bake element not working
Our oven is at least 30 years old and the parts are not even available through the manufacture anymore. A new stove would cost well over $1000.00. Jen airr is the only down draft stove available. So the repair was much more affordable that the alturnative. So thank you to part select for providing this service. The repair was simple. This is coming from a 36 year old female who has been around electrical work, but never done any myself. My husband was out of town and I felt I could do the job. I first made sure I had another adult present. I turned off the power to the oven. I then removed the visible screws to the element plate (2 on top and 1 in lower middle). I then pulled the element out enough to get behind the plate and feel the screws that were connecting the wires to the element/ground. Again 3 total. The oven space is very small and difficult to work in. I had to do a lot by feel. Once the old element was free I just exchanged it for the new one and reversed the process, making sure all the wires were tight. I then turned the power back on. Turned the oven on, it smoked lightly for a moment and turned red hot. Over all it was extreemly simple.
  • Shan'te from Saint Joseph, MI
  • Difficulty Level:
    Easy
  • Total Repair Time:
    15 - 30 mins
  • Tools:
    Screw drivers
23 of 27 people found this instruction helpful.
Was this instruction helpful to you?
Thank you for voting!
Fixes Symptom 8% of time

$ 138.87
  In Stock
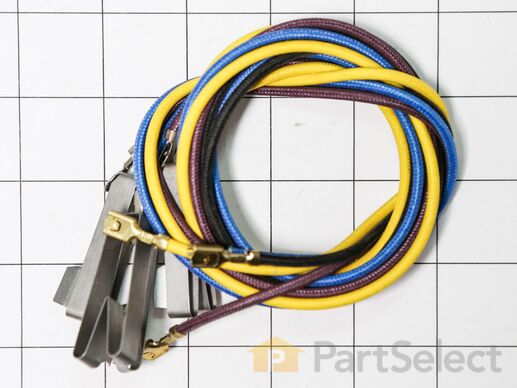
PartSelect Number PS2078968
Manufacturer Part Number 712022K

Customer Repair Stories

right front burner did not work
I first ordered the wrong part (ceramic plug) which was clearly my bad but was sent a wrong part. I was impressed how quickly this was corrected (return postage was sent) and I ordered again. This order was quickly filled and I figured out my error. After ordering and receiving the right part (4 wire contact) I had a heck of the time getting the range out and taken apart. The contact was clearly in need of replacement but this didn't solve the problem. Now that I was getting smarted I ordered a new infinite switch which solved the problem. Here's a tip for others, you can replace an infinite control on a S160 without dismantlement the range. Remove the four screws under the control panel (right above the oven) and pivot the whole thing out from the bottom.
  • Chris from Salem, OR
  • Difficulty Level:
    A Bit Difficult
  • Total Repair Time:
    More than 2 hours
  • Tools:
    Pliers, Screw drivers
0 of 1 people found this instruction helpful.
Was this instruction helpful to you?
Thank you for voting!
The contacts on my convertible range top were corroded
I ordered the kit that contained all 4 wires and contacts. The replacement was fairly easy. The only drawback was the tight quarters in running the wires. The job was quick and a success. Now I can use my right side of my stovetop again!
  • Kurt from Salem, NH
  • Difficulty Level:
    Easy
  • Total Repair Time:
    30 - 60 mins
  • Tools:
    Pliers, Screw drivers
11 of 33 people found this instruction helpful.
Was this instruction helpful to you?
Thank you for voting!
Fixes Symptom 5% of time

This is a multi-use and multi-appliance screw. It can be used on a microwave, refrigerator, range/oven, air conditioner, dehumidifier, washer, or dryer. The measurements of this screw are 8 x 1/2 inch. It has 6 threads. Refer to the manual provided by the manufacturer for further information on repair and accurate guidance. Remember to wear work gloves as a safety precaution.

$ 20.95
  In Stock
PartSelect Number PS12349731
Manufacturer Part Number W11233072
Fixes Symptom 4% of time

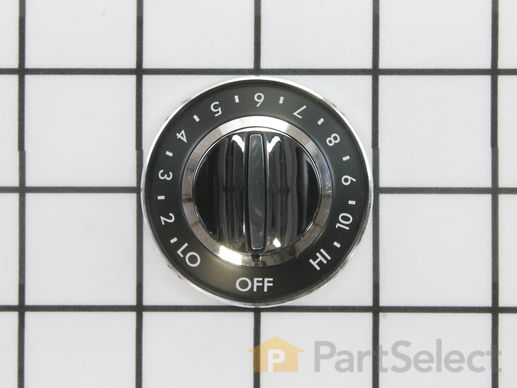
This surface burner knob is two inches in diameter. It is a black knob with a chrome trim, and white numbering denoting the temperature level of the surface burner. Sold individually. This knob accepts a D-shaped shaft.

$ 22.95
  In Stock
PartSelect Number PS11757562
Manufacturer Part Number WPY700854

Customer Repair Stories

knobs were old could not read numbers
knobs fit perfectly
  • catherine from holland, MA
  • Difficulty Level:
    Really Easy
  • Total Repair Time:
    Less than 15 mins
8 of 10 people found this instruction helpful.
Was this instruction helpful to you?
Thank you for voting!
Lettering on old stove knobs was no longer visible and knobs were loose.
Took the old knobs off and replaced them with the new!
  • Chris from Poway, CA
  • Difficulty Level:
    Really Easy
  • Total Repair Time:
    Less than 15 mins
26 of 31 people found this instruction helpful.
Was this instruction helpful to you?
Thank you for voting!
Fixes Symptom 3% of time

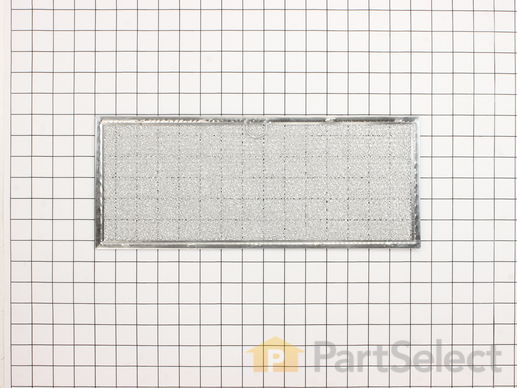
This filter is made of metal and is intended for use with ranges and cooktops. Grease filters are an important but often neglected part of ranges. If the filter is full, your extractor fan will become noisier, and cause a bad odor to come from your range. Neglecting the grease filter can also pose a fire hazard in your kitchen. Regular maintenance and cleaning of the grease filter is important and will make the part work more efficiently and last longer. It takes about 30 seconds to replace your grease filter. While replacing the filter, take a minute to check for a grease buildup underneath, and clean out any drip-through grease. As per the manufacturer, if this filter is 1/2" less wide than the original, it will still function the same.

$ 24.13
  In Stock
PartSelect Number PS11743870
Manufacturer Part Number WP71002111

Replacing your Jenn-Air Range Grease Filter

Replacing your Grease Filter

Customer Repair Stories

Needed to replace filter
Just placed it at the filter location. Liked the ring feature on the filter for ease of removal for cleaning. My previous ones didn't have such feature. Thank you for filling my order. I bought an extra filter for the future. I'm a big user of my Jenn-Air range. I may soon be needing to replace my griddle. Will be contacting your company then.
  • Marie from New Smyrna Bch, FL
  • Difficulty Level:
    Really Easy
  • Total Repair Time:
    Less than 15 mins
98 of 164 people found this instruction helpful.
Was this instruction helpful to you?
Thank you for voting!
Replace Grease Filter
Just a couple of minutes to left off the cover grid, left out the old filter and drop in the new one.
  • Gene from Washington C.H., OH
  • Difficulty Level:
    Really Easy
  • Total Repair Time:
    Less than 15 mins
527 of 543 people found this instruction helpful.
Was this instruction helpful to you?
Thank you for voting!