9027 - Overview
Models starting with 9027
Click on the best match to narrow your results.
- 9027 (STE XP 2004-07) Husqvarna Snow Blower (Snowblower)
- 9027 Makita Grinder (Grinder)
- 90272 LG Dryer (LG Dryer Model 90272 Parts)
- 9027L Makita Grinder (Grinder)
- 9027ST ( HU9027STB, 954223074 2004-03 ) Husqvarna Snow Blower (9027 St, Hu9027stb, 954223074, 2004-03)
- 9027ST ( HU9027STA 2002-09 ) Husqvarna Snow Blower (9027 St - Hu9027sta (2002-09))
- 9027ST ( HU9027STB 2004-03 ) Husqvarna Snow Blower (9027 St - Hu9027stb (2004-03))
- 9027ST ( 954223077-C 2004-07 ) Husqvarna Snow Blower (27 Inch Snow Blower)
- 9027ST ( 954223074-A 2002-09 ) Husqvarna Snow Blower (27 Inch Snow Blower)
- 9027ST (9027 ST HUA -954223074 -2002-09) Husqvarna Snow Blower (Snowblower)
- 9027STC Husqvarna Snow Blower (Husqvarna Snowblower Model 9027STC Parts)
- 9027STE ( HU9027STC 2004-07 ) Husqvarna Snow Blower (9027 Ste - Hu9027stc (2004-07))
- 9027STE ( 96091001805 2008-11 ) Husqvarna Snow Blower (Snow Blower)
- 9027STE ( 96191000300,961910003 2005-10 ) Husqvarna Snow Blower (Snow Blower)
- 9027STE ( 96191001800 2007-07 ) Husqvarna Snow Blower (Snow Blower)
- 9027STE ( 96191001801,961910018 2007-10 ) Husqvarna Snow Blower (Snow Blower)
- 9027STE ( 96191001802,961910018 2007-10 ) Husqvarna Snow Blower (Snow Blower)
- 9027STE ( 96191001803 2008-02 ) Husqvarna Snow Blower (Snow Blower)
- 9027STE ( 96191001804 2008-08 ) Husqvarna Snow Blower (Snow Blower)
- 9027STE ( 96191001805 2009-01 ) Husqvarna Snow Blower (Snow Blower)
- 9027STE ( EU9027STEA,954170236 2004-09 ) Husqvarna Snow Blower (Snow Blower)
- 9027STE ( HU9027STC,954223077 2004-07 ) Husqvarna Snow Blower (Xp Snow Blower)
- 9027STE ( 961910003-02 2007-01 ) Husqvarna Snow Blower (27 Inch Snow Blower)
- 9027STE ( 961910003-04 2007-01 ) Husqvarna Snow Blower (27 Inch Snow Blower)
- 9027STE ( 96191001802 2007-10 ) Husqvarna Snow Blower (9027 Ste - 96191001802 (2007-10))
- 9027STE ( 961910003-01 2012-11 ) Husqvarna Snow Blower (27 Inch Snow Blower)
- 9027STE ( 96191001801 2007-10 ) Husqvarna Snow Blower (9027 Ste - 96191001801 (2007-10))
- 9027STE ( 96191000300 2005-10 ) Husqvarna Snow Blower (9027 Ste - 96191000300 (2005-10))
- 9027STE ( EU9027STEA 2004-09 ) Husqvarna Snow Blower (9027 Ste - Eu9027stea (2004-09))
- 9027STEXP ( 954223077-C 2004-07 ) Husqvarna Snow Blower (27 Inch Snow Blower)
- 9027STEXP Husqvarna Snow Blower (Husqvarna Snowblower Model 9027STEXP Parts)
Keep searches simple, eg. "belt" or "pump".

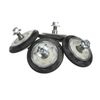
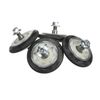
Roller Assembly (Pack of 4)
PartSelect #: PS17269866
Manufacturer #: 4581EL2002L
This part is sold individually. The drum support roller is found in your dryer. It is used to hold the drum in place in the cabinet while letting the drum rotate on the support rollers. It is recommen...
$144.18
In Stock

Hi-Limit Thermostat And Thermistor Kit
PartSelect #: PS16878105
Manufacturer #: AGM30045804
This dryer thermistor temperature sensor helps monitor and regulate the temperature inside a dryer. This part includes the wire harness. If your dryer overheats, does not produce enough heat, or takes...
$93.89
In Stock

Dryer Sensor
PartSelect #: PS3529161
Manufacturer #: 6500EL3001A
The sensor controls the temperature in your dryer and will turn off once your clothes have reached the desired dryness level. If you notice that your dryer is not giving off enough heat to dry the clo...
$20.67
In Stock

PARTS ASSEMBLY
PartSelect #: PS16661200
Manufacturer #: 383EEL3002R
This genuine OEM conversion kit allows your dryer to be converted from using natural gas to liquid propane. It caters to homes that rely on propane for their energy needs. This kit comes with an orifi...
$18.88
In Stock
Exact Part matches for your search term
[Viewing 3 of 3]
Screw
This part number matches the current model number 9027
PartSelect #: PS12282279
Manufacturer #: 9027
No Longer Available

Bench bracket
This part number matches the current model number 9027
PartSelect #: PS12495603
Manufacturer #: 9027
No Longer Available

Compressor Id:
This part number matches the current model number 9027
PartSelect #: PS18320072
Manufacturer #: 9027
No Longer Available
Common Symptoms of models starting with 9027
[Viewing 7 of 7]Noisy
Fixed by
these parts
these parts


Show All
Not Heating
Fixed by
these parts
these parts


Show All
Door won’t close
Fixed by
these parts
these parts


Show All
Drum Not Spinning
Fixed by
these parts
these parts

Show All
Marks left on clothes
Fixed by
these parts
these parts

Show All
Won’t Start
Fixed by
these parts
these parts

Show All
Door Sags
Fixed by
these parts
these parts

Show All
Keep searches simple. Use keywords, e.g. "leaking", "pump", "broken" or "fit".
Dryer making a thumping and squealing noise when running
Had to replace front drum support rollers. Removed screws underneath top in back that held bracket that keeps top in place. Slid top towards rear and lifted up. Removed 4 screws that hold plastic front panel in place (inside..2 on each corner) Unplugged front panel electric plugs to remove panel. Opened door..removed 2 screws at bottom of
... Read more
door opening. Removed screws on top of front panel. Unplugged door switch plug. Removed front panel. Removed right front roller with 9/16th wrench for nut. Adjustable for back of stud. Lifted up on drum to get roller out. Reversed to install. Left roller a bit harder to get to stud. Removed and installed same as right side. Did not attempt to replace rear rollers. Have them if needed but very much more involved to replace.
Read less
Parts Used:
-
Mark from WAVERLY, OH
-
Difficulty Level:Easy
-
Total Repair Time:30 - 60 mins
-
Tools:Screw drivers, Wrench (Adjustable), Wrench set
109 of 139 people
found this instruction helpful.
Was this instruction helpful to you?
Thank you for voting!
Screeching during operation
Found disassembly video and watched several times. Suspected that one of the drum wheels had seized up. Found extreme volume of lint and hair inside unit as well as a dryer sheet melted on top of heating unit. Front left drum wheel was worn down from lint and hair jamming its movement. Video made it easy, not a really complicated piec
... Read more
e of machinery. Replaced all 4 wheels due to normal wear on other three. Wanted to be sure drum evenly balanced on all 4. Parts came quickly and were easy to install. My sister and I did this together. Would not recommend doing it alone. Took time to vac and wipe down entire unit. Now it runs so quiet we have to look to see if it is operating. Got a brand new machine out of it, saved a couple of hundred dollars in repair bills, and found 11 cents inside the machine. For your own piece of mind, if you have had your dryer for several years, you need to open it up and clean it out. Its not hard... added note, we are both in our 60's... so if we can do it so can you.... Such a feeling of accomplishment, can't buy that in a store....
Read less
Parts Used:
-
CAROL from NAMPA, ID
-
Difficulty Level:Really Easy
-
Total Repair Time:More than 2 hours
-
Tools:Pliers, Screw drivers
59 of 86 people
found this instruction helpful.
Was this instruction helpful to you?
Thank you for voting!
Gas Dryer not getting hot
I noticed the flame would start, then quit after about 15 seconds. I checked the flame detector, and found the lenze cracked. I replaced it, and it's as good as gold.
It looked like a hard job to take the drum out to get at the part. But the top was off with 3 screws, the front about 6 I think. Then the front frame, only 4 s ... Read more crews. I think setting the belt tentioner was the hardest thing to do.
Done in 45 minutes, both the job, then the next load of laundry.
Read less
Parts Used:
-
Terry from Goose Creek, SC
-
Difficulty Level:Easy
-
Total Repair Time:30 - 60 mins
-
Tools:Screw drivers
26 of 43 people
found this instruction helpful.
Was this instruction helpful to you?
Thank you for voting!


