


ACF4255AB-PACF4255AB1 Amana Range - Overview
Sections of the ACF4255AB-PACF4255AB1
[Viewing 1 of 1]
Keep searches simple, eg. "belt" or "pump".
 – Part Number: 8009")
Refrigerator Light Bulb (40w)
PartSelect #: PS884734
Manufacturer #: 8009
This an authentic OEM 40-Watt replacement light bulb, used in a number of household appliances. It is specially designed to withstand extreme temperatures, which is why these replacement bulbs are mos...
$17.80
In Stock

Appliance Scraper
PartSelect #: PS408570
Manufacturer #: WA906B
Use this scraper for your ceramic/glass cooktop. It has a retractable blade and is an all-purpose tool for cooktops, mirrors, windows and tile. Use it to also remove paint, paper, dirt, stickers and more.
$8.89
In Stock

Radiant Surface Burner Element
PartSelect #: PS11764909
Manufacturer #: W10823699
This surface element is made for under glass set-ups and supplies the heat to a cooking area on top of the range. It has an outside diameter of approximately 7 inches (1500 watts), and is a genuine OE...
$93.60
In Stock

Refrigerator Single Hex Head Screw
PartSelect #: PS11742731
Manufacturer #: WP489069
Sold individually. The size of this screw is 1/4" hex head and 10-12 x 1/2".
$7.95
In Stock

Drawer Wheel
PartSelect #: PS2033102
Manufacturer #: 31733401
Also known as a roller.
No Longer Available

Range Main Power Terminal Block
PartSelect #: PS11745232
Manufacturer #: WP8203546
Sold individually.
$23.09
In Stock


Temperature Sensor
PartSelect #: PS11731155
Manufacturer #: W10850495
This temperature sensor detects the temperature within the oven cavity.
No Longer Available

Questions And Answers for ACF4255AB-PACF4255AB1
We're sorry, but our Q&A experts are temporarily unavailable.
Please check back later if you still haven't found the answer you need.
Common Symptoms of the ACF4255AB-PACF4255AB1
[Viewing 2 of 2]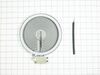

")


Keep searches simple. Use keywords, e.g. "leaking", "pump", "broken" or "fit".
F2 code on display and temperature climbing
1. Flip "OFF" circuit breaker.
2. Pull out range unit from wall.
3. Unplug range unit.
4. On the back of the range unit, remove 4 screws holding lower rear cover using a phillips head screwdriver.
5. Remove lower rear cover.
6. Unplug temperature sensor connector (1 wire connector located upper right section behin ... Read more d oven).
7. From inside oven (upper left, back corner), remove 2 screws holding temperature sensor unit using a Phillips head screwdriver.
8. Remove old temperature sensor unit.
9. Insert new temperature sensor unit (wire connector end first) through opening and secure reusing old screws.
10. Re-connect temperature sensor connector.
11. Re-attach and secure lower rear cover reusing 4 old screws.
12. Plug in range unit.
13. Move range unit back to desired location.
14. Flip "ON" circuit breaker.
Read less
Parts Used:
-
Joel from Andover, MN
-
Difficulty Level:Really Easy
-
Total Repair Time:Less than 15 mins
-
Tools:Screw drivers
9 of 14 people
found this instruction helpful.
Was this instruction helpful to you?
Thank you for voting!
worn hinges, door would not stay closed
I just got on youtube, typed in "replacing hinges on an amana oven door" and an awesome video popped up. The job was a cinch.
Parts Used:
-
Miron from Boise, ID
-
Difficulty Level:Easy
-
Total Repair Time:1- 2 hours
-
Tools:Screw drivers
8 of 12 people
found this instruction helpful.
Was this instruction helpful to you?
Thank you for voting!
Loose terminal caused block to overheat and break
Removed all terminals and block mounting screws. Repaired one burnt terminal and reassembled. Replacement part was an exact fit and reassembly whnet very well.
Parts Used:
-
Dana from Black Mountain, NC
-
Difficulty Level:Really Easy
-
Total Repair Time:Less than 15 mins
-
Tools:Nutdriver, Screw drivers
6 of 10 people
found this instruction helpful.
Was this instruction helpful to you?
Thank you for voting!