


ASD2575BRB03 Amana Refrigerator - Overview
Sections of the ASD2575BRB03
[Viewing 13 of 13]


Keep searches simple, eg. "belt" or "pump".

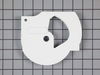
Refrigerator Door Bin
PartSelect #: PS11739091
Manufacturer #: WP2187172
The white refrigerator door bin is an essential component for maximizing the storage capacity of your appliance. Measuring approximately 16.25" wide, 3.25" high, and 6.25" deep, it securely holds jars...
$40.95
In Stock
 – Part Number: 8009")
Refrigerator Light Bulb (40w)
PartSelect #: PS884734
Manufacturer #: 8009
This an authentic OEM 40-Watt replacement light bulb, used in a number of household appliances. It is specially designed to withstand extreme temperatures, which is why these replacement bulbs are mos...
$17.80
In Stock

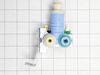
Refrigerator Everydrop Ice & Water Filter
PartSelect #: PS11701542
Manufacturer #: EDR1RXD1
The EDR1RXD1 water filter provides clean, fresh-tasting water by reducing contaminants such as lead, chlorine, and particulates. Designed for easy installation, this filter ensures your refrigerator w...
$75.79
In Stock

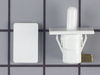
Refrigerator Lower Door Closing Cam
PartSelect #: PS11739042
Manufacturer #: WP2182179
The lower door closing cam is used in refrigerator doors, it can be located on the fresh food side or the freezer side. It helps hold the door open. This cam is made out of plastic, so it might crack ...
$9.95
In Stock

Refrigerator Meat/Vegetable Drawer w/Handle
PartSelect #: PS11739122
Manufacturer #: WP2188664
This OEM, clear convertible meat drawer can be used to store meats or vegetables and is designed for the lower portion of your refrigerator, generally. It has its own cold air duct to allow cold air f...
$56.95
In Stock

Refrigerator Slideout Shelf w/Glass
PartSelect #: PS11751713
Manufacturer #: WPW10276348
This is an OEM glass shelf for a variety of models of refrigerator. This shelf assembly features an approximately 18 inch long and 18-inch-wide white plastic frame and its inner glass pane, and is des...
$148.02
In Stock

Refrigerator Ice Bin Auger Drum
PartSelect #: PS372186
Manufacturer #: 4388736
This white ice bin auger drum comes with a washer.
$49.29
In Stock

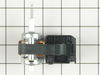
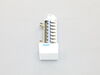
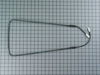
Refrigerator Bimetal Defrost Thermostat
PartSelect #: PS11750673
Manufacturer #: WPW10225581
If you have ice building up in your freezer, or if your freezer is getting too warm during the defrost cycle you may need to replace the bi-metal defrost thermostat. The function of the defrost bi-met...
$33.95
In Stock

Refrigerator Ice Bucket
PartSelect #: PS11757044
Manufacturer #: WPW10670845
Bucket only. All other parts sold separately. This part holds the ice once it's released from the icemaker.
$86.51
In Stock

Refrigerator Glass Shelf
PartSelect #: PS11731733
Manufacturer #: W10864399
This is the glass panel only. The frame is sold separately.
$119.92
In Stock
 – Part Number: WPW10178772")
Refrigerator Crisper Pan (Clear)
PartSelect #: PS11749661
Manufacturer #: WPW10178772
Sold individually. This crisper drawer is clear in colour. The crisper drawer stores fruits and vegetables at a humidity level that helps keep them fresh longer.
$101.81
On Order

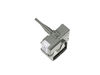
Refrigerator Screw
PartSelect #: PS11757021
Manufacturer #: WPW10661886
This mounting screw is a genuine OEM replacement part for the door handle in your refrigerator. If you are having trouble shutting the refrigerator door, or opening it, replacing this screw can help s...
$10.95
In Stock
Questions And Answers for ASD2575BRB03
We're sorry, but our Q&A experts are temporarily unavailable.
Please check back later if you still haven't found the answer you need.
Sort by:
- < Prev
- 1
- Next >
Search filter:
Clear Filter
Your search term must have 3 or more characters.
Keep searches simple. Use keywords, e.g. "leaking", "pump", "broken" or "fit".
Sorry, we couldn't find any existing answers that matched.Try using some different or simpler keywords, or submit your new question by using the "Ask a Question" button above!
Ernest
December 6, 2019
This is the second time that I've replaced the water filter and the retainer door at the bottom of the refrigerator keeps coming loose while trying to close this latch.Help
For model number ASD2575BRB03
Hi Ernest, not sure you should just have to line up the filter correctly and close the latch. I would contact the manufacturer for further help at 866-616-2664. Thank you for your question and good luck with your repair!
Was this helpful?
Thank you for voting!
Related Parts:
Refrigerator Everydrop Ice & Water Filter

$75.79
In Stock
David
January 7, 2020
Door holding water filter in came off can’t get water filter out.
For model number ASD2575BRB03
Hello David, Thank you for the question. The Doro is only sold as part of the Filter Housing PartSelect Number PS11759606. We hope this helps!
Was this helpful?
Thank you for voting!
Related Parts:
Water Filter Housing

$93.65
In Stock
Freddie
February 9, 2020
The water filter door is broken off, how do i replace it, there's is no number on the part that's broken, thank you very much
For model number ASD2575BRB03
Hello Freddie,
Thank you for your question. The water filter door comes with the water filter housing under part PS11759606 for your model. You would need to remove the kick plate to access the filter housing by unscrewing each end of the plate. Once you remove it, its as simple as replacing the new door and housing with the new part. We hope this helps.
Was this helpful?
Thank you for voting!
Related Parts:
Water Filter Housing
$93.65
In Stock
- < Prev
- 1
- Next >
Common Symptoms of the ASD2575BRB03
[Viewing 21 of 21]Door won’t open or close
Fixed by
these parts
these parts

Show All
Fridge too warm
Fixed by
these parts
these parts

Show All
Leaking
Fixed by
these parts
these parts


Show All
Noisy
Fixed by
these parts
these parts


Show All
Ice maker won’t dispense ice
Fixed by
these parts
these parts


Show All
Light not working
Fixed by
these parts
these parts


Show All
Clicking sound
Fixed by
these parts
these parts
Show All
Ice maker not making ice
Fixed by
these parts
these parts
Show All
Freezer not defrosting
Fixed by
these parts
these parts
Show All
Freezer section too warm
Fixed by
these parts
these parts
Show All
Fridge and Freezer are too warm
Fixed by
these parts
these parts
Show All
Not dispensing water
Fixed by
these parts
these parts
Show All
Will Not Start
Fixed by
these parts
these parts
Show All
Frost buildup
Fixed by
these parts
these parts
Show All
Fridge too cold
Fixed by
these parts
these parts
Show All
Door Sweating
Fixed by
these parts
these parts

Show All
Too warm
Fixed by
these parts
these parts
Show All
Freezer too cold
Fixed by
these parts
these parts
Show All
Ice maker dispenses too much ice
Fixed by
these parts
these parts

Show All
Ice maker dispenses too little ice
Fixed by
these parts
these parts
Show All
Fridge runs too long
Fixed by
these parts
these parts
Show All


")


Keep searches simple. Use keywords, e.g. "leaking", "pump", "broken" or "fit".
Door Bins Broke
Like always your products were ordered and came extremely fast. The installation was quick. No tools needed this time. Now we have 3 door bins where we had two broken ones. Our refrigerator is more organized than ever. Thanks again!
Parts Used:
-
Eric from Hamburg, PA
-
Difficulty Level:Really Easy
-
Total Repair Time:Less than 15 mins
391 of 400 people
found this instruction helpful.
Was this instruction helpful to you?
Thank you for voting!
Plastic bits dispensed from Ice Dispenser in Door
Removed Ice bin from Fridge
Removed all bolts on bin with nut driver...about six
Removed housing...be careful with spring on crusher/cube control rod
Removed C clamp on end of auger with small slotted screw driver and needle nose pliers.
Removed plastic nut on end of auger shaft
Remov ... Read more ed Ice crusher jaws and laid them out in the correct order
Removed Ice propeller and installed new part
Put back together in opposite order
Easy
Read less
Parts Used:
-
john from seaford, VA
-
Difficulty Level:Easy
-
Total Repair Time:15 - 30 mins
-
Tools:Nutdriver, Pliers, Screw drivers, Socket set
205 of 245 people
found this instruction helpful.
Was this instruction helpful to you?
Thank you for voting!
Fridge was getting too warm, ice buildup on coils.
WARNING: REPLACING THIS PART REQUIRES CUTTING AND SPLICING ELECTRICAL WIRES. RISK OF ELECTRICAL SHOCK OR FIRE. DO NOT ATTEMPT THIS REPAIR IF YOU ARE NOT EXPERIENCED WITH ELECTRICAL WIRING.
Part Info:
The bi-metal strip is clipped onto the evaporator coils and is designed to regulate the defrost coil temperature. If it is n ... Read more ot functioning properly you may notice ice buildup preventing air flow (and preventing proper refrigeration), or more rarely the freezer side may get too warm during the defrost cycle.
Materials:
* Replacement bi-metal strip
* Wire cutters
* Wire strippers
* Wire nuts
* Electrical tape
* 10MM socket
Steps:
1: UNPLUG THE FRIDGE! If there is ice buildup, wait until the ice has melted. A box fan blowing at the ice will help melt it more quickly.
2: Remove the panel covering the evaporator coils. It's located inside the fridge, on the freezer side.
3: Un-clip the bi-metal strip from the evaporator coils.
4: Unplug the wires from the evaporator fan, defrost coil and bi-metal strip, then disconnect the main connector that is plugged into the rear wall.
5: Clip both wires to the old ( bad ) bi-metal strip. Cut close to the casing of the bi-metal strip so there are long wires to splice onto.
6: Strip 1/4 to 1/2 inches of insulation off of the ends of the wires ( depending on the size of the wire-nuts you use). Twist the bare wires slightly to prevent fraying.
7: Do the same for the ends of the wires on the (new) bi-metal strip.
8: Take the ends of the wires belonging to the (new) bi-metal strip and the wires coming from the main plug. Take the like-colored wires, and twist the bare metal ends together.
9: Twist on wire nuts, for both sets of wires. Make sure they are snug, with no bare wire showing.
10: Tape over the wire nuts with electrical tape. Tape over the wires nuts in a spiral fashion, completely covering the nut and both wires that are now spliced together. This will prevent accidental shorting.
11: Plug the main plug back into the rear wall of the fridge. Also re-connect the connectors to the evaporator fan and defrost coil. Make sure the clips on the connectors are snug to ensure a good connection.
12: Clip the new bi-metal strip onto the coils, in the same spot as before. ( Usually just after the small incoming copper tubing that connects to the coils, known as the expansion valve. That is usually the coldest spot on the coils during operation).
13: Replace the panel that covers the coils.
14: Plug the fridge back in... Now you fridge should defrost correctly. If it does not, your defrost coil could be burned out, or the control board could be faulty.
Read less
Parts Used:
-
Cathy from Winter Park, FL
-
Difficulty Level:A Bit Difficult
-
Total Repair Time:15 - 30 mins
-
Tools:Nutdriver
159 of 185 people
found this instruction helpful.
Was this instruction helpful to you?
Thank you for voting!