Parts That Fix Whirlpool Dryer CGM2743BQ0 Noisy
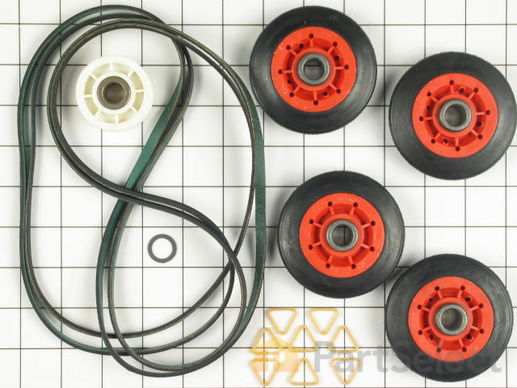
The Whirlpool Dryer Repair Kit is a universal maintenance kit for 27-inch dryers, compatible with various models from Whirlpool, Kenmore, Maytag, and others. It includes a belt, drum rollers, an idler pulley, clips, and a washer to fix common issues like noise and improper drum rotation. Installation requires disassembling the dryer to replace parts using standard tools. Ensure the dryer is unplugged before starting. This durable OEM kit provides reliable repairs for quieter, more efficient operation.
Replacing your Whirlpool Dryer Dryer Repair Kit

Customer Repair Stories
-
Eddie from PELZER, SC
-
Difficulty Level:A Bit Difficult
-
Total Repair Time:More than 2 hours
-
Tools:Nutdriver, Screw drivers
-
jason from HOLDEN, MA
-
Difficulty Level:Really Easy
-
Total Repair Time:30 - 60 mins
-
Tools:Socket set
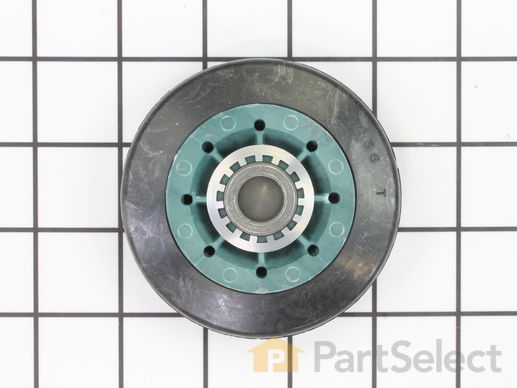
This drum support roller is sold individually. Most dryers require two. The tri-rings are included. This is a drum support roller for a dryer. It is a genuine replacement part. This part is sold separately. Most dryers require two drum rollers. It is recommended to check and replace both drum support rollers at the same time to ensure proper drum rotation and because they often wear at the same rate. The drum support roller holds the drum in the proper position while it spins on the support wheels. If rollers are worn out, they will cause the dryer to be noisy.
Replacing your Whirlpool Dryer Dryer Drum Support Roller

Customer Repair Stories
-
Robert from GOODRICH, TX
-
Difficulty Level:Easy
-
Total Repair Time:30 - 60 mins
-
Tools:Nutdriver, Pliers, Screw drivers, Socket set
-
Jeff from Mesa, AZ
-
Difficulty Level:A Bit Difficult
-
Total Repair Time:30 - 60 mins
-
Tools:Nutdriver, Screw drivers, Wrench (Adjustable), Wrench set
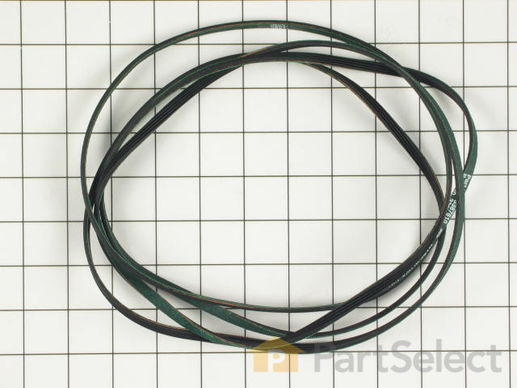
The Drive Belt is a 93 1/2" belt which wraps around the dryer drum to allow tension and movement. If broken the dryer will not turn properly, or there may be loud noises. The part is rated as "medium" difficulty to install. Refer to your model number and user manual to ensure this part is correct for you. To complete this repair you will need a Phillips screwdriver, 1/4 inch nut driver, a putty knife, and a pair of needle nose pliers. Ensure you disconnect your power to the dryer before beginning this repair, which should take between 30 and 60 minutes maximum to complete.
Replacing your Whirlpool Dryer Multi Rib Belt

Customer Repair Stories
-
john from goldsboro, NC
-
Difficulty Level:A Bit Difficult
-
Total Repair Time:30 - 60 mins
-
Tools:Nutdriver, Pliers, Screw drivers
-
Larry from exeter, RI
-
Difficulty Level:Easy
-
Total Repair Time:30 - 60 mins
-
Tools:Nutdriver, Screw drivers
If you notice that your dryer is noisy or will not tumble, you may need to replace the tri ring. This part is triangular, and is less than an inch in size. Tri rings can be found both on the idler pulley shaft, or on the rear drum roller shaft. In either case, you will need to remove the front panel of the dryer and the drum to access the part for repair. Once you have accessed the damaged tri ring, you will simply need to slip it off and replace it with the new one. This part is sold individually. Be sure to disconnect the power source from the dryer before you begin this repair.
Replacing your Kenmore Dryer Dryer Tri Ring

Customer Repair Stories
-
Danny from Oolitic, IN
-
Difficulty Level:Really Easy
-
Total Repair Time:Less than 15 mins
-
Tools:Nutdriver, Pliers
-
Joe from St. Louis, MO
-
Difficulty Level:Easy
-
Total Repair Time:30 - 60 mins
-
Tools:Nutdriver, Pliers
This drum seal with a silicone rubber adhesive is used in dryers. This part seals the drum to make sure air does not escape from the dryer. If your dryer is making loud noises, is not producing enough heat, or no heat at all, or there are marks left on your clothes, replacing the seal on your dryer can solve the problem. The tools needed for this installation project are: 1/4 inch nut driver, Phillips screwdriver, small flat blade screwdriver, and putty knife. Remember to unplug your dryer from the power source before beginning this installation project. Refer to the manual provided by the manufacturer for installation instructions.
Replacing your Whirlpool Dryer Drum Seal w/Adhesive

Customer Repair Stories
-
William from Pontiac, MO
-
Difficulty Level:Easy
-
Total Repair Time:More than 2 hours
-
Tools:Screw drivers, Socket set
-
Jerry from Everett, WA
-
Difficulty Level:Easy
-
Total Repair Time:30 - 60 mins
-
Tools:Screw drivers, Socket set
Shaft for dryer drum support roller. Rear shaft with left hand threads. Part is updated so nuts may need to be replaced as well on older dryers.
Replacing your Whirlpool Dryer Dryer Drum Support Shaft

Customer Repair Stories
-
Carl from MARION, KY
-
Difficulty Level:Really Easy
-
Total Repair Time:More than 2 hours
-
Tools:Nutdriver, Pliers, Socket set
This front shaft with right hand threads is used in dryers. The shaft and the drum support rollers ride on to support the drum. If your shaft has flat spots and the rollers do not spin, replacing the shaft can solve the problem. The tools needed for this repair are: 5/16 inch socket or nut driver, 1/4 inch socket or nut driver, small flathead screw driver, channel-lock pliers, 9/16 inch socket. Remember to unplug your appliance from the power source before beginning this installation project. Refer to the diagram provided by the manufacturer for further installation instructions.
Replacing your Whirlpool Dryer Dryer Drum Support Roller Shaft Right Hand Threads

Introducing the Whirlpool Dryer Idler Spring, a genuine OEM part designed for some models of Whirlpool, KitchenAid, Maytag, Jenn-Air, Amana, Inglis, and Magic Chef clothes dryers. This essential product functions to hold the idler pulley tight against the drum belt, enabling the belt to turn smoothly and efficiently. Specifically designed for the idler pulley arm in dryers, it ensures optimal performance of your appliance. Guaranteeing maximum durability and reliable performance, safety measures include unplugging your dryer before installation and wearing work gloves to protect your hands. Opt for the Whirlpool Dryer Idler Spring to maintain the effectiveness of your dryer. Please verify that this part is suitable for your model before ordering to counter any potential variations in size or shape.
Replacing your Whirlpool Dryer Dryer Spring

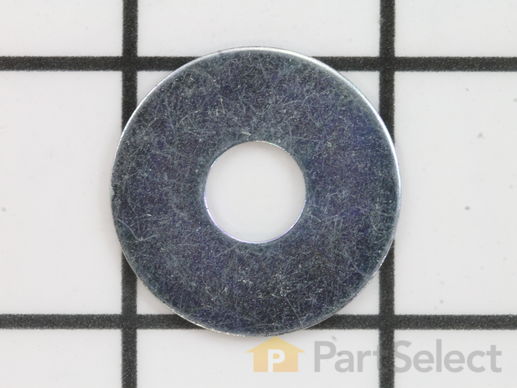
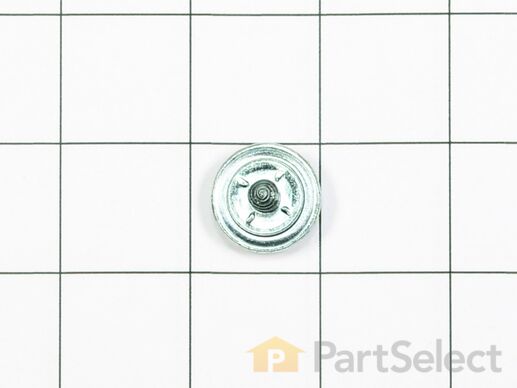
This part is located on the drum roller support shaft in your dryer appliance. The exterior of the washer is 1 inch in diameter with a hole in the middle and is made of metal. They are installed alongside the drum support rollers and idler pulleys. If you notice that your dryer is making an unusual sound it could be due to the washer becoming loose on the drum support. They help prevent the rollers and pulleys from bumping up against the brackets they are installed on. If you are replacing the rollers, we suggest you replace the washers at the same time.
If your washer shakes or vibrates loudly when it reaches its max speed, check that the leveling legs are even. To ensure that the washer is firmly on the ground using all four legs, adjust the legs so that the machine is level, and tighten the locking nuts on the legs that are threaded. Keep the washer as close to the floor as possible. Your model might have rear legs that level themselves, or it might have threaded legs all around. Make sure the rubber feet have not worn out. Replace any missing or damaged legs and feet. This replacement part is sold individually.
Replacing your Kenmore Dryer Washer Leveling Foot

Customer Repair Stories
-
Beth from Valley Springs, CA
-
Difficulty Level:Really Easy
-
Total Repair Time:1- 2 hours
-
Tools:Screw drivers
Instructions:
1. Tip dryer over onto a non-scratch surface. I used a tarp on the floor.
Insert leveling foot into the foot opening on the bottom of the dryer &
screw in with fingers until it is difficult to turn.
2. Use t ... Read more he adjustable wrench on the hexed foot (not the threads) to adjust to the desired level.
3. Tip dryer upright taking care not to exert pressure on the feet closest to floor. I used a folded-up tarp under the bottom edge of the dryer while lifting it to the upright position.
4. Use a level, back to front & side to side, to determine if feet need further adjustment.
5. Adjustments can be made with the dryer in the upright position, using the adjustable wrench on the hexed foot.
-
Bobbie from BEND, OR
-
Difficulty Level:Very Easy
-
Total Repair Time:Less than 15 mins
-
Tools:Wrench (Adjustable)
Sold individually.
The WP8066184 is a dryer motor pulley that is used in some dryer models. It supports the motor belt where it connects with the motor. Symptoms of failure include squealing or grinding noise during drum rotation. Please use the model number of the appliance to check for compatibility before purchasing.
Replacing your Whirlpool Dryer Dryer Motor Pulley

Customer Repair Stories
-
Rob from GAITHERSBURG, MD
-
Difficulty Level:Really Easy
-
Total Repair Time:30 - 60 mins
-
Tools:Wrench (Adjustable)
Hint: Use a one gallon ice cream bucket to hold up the drum while connecting the belt. It makes it much easier and gives you more clearance.
-
Brian from IMLAY CITY, MI
-
Difficulty Level:Very Easy
-
Total Repair Time:15 - 30 mins
-
Tools:Nutdriver, Pliers, Screw drivers, Wrench set
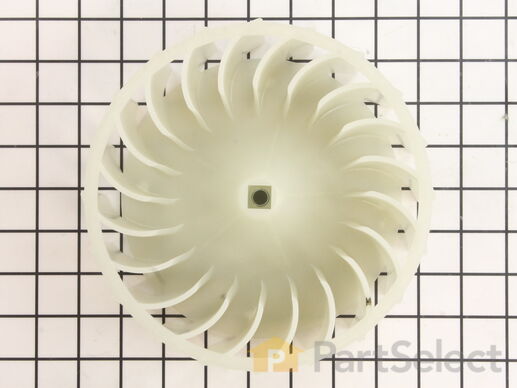
The blower wheel pulls air over the heat source, through the clothes drum, and past the thermostats, then pushes it out the exhaust duct.
When the igniter reaches a high enough temperature, these coils (Coil Valve, Dryer Gas Valve Coil Kit, Dryer Valve Coil Kit, Gas Valve Solenoid) work together to open the gas valve and allow the gas to enter the burner. This is a safety mechanism to ensure that there are no unsafe buildups of gas inside your appliance. The coils are attached to the dryer gas valve. If the dryer does not heat or heats intermittently, the coil may not be opening the gas valve. Both coils must be operational for the valve to open. No continuity would indicate a defective coil, but they can be intermittent and fail when they get hot. Both coils should be replaced when one of them is broken. This part can break as a result of material fatigue from normal use. This part measures approximately 1 inch in diameter and 1 inch in height, and is constructed of plastic and metal. It comes in black/beige. This part features a 3-terminal boost/hold coil and a 2-terminal secondary coil
Customer Repair Stories
-
Robert from Seattle, WA
-
Difficulty Level:Really Easy
-
Total Repair Time:Less than 15 mins
-
Tools:Nutdriver, Screw drivers
-
Gary from Haverhill, NH
-
Difficulty Level:Easy
-
Total Repair Time:30 - 60 mins
-
Tools:Nutdriver, Screw drivers, Socket set
This clamp is used to secure the drive motor.
Customer Repair Stories
-
Cynthia M from Westfield, MA
-
Difficulty Level:Easy
-
Total Repair Time:More than 2 hours
-
Tools:Screw drivers
This part seals between the blower housing and the blower housing cover.
Replacing your Whirlpool Dryer Dryer Blower Housing Seal


