


ECKMFEZ1 Whirlpool Ice Maker - Overview
Sections of the ECKMFEZ1
[Viewing 1 of 1]
Keep searches simple, eg. "belt" or "pump".


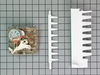
Icemaker Motor Kit
PartSelect #: PS733947
Manufacturer #: 8201515
This kit includes the module motor, ejector arm, and ice stripper arm. The complete icemaker is sold separately.
$88.15
In Stock

Refrigerator Ice Mold
PartSelect #: PS11749915
Manufacturer #: WPW10190929
This is an ice maker mold and heater assembly for a refrigerator ice maker. It is used with modular style icemakers and is located in the freezer section of the refrigerator. This ice mold is flake re...
$143.08
In Stock

Refrigerator Screw
PartSelect #: PS11742754
Manufacturer #: WP489478
Sold individually.
$7.95
In Stock

Refrigerator Cycling Thermostat
PartSelect #: PS11743313
Manufacturer #: WP627985
The ice maker thermostat, also known as the cycling thermostat, controls and regulates the ice maker ejection cycle by monitoring the temperature inside the freezer to determine when to release the ic...
$53.95
In Stock


Refrigerator Shut Off Arm
PartSelect #: PS11743310
Manufacturer #: WP627792
This is a shut off arm for the ice maker in a refrigerator. When the shut off arm has reached maximum height, it triggers the switch to shut off the ice maker so it does not continue to make ice until...
$54.48
In Stock


Refrigerator Ejector Arm
PartSelect #: PS11743312
Manufacturer #: WP627843
This is an ejector arm, and it is used in conjunction with your refrigerator. The function of this part is to act as a cube ejector inside your ice maker. The arm will rotate inside the ice maker to a...
$46.18
In Stock

ARM-STRIPR
PartSelect #: PS11748652
Manufacturer #: WPW10122563
Introducing the ARM-STRIPR Ice Stripper Bracket by Whirlpool, a genuine OEM part designed for efficiency and durability. Ideally crafted for modular ice makers, this essential component effectively pu...
$51.42
In Stock

Exact Part matches for your search term
[Viewing 1 of 1]
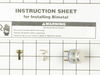
ICE MAKER KIT-PKG ASSEMBLY (EZ
This part number matches the current model number ECKMFEZ1
PartSelect #: PS17629131
Manufacturer #: W11700559
$134.01
On Order
Questions And Answers for ECKMFEZ1
We're sorry, but our Q&A experts are temporarily unavailable.
Please check back later if you still haven't found the answer you need.
Common Symptoms of the ECKMFEZ1
[Viewing 3 of 3]Ice maker not making ice
Fixed by
these parts
these parts
Show All
Leaking
Fixed by
these parts
these parts

Show All
Ice maker won’t dispense ice
Fixed by
these parts
these parts
Show All


Keep searches simple. Use keywords, e.g. "leaking", "pump", "broken" or "fit".
No ice in ice trey
The easiest thing to do was pull the ice make off. After taking the 3 screws out of the wall of the freezer, take a screwdriver (flathead) and push on the tab for the electrical plug and wiggle the cord out. Then you can take 3 screws out for the main cover and another 2 screws on the next cover. There's the part, pop it out and replace h
... Read more
olding pins and start the process of putting back together the opposite way you took it apart.
Read less
Parts Used:

-
Wayne from Leesburg, FL
-
Difficulty Level:Really Easy
-
Total Repair Time:15 - 30 mins
-
Tools:Screw drivers, Socket set
79 of 104 people
found this instruction helpful.
Was this instruction helpful to you?
Thank you for voting!
Wanted to install ice maker in my freezer
I was clening my uprght freezer and noticed that it was preped for an icemaker. I first went to the Whilpool website and could not find my part as my freezer was a 2008 model.
I saw PartSelect on the search page and went to thier site.
I put in my modle number of the Whilpool Ice maker kit that was on the back of my freeze ... Read more r. PartSelect had the part in stock and approx $18.00 less than the other kits listed on the Whilpool site (that did not match my kit number). I orderd the kit on Sunday and it arrived on Wednesday. It took less than and hour to install. Every part I needed was included. The following day I installed the water line and now I have an extra icemaker.
Read less
Parts Used:
-
Donald A. from ORLANDO, FL
-
Difficulty Level:Easy
-
Total Repair Time:30 - 60 mins
-
Tools:Nutdriver, Screw drivers
77 of 111 people
found this instruction helpful.
Was this instruction helpful to you?
Thank you for voting!
KITCHEN AID SIDE-BY-SIDE REFRIGERATOR ICE-MAKER stopped working due to a broken motor assembly.
Changing the KITCHENAID MOTOR ASSEMBLY TO THE ICE-MAKER was fairly straightforward. The hardest part was figuring out WHAT was broken and how to fix it. I was determined to save myself hundreds of dollars by doing it myself and avoiding a visit by the 'repairman'.
1.) Went to KitchenAid website to look at Parts List for my ... Read more side-by-side refrigerator and ice maker assembly (a PDF file, easily downloadable) . The illustrations helped me visualize the assembly and various parts involved.
2.) Removed cover on front of ice maker.
3.) Removed hex-head screw on undersurface of icemaker on the right, which stablilizes a plastic cover for the electrical connector to the ice maker. Once this is off, it's then possible to slide the ice maker out.
4.) Slide the ice maker out from it's 'shelf' in the freezer. You won't be able to completely remove it until you disconnect the power supply.
5.) Disconnect the multi-pin power connector. (It's probably safest to unplug the refrigerator altogether before doing this, but I did not. No exposed metal wiring or connectors. No problems when I did it this way.)
6.) Once the ice-maker was out, remove the white cover from the motor assembly (on the left side of the unit).
7.) Remove the three screws from the black housing of the motor assembly. (This is where I discovered that the connector between the motor and drive-train was broken and needed to be replaced.)
8.) Remove and replace the drive system for the ice cube ejector.
9.) Then reverse the steps to reassemble.
This may seem a bit vague, but it's really quite straightforward once the ice maker is out of the freezer. The replacement motor assembly includes the motor, the motor housing, the drive-train, and the ice-cube ejector. Very easy to re-asemble.
Shopping for and ordering the part took some time since there are so many different after-market parts dealers. In all honesty, I'm glad I decided on PartSelect.com. They had a decent price, safe checkout, and timely delivery. All the essentials of a good online store.
Thanks, and good luck to the next guy who has to deal with a KitchenAid snafu.
Read less
Parts Used:
-
ANDREW from DURANGO, CO
-
Difficulty Level:A Bit Difficult
-
Total Repair Time:30 - 60 mins
-
Tools:Nutdriver, Screw drivers
56 of 76 people
found this instruction helpful.
Was this instruction helpful to you?
Thank you for voting!