Your coupon for will be reflected when you check out!
✖
Your coupon for
✖
Hello!
You're visiting the PartSelect site in U.S.
Would you like to shop on the Canadian site?
Stay on this site
Go to Canadian site
✖
Model Number Locations
1Select Category Type
Select Category Type
2Select Product Type
Select Product Type
3Select {MODEL} Type
Select {MODEL} Type
Sample Model Number Tags
Model numbers can be made up of numbers (1005400, for example) or a combination of letters and numbers (LAT1000AAE). The model number will most likely appear on either a paper sticker or a metal plate. Your appliance's model number tag may look similar to the sample model number tags shown here (model number highlighted in yellow):
Model has been saved to My Models. If you're not signed in, your lists are available on this device and will expire within 30 days.
Model has been saved to My Models.
If you are having trouble cleaning out your grease filter, or if it is damaged to the point of no return, maybe it is time to replace it. The grease filter is a ventilator that traps grease from the e...
The relay switch may also be known as the door micro switch and is a part for your microwave. The function of this part is to monitor the door latch and communicate whether the door latch is open or c...
The glass tray, used in a microwave, holds food plates and containers on it. The glass tray, also known as a turntable, rotates when the microwave is heating up food to ensure the plate of food is eve...
This is a lower handle end cap for a microwave door. It covers the end of the microwave door handle. The cap measures approximately 2 inches by 2.5 inches and is stainless steel. It is located at the ...
This part is an upper handle end cap and it works in conjunction with your microwave. The purpose of this end cap is to clip into the microwave to cover the end of the door handle. This part is made o...
The roller guide sits underneath the glass turntable tray in your microwave. If your microwave turntable tray is not rotating properly, you may need to replace the turntable roller guide. The function...
This is an exhaust damper assembly for a microwave, which is also known as a microwave vent damper. The damper directs air flow through the vent duct from the top or rear of your microwave, depending ...
This mounting bracket is used to mount microwaves to the wall when installing the unit over a range. This metal, genuine OEM mounting bracket is approximately 31 inches long x 2 inches wide. If you no...
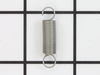
The microwave door latch spring creates tension, and engages the door latch when the door is closed. This spring is made completely of metal, and is approximately 1 inch long. If your microwave door w...
Ask our experts a question about this model and we'll get back to you as soon as possible!
1 question answered by our experts.
Sort by:
< Prev
1
Next >
Search filter:
Clear Filter
Your search term must have 3 or more characters.
Keep searches simple. Use keywords, e.g. "leaking", "pump", "broken" or "fit".
Sorry, we couldn't find any existing answers that matched.Try using some different or simpler keywords, or submit your new question by using the "Ask a Question" button above!
Richard
November 30, 2021
Control panel not responding to touch
For model number EI30BM5CHSA
Hello Richard, Thank you for your inquiry. You could have an issue with the door switches, the display, the touchpad or the control board. You can test the parts with a multimeter. If you are unfamiliar with how a multimeter functions, we have videos available to assist you. Good luck with your repair.
I first removed the top plate above the microwave door (3 screws), then I removed the plate containing the buttons and clock. The microwave has 3 relay switches and they are in a little holder. The holder was too difficult to remove so I just removed the bottom switch and replaced. The microwave started right up.
was told buy a repair person to check the door micro switches as it was a common problem. removed the top plastic air grill to get access to the screw that holds in place the control cover. After unplugging the unit, i took out the (2) screws that held in the switches and removed them (3). One switch was a bit melted so i tested it with a
... Read more 12 volt battery and it was bad. Ordered a new one from Part select and got it fast . Works great .
After unplugging the unit remove the control face buy removing the screws. All three door switchs are on a bracket on the left. Remove the two screws holding the bracket in place and pull out. Disconnect the wires from the three switches and test each switch indivually to determine the bad one. I used a multimeter set on ohms.Replace the
... Read morebad switch with the new one and replace all the wires. Reassemble the unit and you are good to go.


 – Part Number: 5304453895")