Back
Back
Keep typing for more specific results...
Models > FGHB2868TF7 > Symptoms > Door won’t open or close

Parts That Fix Frigidaire Refrigerator FGHB2868TF7 Door won’t open or close

Door won’t open or close is a commonly reported symptom for the FGHB2868TF7 Frigidaire Refrigerator, and we have put together a full guide on how to fix this. This advice is based on feedback from people who own this exact appliance. We have listed the most common parts for your FGHB2868TF7 Frigidaire Refrigerator that will fix Door won’t open or close. We have included repair instructions, and helpful step-by-step video tutorials. If you are experiencing this issue, not to worry, DIYers just like you have fixed this, and shared their experience to help you!
Fixes Symptom 62% of time

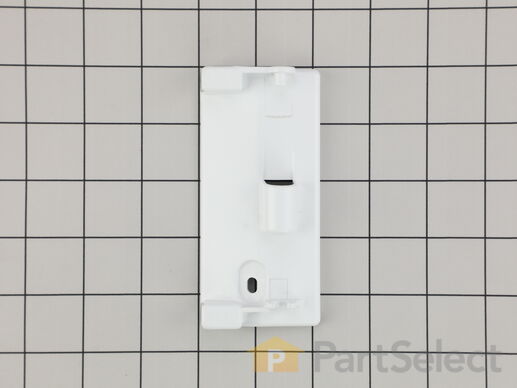
This mullion hinge pin is a genuine OEM replacement part, measuring 1.5 inches by 1.25 inches by 0.85 inches. It is specially designed to secure the mullion in refrigerators, allowing it to pivot and ensure smooth door movement. The mullion acts as a barrier between the refrigerator and freezer to maintain the desired temperatures for each section. A damaged or loose hinge pin will result in temperature fluctuations, frost buildup along the door edges, and difficulties opening and closing the door. Therefore, it is important that you replace the pin as soon as it is no longer functioning. Note that your appliance may require two hinge pins, one near the top of the mullion and one near the bottom. Remove the mullion cover, detach the hinge pin, and install a the new one into the hinge assembly. Place the cover back on and verify that the hinge assembly is working by carefully opening and closing the refrigerator doors to check that they are moving smoothly. Each sold individually.

$ 25.95
  In Stock
PartSelect Number PS2358752
Manufacturer Part Number 241779401

Customer Repair Stories

1 Broken plastic mullion hinge. Mullion was not operating correctly.
Removed screw on Mullion so that the replacement hinge can slide onto the small plastic bracket on the door. Slid the mullion on the hinges and screwed in muliion (1 screw).
  • Bernard from NEW WINDSOR, NY
  • Difficulty Level:
    Very Easy
  • Total Repair Time:
    15 - 30 mins
  • Tools:
    Screw drivers
2 of 4 people found this instruction helpful.
Was this instruction helpful to you?
Thank you for voting!
Fixes Symptom 13% of time

The magnet is sold separately.

$ 39.95
  In Stock
PartSelect Number PS12364145
Manufacturer Part Number 241779802
Fixes Symptom 6% of time

This crisper pan roller is sourced directly from the manufacturer for use in your refrigerator. It is a genuine OEM part that is designed to fit just like the original for your convenience. The roller is a plastic wheel-like component that attached to the sides of the crisper pan and allows it slide in and out of the refrigerator smoothly. The rollers allow users to easily and conveniently access the contents of the drawers. Over time, the roller may wear down, break, or fall off. If the roller is faulty, you may notice difficulty sliding the drawer in and out, or the drawer may feel loose and unstable when you pull it out. Each crisper pan roller is sold individually. Ensure that you order the correct number of rollers for your refrigerator.

$ 11.95
  In Stock
PartSelect Number PS12071116
Manufacturer Part Number 5304508016

Customer Repair Stories

Roller screw recipients broke out. Can't be repaired.
Was not able to repair. Wasn't rollers I needed. Plastic screw recipients in front on frame had broken out so rollers weren't the problem. Tried gluing back pieces to no avail. Crisper frames are poorly designed.
  • hellen from SPRINGFIELD, MO
  • Difficulty Level:
    Very Difficult
  • Total Repair Time:
    More than 2 hours
  • Tools:
    Screw drivers
16 of 19 people found this instruction helpful.
Was this instruction helpful to you?
Thank you for voting!
Fixes Symptom 5% of time

$ 75.61
  In Stock
PartSelect Number PS17990263
Manufacturer Part Number 241778315

Customer Repair Stories

Original refrig door gasket was fraying
It's too easy to describe.

What's more important is that someone read this and see that you can save hundreds of dollars doing this repair yourself. I'm sure many handy people think that about everything they repair, but this repair is insanely easy and the $ savings ridiculous.
When I called the place I purchased the refrigerator from, they were more than happy to sell me the part with a 35% markup (your price was reasonable) and (when i asked) they told me that sending someone to my home to make the repair would cost about $400 ($200 per door) including the "home instal" fee.
I removed the old gaskets and put on the new ones (on both doors) in under 10 minutes. I confess that I did the job under the auspices of my very handy son but he'll agree with everything I just wrote. To the unhandy: go forth and replace your own gaskets.
  • Barry from CHEVY CHASE, MD
  • Difficulty Level:
    Very Easy
  • Total Repair Time:
    Less than 15 mins
11 of 12 people found this instruction helpful.
Was this instruction helpful to you?
Thank you for voting!
Old door gasket was worn and edge was cut
Pulled the old gasket out if groove on the door, cleaned inside the groove, squirted some windex in the groove to ease the new gasket in the groove, then proceeded to work the gasket into the groove. Made sure gasket was all the way in the groove around the perimeter of the door. Done!
  • Ed from PETALUMA, CA
  • Difficulty Level:
    Really Easy
  • Total Repair Time:
    15 - 30 mins
16 of 21 people found this instruction helpful.
Was this instruction helpful to you?
Thank you for voting!
Fixes Symptom 4% of time

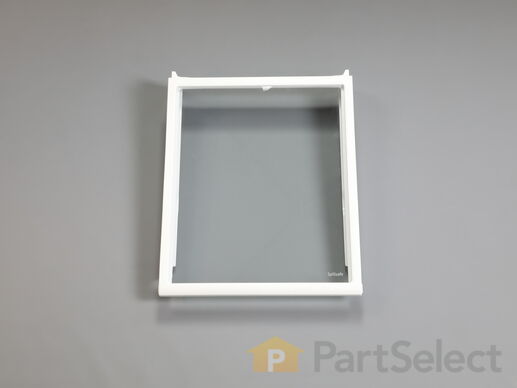
This crisper drawer cover assembly is for refrigerators. The crisper drawer cover assembly includes the crisper drawer cover frame and the insert that covers the drawer. The assembly may include multiple parts; refer to your parts diagram for a complete list of parts included. This cover does not come with the wheel. The wheel attaches to the shelf (roller 5304508016).

$ 92.95
  In Stock
PartSelect Number PS12071129
Manufacturer Part Number 5304508067

Customer Repair Stories

Left guide wheel broke off on both drawer covers definitely a design problem
Replace the drawer cover by removing the drawer brackets
  • Joseph from ROUND TOP, NY
  • Difficulty Level:
    Really Easy
  • Total Repair Time:
    30 - 60 mins
  • Tools:
    Screw drivers
4 of 5 people found this instruction helpful.
Was this instruction helpful to you?
Thank you for voting!
Crisper wheel broke on crisper cover.
Removed parts off old cover replaced all items on new cover installed in refrigerator replaced crisper drawer project complete
  • Peter from MYRTLE BEACH, SC
  • Difficulty Level:
    Easy
  • Total Repair Time:
    15 - 30 mins
  • Tools:
    Screw drivers
6 of 8 people found this instruction helpful.
Was this instruction helpful to you?
Thank you for voting!
Fixes Symptom 4% of time

Sold individually.

$ 22.95
  In Stock
PartSelect Number PS1526054
Manufacturer Part Number 240578902
Fixes Symptom 4% of time

$ 63.65
  In Stock
PartSelect Number PS17996096
Manufacturer Part Number 5304537408

Customer Repair Stories

Freezer drawer gasket damaged and leaking cold air
Remove old gasket by pulling it away from the frame. Work all the way around the gasket till it is entirely separate from the door. Remove the old gasket by slipping it over the door. Note the orientation of the new gasket will have the small bead towards the door - slip the new gasket over the door so that it is in the inside of the freezer door. Press the small bead into the slot in the door. Work all the way around, pressing the bead in with your fingers. When it's all secure, close the door and check for no gaps. Takes 5 minutes and no tools - very easy. Make sure you order the correct COLOR of gasket - it comes in black and white. The black looks best on stainless steel door.
  • James from HOUSTON, TX
  • Difficulty Level:
    Very Easy
  • Total Repair Time:
    Less than 15 mins
4 of 5 people found this instruction helpful.
Was this instruction helpful to you?
Thank you for voting!
Freezer was accumulating a sheet of ice in the bottom
determined it was an air leak. Freezer portion has no drain. A fan in back blows air in through vents to keep unit defrosted. There was a gap across the entire top of gasket where it seals up against the frame. Simply pull the old gasket out of its track around the entire door. No tools needed and the door does not need to be removed. Fit the new gasket into the track until it is securely seated around all 4 sides of the door. That's it. I still had a small gap between the top of the door gasket and the freezer frame. The freezer frame may have warped a little over the years. I applied a thin strip of weather stripping to the freezer body where it meets up against the new gasket. That did it.
  • Brant from WALLINGFORD, CT
  • Difficulty Level:
    Really Easy
  • Total Repair Time:
    Less than 15 mins
6 of 6 people found this instruction helpful.
Was this instruction helpful to you?
Thank you for voting!
Fixes Symptom 3% of time

This door guide and heater assembly is a genuine OEM replacement part designed for use with French-door refrigerators. The flipper assembly plays a critical role in maintaining an airtight seal between the refrigerator’s doors, preventing warm air from entering and keeping your food at the correct temperature. If your refrigerator’s doors are not sealing properly, it may lead to temperature fluctuations that could cause food spoilage. Replacing this flipper assembly ensures that your refrigerator operates efficiently and your food stays fresh. The assembly includes both a door guide and a heater, which work together to maintain the integrity of the door seal. When replacing this part, it is important to unplug the refrigerator to avoid any electrical hazards. Additionally, store any perishable items safely while the refrigerator is disconnected from power. It’s also recommended to wear work gloves to protect your hands during the installation process.

$ 128.56
  In Stock
PartSelect Number PS12746128
Manufacturer Part Number 242036309