Your coupon for will be reflected when you check out!
✖
Your coupon for
✖
Hello!
You're visiting the PartSelect site in U.S.
Would you like to shop on the Canadian site?
Stay on this site
Go to Canadian site
✖
Model Number Locations
1Select Category Type
Select Category Type
2Select Product Type
Select Product Type
3Select {MODEL} Type
Select {MODEL} Type
Sample Model Number Tags
Model numbers can be made up of numbers (1005400, for example) or a combination of letters and numbers (LAT1000AAE). The model number will most likely appear on either a paper sticker or a metal plate. Your appliance's model number tag may look similar to the sample model number tags shown here (model number highlighted in yellow):
Model has been saved to My Models. If you're not signed in, your lists are available on this device and will expire within 30 days.
Model has been saved to My Models.
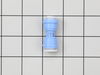
The PurePour water filter is compatible with Frigidaire, Frigidaire Gallery and Professional side-by-side and French Door refrigerators with PurePour ice and water filtration. This genuine Frigidaire ...
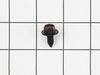
This small, Phillips-head screw works with your refrigerator/freezer. It screws in to the freezer door and connects to the door handle. This part is made of stainless steel and is sold individually. T...
Sold individually.
This is a genuine part. The handle mounting shoulder screw (no.10 ab) is made for use with many refrigerators. The metal screw helps to fasten the handle assembly to the outer do...
Enhance the functionality of your refrigerator with this genuine OEM Basket Hanger. Specifically designed for the right side, this drawer slide rail offers stable and secure support for your freezer b...
This freezer basket hanger, also known as a drawer slide rail, is a genuine OEM replacement part for the freezer compartment of your refridgerator. This hanger is for the left side. Pull out the front...
2. Revove (1) U type nut keeper & (1) metal washer.
3. Remove (1) plastic nut on end of metal auger.
4. Remove inner plastic cover (4) screws and disconnect control rod. (Note postion of control rod befor disconnecting)
5. Note position an
... Read mored order of metal blades and plastic spacers on auger before siding off the end of auger to reposition them upon re-assembly.
6. Remove metal support panel from end of ice bucket (4) screws.
7. Remove auger & plastic cylinder from ice bucket.
8. Remove - slide drive blade off auger.
9. Drive blade replaced.
10. Re-assembled other items removed in reverse order
I checked the dampener, it worked. The compressor and fan worked. I knew because my freezer was still hovering around 10 degrees. Coils were clean. Thermistor was the only thing it could be. Took all my shelves out. Removed four screws. Took the back panel off. The thermistor sits tucked in on the side. I piped it out, in clipped it. Used
... Read more my multimeter to test the numbers. Numbers were off just a bit. Ordered the part. Crossed my fingers.,took less then 5 minutes to put the part in. Plugged in the fridge. It was sitting at 33 degrees in about an hour and a half. I can’t believe I fixed it. I knew NOTHING about refrigerators. For how big my fridge is, it would have cost 3,000 and up to get a new one with the same cu ft size. Instead, it cost me $44. That includes shipping. Thank you Parts Select!! Made it so easy to pick the correct part for my model fridge!