Back
Back
Keep typing for more specific results...
Models > GCWP1000M0WW > Symptoms > Will not agitate

Parts That Fix General Electric Washer GCWP1000M0WW Will not agitate

Will not agitate is a commonly reported symptom for the GCWP1000M0WW General Electric Washer, and we have put together a full guide on how to fix this. This advice is based on feedback from people who own this exact appliance. We have listed the most common parts for your GCWP1000M0WW General Electric Washer that will fix Will not agitate. We have included repair instructions, and helpful step-by-step video tutorials. If you are experiencing this issue, not to worry, DIYers just like you have fixed this, and shared their experience to help you!
Fixes Symptom 44% of time

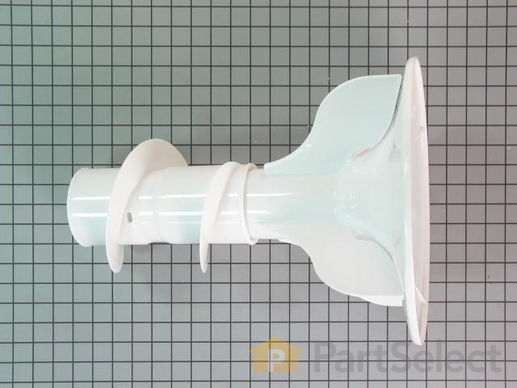
This is a dual-action agitator for a washer. It is an OEM replacement part that is sourced from the manufacturer. The agitator tosses your clothes to clean them efficiently. This plastic dual-action agitator is white in color. It is approximately 18 inches tall with a base diameter of about 12 1/4 inches. No tools are required for this repair. Your agitator has eight tabs that fasten on the drive block of your washer, which is driven by the transmission. This part does not include the agitator coupling kit, which is frequently purchased at the same time as the agitator.

$ 53.70
  In Stock
PartSelect Number PS1482519
Manufacturer Part Number WH43X10034

Replacing your General Electric Washer Dual Action Agitator

Replacing your Dual Action Agitator

Customer Repair Stories

Two paddles on the agitator broke off.
After reading how others have done this and how easy it was, I decided to give it a try. And, sure enough, it was really easy. However, one concern I had was on lifting the old agitator off from the axle using both hands. I didn't want to have the agitator come crashing into my face as I pulled up. So I put a pillow on top of the agitator.
  • Karen from Hamilton, NY
  • Difficulty Level:
    Really Easy
  • Total Repair Time:
    Less than 15 mins
15 of 19 people found this instruction helpful.
Was this instruction helpful to you?
Thank you for voting!
Blades broken off agitator
Simply put hands, one under each side of the agitaror and pulled up. The part snapped off very easily. I then placed the new part in the tub and pressed down. Extremely easy, should have done it sooner!
  • Michael from Itasca, IL
  • Difficulty Level:
    Really Easy
  • Total Repair Time:
    Less than 15 mins
72 of 86 people found this instruction helpful.
Was this instruction helpful to you?
Thank you for voting!
Fixes Symptom 33% of time

Bolt not included. This part connects the transmission drive shaft to the agitator base.

$ 26.95
  In Stock
PartSelect Number PS1482517
Manufacturer Part Number WH43X10032

Replacing your General Electric Washer Washer Agitator Coupling

Replacing your Washer Agitator Coupling

Customer Repair Stories

No Agitation Spins OK
Followed your video instructions and removed agitator.Used 7/16 3/8 in socket wrench to remove bolt in the agitator coupling and replaced coupling. Put new bolt in and tightened. Installed Agitator.Works Great.
  • Raymond from TRAVELERS RST, SC
  • Difficulty Level:
    Very Easy
  • Total Repair Time:
    Less than 15 mins
  • Tools:
    Socket set
5 of 7 people found this instruction helpful.
Was this instruction helpful to you?
Thank you for voting!
not agatating
pulled off cup on top of agataor. scrwed off nut. pulled off agatator. flipted up side down. took off agatator bell wich is on the bottom of the agator. sliped on bell. put agatator back on and scrwed on nut. dont reamber the size of the nut.sorry. put cap on and your done.
  • pilar from covert, MI
  • Difficulty Level:
    Really Easy
  • Total Repair Time:
    30 - 60 mins
  • Tools:
    Screw drivers, Socket set
13 of 22 people found this instruction helpful.
Was this instruction helpful to you?
Thank you for voting!
Fixes Symptom 7% of time

This is a replacement screw for your washer. The screw has a hex head and is approximately 1 inch in length. The washer portion of this screw is approximately 1 inch in diameter. This part is sold individually and is an authentic OEM part sourced directly from the manufacturer.

$ 7.95
  In Stock
PartSelect Number PS1482328
Manufacturer Part Number WH02X10237
Fixes Symptom 5% of time

This part is the replacement inner tub base hub for your washer. It is made of metal and is approximately 15 inches in diameter. The inner tub base hub fits between the wash tub and the spin basket, and it holds the spin basket on the gear case shaft. The main reason you would want to replace the hub, is if the washer will not agitate, or if you notice excessive noise or shaking when the washer is in use. Be sure to disconnect the washer from the water and power sources before you begin this repair. This part is sold individually and is and OEM part from the manufacturer.

$ 79.33
  In Stock
PartSelect Number PS273296
Manufacturer Part Number WH45X10027

Replacing your General Electric Washer Washer Tub Base Hub

Replacing your Washer Tub Base Hub

Customer Repair Stories

The zinc drive hub that connects the transmission to the tub had corroded away.
It was almost a complete tear down. Most difficult part was discivering how to remove the front panel. Slip a putty knife between the top and front covers. push and depress the spring tab on each side. The left hand nut on the hub was difficult. I had to get a neighbor to hold a large pair of pliers while I put a pipe wrench on the nut and hit it with a 2 lb. hammer in order to break it loose. Puting it back together do not forget to reconnect the level sensing hose to the level selector, I did. Machine will not perform without it. You can do it! I did.
  • James from Lapeer, MI
  • Difficulty Level:
    A Bit Difficult
  • Total Repair Time:
    More than 2 hours
  • Tools:
    Pliers, Screw drivers, Socket set, Wrench (Adjustable), Wrench set
10 of 13 people found this instruction helpful.
Was this instruction helpful to you?
Thank you for voting!
Loud bang during spinning
Remove aggitator, disconect 4 support straps, pry off clips/ latches on top of drum. Remove small bolt that holds on the small plastic unit unto trans.
That will give you access to the large bolt that holds the hub in place. This nut is on tight use a pipe wrench and adjustable wrench and TURN CLOCKWISE TO REMOVE - lock for direction on nut.
Remove the bin gently and turn over to remove the small bolts that hold the hub in place.
Installation is reverse of removal.
  • Jim from Marion, MA
  • Difficulty Level:
    A Bit Difficult
  • Total Repair Time:
    1- 2 hours
  • Tools:
    Pliers, Screw drivers, Wrench (Adjustable)
16 of 18 people found this instruction helpful.
Was this instruction helpful to you?
Thank you for voting!
Fixes Symptom 3% of time

The tub dampening straps support the wash tub and reduce vibration by keeping the tub at the center of the cabinet. If your washer shakes and moves, or is making a loud banging noise during the wash cycle, the washing machine tub could be off-balance, meaning one or more of these straps may be loose, or broken. Other symptoms include: the washer leaking, not agitating, or pumping but not spinning. These straps are sold individually. However, we recommend that you replace all 4 straps at the same time. It is also recommended that you check the tub for cracks where these straps mount.

$ 34.95
  In Stock
PartSelect Number PS271100
Manufacturer Part Number WH1X2727

Replacing your General Electric Washer Washer Dampening Strap

Replacing your Washer Dampening Strap

Customer Repair Stories

Noticed 3 straps were broken when we replaced the hose
I removed the front cover, then unscrewed the top to expose the top. There are two screws that hold each strap, which turns out are different sizes, so I had to use two different sockets. I also had to remove the hose & plastic tube for the bleach. Once that was done, the replacement was easy, I replaced all 4 straps, reconnected the tube for the bleach, screwed the top back on and snapped the front cover into place. This took maybe 30 minutes - and I am female!
  • Christine from Tempe, AZ
  • Difficulty Level:
    Easy
  • Total Repair Time:
    15 - 30 mins
  • Tools:
    Pliers, Socket set
14 of 20 people found this instruction helpful.
Was this instruction helpful to you?
Thank you for voting!
loud noise upon aggitation
replaced Tub dampeners Straps.
  • Robert from Covington, PA
  • Difficulty Level:
    Really Easy
  • Total Repair Time:
    15 - 30 mins
  • Tools:
    Nutdriver
18 of 23 people found this instruction helpful.
Was this instruction helpful to you?
Thank you for voting!
Fixes Symptom 3% of time

The point of the lid switch is for the tub to stop spinning when the washer lid is opened. It is a safety precaution just in case someone decides to stick their hand inside the washer while the tub is spinning.

$ 38.95
  In Stock
PartSelect Number PS5135698
Manufacturer Part Number WH12X10531
Fixes Symptom 2% of time

Sold individually.

$ 13.95
  In Stock
PartSelect Number PS12073992
Manufacturer Part Number WH43X25443
Fixes Symptom 2% of time

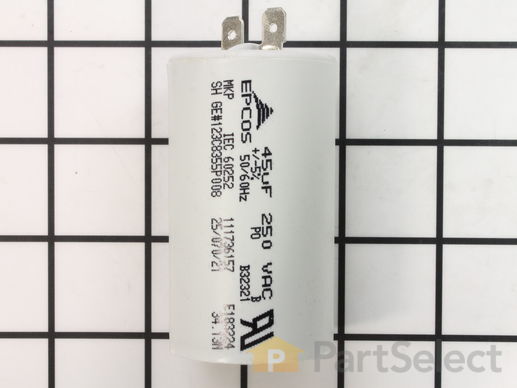
This part increases the voltage to the drive motor to help start it.

$ 45.95
  In Stock
PartSelect Number PS3406186
Manufacturer Part Number WH12X10462

Replacing your General Electric Washer Washer Capacitor

Replacing your Washer Capacitor

Customer Repair Stories

My washer smoked the entire house up.
Step 1: Remove panel, replace capacitor, and close panel.
  • Diane from MUNITH, MI
  • Difficulty Level:
    Very Easy
  • Total Repair Time:
    Less than 15 mins
2 of 2 people found this instruction helpful.
Was this instruction helpful to you?
Thank you for voting!
Capacitor failed (cracked, split, and melted a little), washer would not spin and laundry room filled up with smoke
Went to PartSelect website, troubleshot the problem I was having for the model washer I have. Ordered part, once it arrived, I had it installed and all back together in less than 30 minutes. Washer has been running with no problems since the repair. PartSelect is awesome!
  • William from KELLER, TX
  • Difficulty Level:
    Really Easy
  • Total Repair Time:
    15 - 30 mins
  • Tools:
    Pliers
8 of 8 people found this instruction helpful.
Was this instruction helpful to you?
Thank you for voting!
Fixes Symptom 1% of time

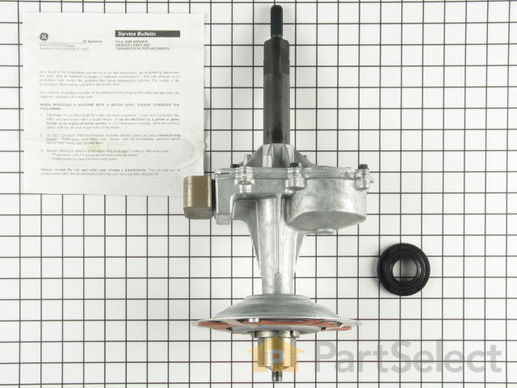
This transmission and brake assembly comes with a new tub seal. This kit aids in the spinning or agitating cycles.

  No Longer Available
PartSelect Number PS271743
Manufacturer Part Number WH38X10002

Replacing your General Electric Washer Transmission and Brake Assembly

Replacing your Transmission and Brake Assembly

Customer Repair Stories

Leaking oil into the washer (in tub and on clothes)
Had never repaired a washer before, but have several tools and enjoy working with my hands. Knew it would be cost prohibitive to call a repairman, and didn't have anything to lose. Quick delivery from partselect -- reasonable price, too. This was as easy as simply taking the whole washer apart (NOTE -- there are instructions behind the knobs inside the unit that are very helpful!) replacing the transmission and putting it all back together. Hardest part was getting the hub nut off of the transmission axle. To get it off (REVERSE THREADED, so 'tighten' to 'loosen') I used a 1 11/16 socket and impact wrench. Use the same tool to tighten (but go EASY...don't overtighten). This was not difficult, but just took some time. A couple of evenings later, we were washing again like NEW. Part cost around $160, labor was 'free' and much less than a new $500 top loader or $800 front loader. If you enjoy taking things apart and have some tools, then go for it!
  • Scott from Bloomington, IN
  • Difficulty Level:
    Easy
  • Total Repair Time:
    More than 2 hours
  • Tools:
    Nutdriver, Pliers, Screw drivers, Socket set, Wrench (Adjustable), Wrench set
54 of 57 people found this instruction helpful.
Was this instruction helpful to you?
Thank you for voting!
Bearing on the transmission to tub wore out (mostly due to the washer not being level)
The back of the control panel had an instruction pamplet that was very useful. 2 parts did not go as written tho. To "pop" the spinner out, required short 1x4s and a shake/shingle bar to pry it up and the wedging of the 1x4s under it, until enough strain was put on it to "pop" it off. Then the large 1&11/16 nut was a bear. It required a short pipe wrench (so it fit in the tub) and a hammer to brake it loose.
  • Victor from League City, TX
  • Difficulty Level:
    Difficult
  • Total Repair Time:
    More than 2 hours
  • Tools:
    Nutdriver, Pliers, Screw drivers, Socket set, Wrench (Adjustable), Wrench set
89 of 105 people found this instruction helpful.
Was this instruction helpful to you?
Thank you for voting!
Fixes Symptom 1% of time

This split ring is supplied by the original equipment manufacturer, and it is designed to secure the tub bearing in washing machines. It is a circular metal ring, with an outer diameter of 2 inches. The ring has a split or gap, which allows it to expand and contract for easy installation and removal. It is typically located on the inner side of the washing machine outer tub, where it provides stability and prevents the washer from excessively shaking during use. It is normal for the split ring to become worn, corroded, or damaged due to age, exposure to moisture, and excessive stress. A faulty split ring will lead to a noisy, unstable washer and eventually cause the tub assembly to fall out of alignment. Remove the washer panels to access the outer tub and split ring. Carefully detach the damaged split ring from the tub and position the new split ring in its place. Ensure that it is properly aligned and securely fastened before reattaching the panels.

  No Longer Available
PartSelect Number PS1766022
Manufacturer Part Number WH02X10265

Replacing your General Electric Washer Washer Split Ring

Replacing your Washer Split Ring