EasyApplianceParts is now PartSelect! We've merged our sites to provide a better shopping experience for you.   Full Details
Back
Back
Keep typing for more specific results...
Models > GI5FSAXVY02 > Symptoms > Fridge too warm

Parts That Fix Whirlpool Refrigerator GI5FSAXVY02 Fridge too warm

Fridge too warm is a commonly reported symptom for the GI5FSAXVY02 Whirlpool Refrigerator, and we have put together a full guide on how to fix this. This advice is based on feedback from people who own this exact appliance. We have listed the most common parts for your GI5FSAXVY02 Whirlpool Refrigerator that will fix Fridge too warm. We have included repair instructions, and helpful step-by-step video tutorials. If you are experiencing this issue, not to worry, DIYers just like you have fixed this, and shared their experience to help you!
Fixes Symptom 62% of time

This capacitor (Refrigerator and Freezer Compressor Run Capacitor, Run Capacitor) provides the voltage or energy current required to start the compressor and keep it running. It allows the compressor in your appliance to easily cycle on and off. This capacitor mounts directly onto the compressor starting relay. If the capacitor is faulty the compressor may get unusually hot and draw excessive amperage. It the compressor overheats, it may fail to run until it cools down again. The compressor may also get noisy from overheating. If this part is totally electrically open, it is defective (often due to overheating) and needs to be replaced. The part measures 1 inch by 1-1/2 inches, and is constructed of plastic with two metal wire terminals. This item includes 1 capacitor, sold individually. This part comes in black.

$ 42.95
  In Stock
PartSelect Number PS11757023
Manufacturer Part Number WPW10662129

Replacing your Whirlpool Refrigerator Refrigerator Capacitor

Replacing your Refrigerator Capacitor

Customer Repair Stories

Both comparments very warm but fan working and lights on
Bought Capacitor, but I had to purchase Combo Start Up Kit that Cap goes into. The site said that 78% of the time my problem of both compartments being warm were resolved/repair by replacing Capacitor, but when the item was replaced it did not and my son looked further and found that it would then be the Combination Start Up Kit (Part# PS11740412), which starts the compressor. Thanks to this site the video used to install both parts. I was able to use the old Capacitor and I am returning the new one first purchased.
  • Lisa from Yulee, FL
  • Difficulty Level:
    Very Easy
  • Total Repair Time:
    15 - 30 mins
  • Tools:
    Screw drivers, Socket set
19 of 20 people found this instruction helpful.
Was this instruction helpful to you?
Thank you for voting!
My refrigerator stopped cooling and the freezer section stopped freezing
I knew the chances of all the freon leaking out was unlikely so I looked at the wiring to the compressor and there was a capacitor and a starter/overload so i figured I would start there. I went on line and found the parts at this site and they were less than the minimum service call charge for a service tech so I figured what the heck let's give her a shot so I did give it a shot. I ordered the parts and they were there in less time than a service tech could come out and i installed the parts and guess what for 90.00 in parts and 15 minutes in time I repaired my refrigerator. Thanks guys, It took less time to order the parts than it did to make the repair so thanks, your website rocks and is very well designed so my hat is off to you guys!
  • garth from forest lake, MN
  • Difficulty Level:
    Really Easy
  • Total Repair Time:
    15 - 30 mins
  • Tools:
    Nutdriver, Screw drivers
426 of 528 people found this instruction helpful.
Was this instruction helpful to you?
Thank you for voting!
Fixes Symptom 21% of time

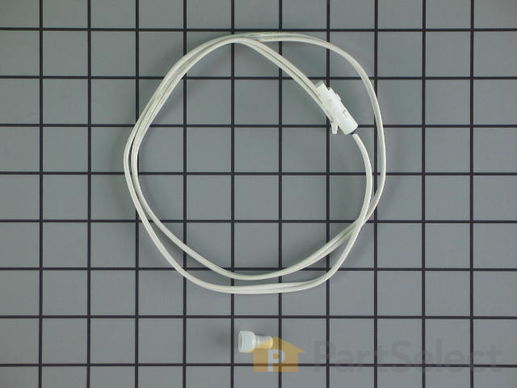
This long harness thermistor kit is what helps monitor and regulate the temperature inside your refrigerator. It can be located in either the freezer compartment near the evaporator coils or in the fresh food compartment near the airflow channels, depending on the model. If you notice issues like excessive icing in the freezer, inadequate cooling in the refrigerator, temperature fluctuations, or error messages on the display panel, it indicates a potential problem with the thermistor. Since your fridge will not be able to maintain the desired temperature, this results in food spoilage, inefficient cooling, and potential damage to the cooling components. To replace the thermistor, disconnect it from the connector plug or wiring harness and remove any mounting brackets or clips using a screwdriver if necessary. Remember to consult your user manual to determine the required number of thermistors, as they are sold individually as OEM replacement parts.

$ 42.95
  In Stock
PartSelect Number PS2003772
Manufacturer Part Number 12002355

Replacing your Maytag Refrigerator Thermistor

Replacing your Thermistor

Customer Repair Stories

Our refrigerator was too cold as the thermistor seems to have gone
It was great. We replaced the thermistor A little difficult to get to the thermistor but once we found it five minutes. My refrigerator seems happy but we will monitor it and see.
  • Ellen from SUN CITY WEST, AZ
  • Difficulty Level:
    Really Easy
  • Total Repair Time:
    15 - 30 mins
  • Tools:
    Screw drivers
19 of 29 people found this instruction helpful.
Was this instruction helpful to you?
Thank you for voting!
The refrigerator was freezing most products
Remove the light cover. Use a flat head screw driver to push in the tabs on the back of the program mount and pull down to expose the computer board. The Thermistor is clipped on under the vent holes on the right side. Cut both wires to remove the old thermistor strip a 1/4 inch off the remaning wires and the new thermistor wires twist both ends together crimp on the wire caps snap in the new thermistor reinstall the program board until the retainer clips snap into place, slide the light cover back on.
  • michael from MARION, IL
  • Difficulty Level:
    Easy
  • Total Repair Time:
    Less than 15 mins
  • Tools:
    Pliers, Screw drivers
26 of 29 people found this instruction helpful.
Was this instruction helpful to you?
Thank you for voting!
Fixes Symptom 9% of time

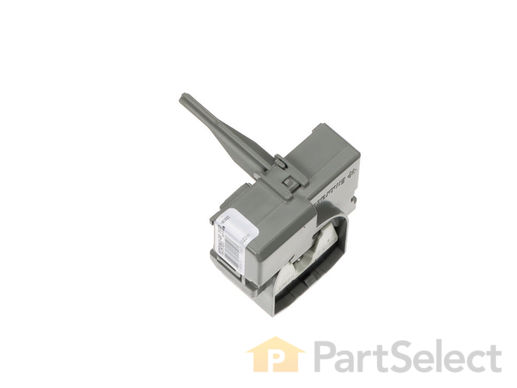
This compressor start relay is for refrigerators. The compressor start relay attaches to the compressor and helps start the compressor motor. Safely store any food that could deteriorate while the power is off and unplug the refrigerator before installing this part.

$ 49.93
  In Stock
PartSelect Number PS11750123
Manufacturer Part Number WPW10197428

Replacing your Whirlpool Refrigerator Refrigerator Compressor Start Relay

Replacing your Refrigerator Compressor Start Relay
Fixes Symptom 5% of time

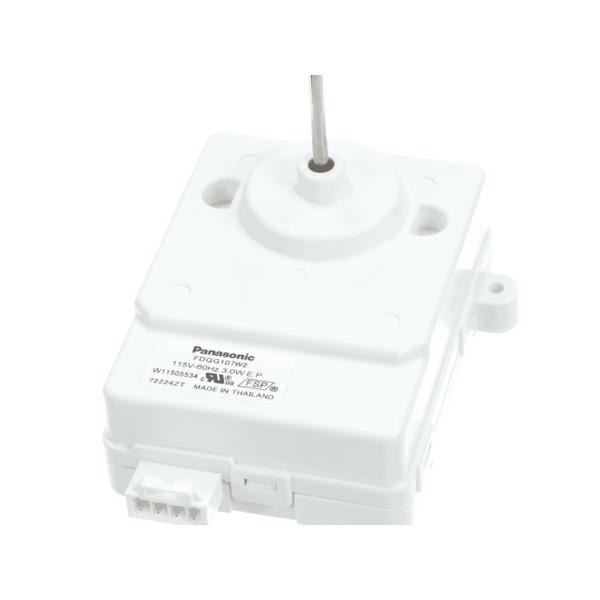
This is a condenser fan motor for your refrigerator/freezer. This fan motor is most commonly used with frost-free refrigerators with a condenser coil. It controls the rotation of the condenser fan blade. When the compressor runs, so does this fan, circulating air through the refrigerator grille, cooling the compressor and condenser coils. This fan motor also helps to evaporate excess water in the drain pan. This model is all white in color, and is roughly 4 inches long, 3 inches wide, and 3.5 inches thick.

$ 61.33
  In Stock
PartSelect Number PS16744942
Manufacturer Part Number W11613295

Replacing your Whirlpool Refrigerator Condenser Fan Motor

Replacing your Condenser Fan Motor

Customer Repair Stories

Freezer and refridgerator just stopped working.
The Condenser Fan Motor was already removed due to searching for the problem. The new fan motor looked different from the original but I felt very comfortable that Part Select had sent me the new part showing original part number changing numbers over the years. Simply placed the fan blades onto the new motor lined up 2 of the holes placed screws and tightened then plugged the wire ribbon into the Condensor Fan Motor, plugged in the Refridgerator and it worked beautifully.

The instruction video on the Part Select Web Site made it so incredibly easy to install. Installation took under 3 minutes!
  • Daniel F from CALEDONIA, MN
  • Difficulty Level:
    Very Easy
  • Total Repair Time:
    Less than 15 mins
  • Tools:
    Screw drivers
1 person found this instruction helpful.
Was this instruction helpful to you?
Thank you for voting!
Refrigerator would cool for a very short period of time. Then the compressor would shutdown via internal thermal overload or high head pressure. This was caused by the lack of airflow across the condenser coils and compressor.
(1) Slide out appliance and remove power source. (2) Removed lower access cover on rear of refrigerator. (3) Disconnected plug to the condenser fan motor. (4) remove blades by pulling gently forward (5) remove mounting hardware holding the fan motor (3 screws) (6) motor is now free and new motor can be installed
  • Daniel from RICHTON, MS
  • Difficulty Level:
    Very Easy
  • Total Repair Time:
    Less than 15 mins
  • Tools:
    Nutdriver, Pliers
9 of 17 people found this instruction helpful.
Was this instruction helpful to you?
Thank you for voting!
Fixes Symptom 2% of time

The p-trap drain tube kit may also be known as the duck bill, or the drain pipe, and it is compatible with your refrigerator. The function of the p-trap drain kit is to carry the water that has formed during the defrost cycle to the bottom of the refrigerator, where your drain pan is located. The tools you will need for this repair include a 1/4-inch nut driver and a small flat-blade screwdriver. To do this repair you will need to pull the refrigerator forward in order to reach the lower access panel at the back. This kit includes the tube extension piece and spacer.

$ 41.95
  In Stock
PartSelect Number PS8691807
Manufacturer Part Number W10619951

Replacing your Whirlpool Refrigerator Refrigerator P-Trap Drain Tube Kit

Replacing your Refrigerator P-Trap Drain Tube Kit

Customer Repair Stories

Freezer icing up .
Watched Partselect video of P-trap installation.Removed water line & back cover& disconnected wires to water solenoid .Removed old drain tube & old problematic rubber funnel. Used contact cleaner to clean rubber residue from drain line and used a little silicone to aide reassembly. Job went well thanks to video.
  • Rich from Lansing, IL
  • Difficulty Level:
    Easy
  • Total Repair Time:
    30 - 60 mins
  • Tools:
    Nutdriver, Wrench (Adjustable)
16 of 17 people found this instruction helpful.
Was this instruction helpful to you?
Thank you for voting!
Water leaking from bottom of refrigerator onto floor
The video on website is very good and explains everything in detail. Just follow the directions. This is EASY!!!!
  • Jack from DINUBA, CA
  • Difficulty Level:
    Really Easy
  • Total Repair Time:
    30 - 60 mins
  • Tools:
    Nutdriver, Screw drivers
107 of 119 people found this instruction helpful.
Was this instruction helpful to you?
Thank you for voting!