Your coupon for will be reflected when you check out!
✖
Your coupon for
✖
Hello!
You're visiting the PartSelect site in U.S.
Would you like to shop on the Canadian site?
Stay on this site
Go to Canadian site
✖
Model Number Locations
1Select Category Type
Select Category Type
2Select Product Type
Select Product Type
3Select {MODEL} Type
Select {MODEL} Type
Sample Model Number Tags
Model numbers can be made up of numbers (1005400, for example) or a combination of letters and numbers (LAT1000AAE). The model number will most likely appear on either a paper sticker or a metal plate. Your appliance's model number tag may look similar to the sample model number tags shown here (model number highlighted in yellow):
Model has been saved to My Models. If you're not signed in, your lists are available on this device and will expire within 30 days.
Model has been saved to My Models.
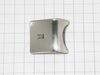
This handle screw, also known as a mounting bolt, is a mounting screw to help secure the door handle to your refrigerator door. If your handle is loose, you may just need to tighten the screw. If your...
$14.94
In Stock
Order now and your part arrives in 2-3 business days!
This door basket assembly is supplied by the original manufacturer to provide storage for various food items in refrigerators. It consists of a white plastic base and a transparent shield, measuring 1...
$62.97
In Stock
Order now and your part arrives in 2-3 business days!
Refrigerator Air Filters are a key component for neutralizing odors and ensuring a fresh stream of air into your refrigerator. Swapping your old filter out for a fresh one isn’t difficult and should t...
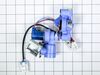
This wiring harness is 20 pin and 3 pin. Replacement ice maker for LG refrigerators. The ice maker assembly contains the mold to form ice and the ejection controls to fill the ice storage bin. Unplug...
$189.44
In Stock
Order now and your part arrives in 2-3 business days!
The Water filter reduces contaminants such a s lead, iron, and chlorine from drinking water. Replace every 6 months or 200 gallons for best performance.
$81.95
In Stock
Order now and your part arrives in 2-3 business days!
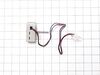
This water dispenser button is a genuine OEM part designed for LG refrigerators. When you push the button, a valve is activated inside the refrigerator, which releases water from the internal water su...
$65.53
In Stock
Order now and your part arrives in 2-3 business days!
This water inlet valve in your refrigerator, also called a solenoid valve or water control valve, regulates water flow to the icemaker and dispenser. It is found at the rear of the appliance, where it...
$130.83
In Stock
Order now and your part arrives in 2-3 business days!
Enhance the performance of your LG refrigerator with the genuine OEM Defrost Sensor Assembly. This product plays an essential role in maintaining the correct temperature within your refrigerator, as i...
$42.48
In Stock
Order now and your part arrives in 2-3 business days!
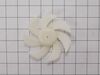
Experience optimal cooling efficiency with this quality Evaporator Fan Motor by LG. Crafted from premium, durable materials, this genuine OEM item flawlessly circulates air through your refrigerator's...
$82.91
In Stock
Order now and your part arrives in 2-3 business days!
was easy watching youtube video of how to replace whole ice maker, was only 3 screws, remove from the door, a couple of screws hold it to the flat piece, route the wires around the unit, connect the plug as installing it in the door, position it, and tighten 3 screws, that easy
To replace the ice maker you first have to remove the back mounting assembly, which ice maker is attached to.
Only three Phillips head screws need to be removed: 2 on the bottom and 1 on the back of the ice maker mounting assembly. Do not remove the two diagonal Phillips head
... Read more screws holding the dispenser motor on the reverse side of the mounting assembly.
As you pull out the mounting assembly to the front you will see a connector on the top inside, which must be unplugged. A narrow standard screw driver will help the connector lock to release; slide the screwdriver tip under the connector lock clip and it will allow the connector to be unplugged.
Once the ice maker mounting assembly is removed and placed on a flat surface it will be self evident as to how to remove and replace the ice maker. The 1” tape might be needed during the cable re-routing process. However you can reuse the original tape required to be removed during the ice maker remove and replace process, if possible.
Reinstall the ice maker mounting assembly in the reverse order it was removed.
Apply power to the refrigerator.
Cycle the ice maker to Off and then back to On. It may take an hour or two before the ice maker produces ice because the temperature inside the ice maker must reach “0” degrees Fahrenheit before it will begin making ice.