EasyApplianceParts is now PartSelect! We've merged our sites to provide a better shopping experience for you.   Full Details
Back
Back
Keep typing for more specific results...
Models > GSD3300D35BB > Symptoms > Not draining

Parts That Fix General Electric Dishwasher GSD3300D35BB Not draining

Not draining is a commonly reported symptom for the GSD3300D35BB General Electric Dishwasher, and we have put together a full guide on how to fix this. This advice is based on feedback from people who own this exact appliance. We have listed the most common parts for your GSD3300D35BB General Electric Dishwasher that will fix Not draining. We have included repair instructions, and helpful step-by-step video tutorials. If you are experiencing this issue, not to worry, DIYers just like you have fixed this, and shared their experience to help you!
Fixes Symptom 54% of time

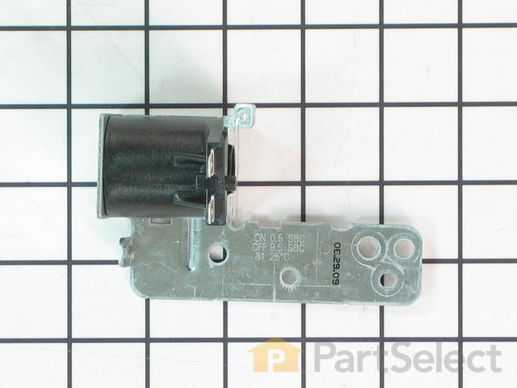
This valve opens in order for the water to drain out of the dishwasher.

$ 45.95
  In Stock
PartSelect Number PS1481923
Manufacturer Part Number WD21X10268

Replacing your General Electric Dishwasher Drain Solenoid and Bracket Assembly

Replacing your Drain Solenoid and Bracket Assembly

Customer Repair Stories

Dishwasher solenoid overheated
If you are replacing an overheated solenoid that had the plastic melt, don't forgot to order a armature and link as well. I made this mistake and had to wait another week to fix the dishwasher. The repair wasn't too bad. The most time consuming part was putting the E-clip retainer ring back on the diverter shaft. Tipping the dishwasher back some really helped for me to have more room to see and work with.
  • Matt from Summerfield, NC
  • Difficulty Level:
    A Bit Difficult
  • Total Repair Time:
    1- 2 hours
  • Tools:
    Nutdriver, Screw drivers
19 of 22 people found this instruction helpful.
Was this instruction helpful to you?
Thank you for voting!
Dishwasher water will not drain.
Very easy about 5 min replacement, Checked electrical conductivity to verify I had a bad solinoid, after I received the new part. I removed and replaced part by only removing and re-installed 2 screws and spring. Dishwasher worked like new.
  • Hector from West Melbourne, FL
  • Difficulty Level:
    Really Easy
  • Total Repair Time:
    Less than 15 mins
  • Tools:
    Screw drivers
47 of 59 people found this instruction helpful.
Was this instruction helpful to you?
Thank you for voting!
Fixes Symptom 17% of time

This coupler, also known as a hose connector, is made of white plastic and is about one inch in height, and just over one inch in length. Replacing the coupler is a fairly easy repair. The hardest part of the repair is accessing the spray arm and filter to remove them, in order to replace the coupler. In order to complete this repair, you will need a flat head screwdriver and a 4-inch nut driver.

$ 13.95
  In Stock
PartSelect Number PS1517648
Manufacturer Part Number WD01X10342
Fixes Symptom 8% of time

This part fits just under the fine filter assembly and supports the lower spray arm.

$ 73.67
  In Stock
PartSelect Number PS1765974
Manufacturer Part Number WD12X10244

Replacing your General Electric Dishwasher Dishwasher Spray Arm Base

Replacing your Dishwasher Spray Arm Base

Customer Repair Stories

Dishwasher wasn't draining
After about an hour of trying to remove the old lower spray arm base (including a trip to Lowe's to get the adjustable wrench), I realized, like a bozo, that I was *tightening* it. So, once I got it loose again, replace it was pretty easy, though still a little tricky getting the spray arm attached w/ fine filter in place. Once that Jenga game was re-assembled, (and clearing out all the extra food debris that led to its not draining in the first place), I ran it through a cycle and it's worked ok ever since. Still likely to replace it with a far newer (this model was released in '98) model. Would buy from the website again.
  • Chris from Barboursville, VA
  • Difficulty Level:
    Really Easy
  • Total Repair Time:
    15 - 30 mins
  • Tools:
    Nutdriver, Wrench (Adjustable)
0 of 1 people found this instruction helpful.
Was this instruction helpful to you?
Thank you for voting!
Clip broken that holds sprayer arm in base
Checked video instructions on you tube. Very simple process. Proud of myself. Glad I did not call "high dollar" technician to do it. You tube is wealth of info.
  • Tom from Louisville, KY
  • Difficulty Level:
    Very Easy
  • Total Repair Time:
    15 - 30 mins
  • Tools:
    Wrench (Adjustable)
1 person found this instruction helpful.
Was this instruction helpful to you?
Thank you for voting!
Fixes Symptom 5% of time

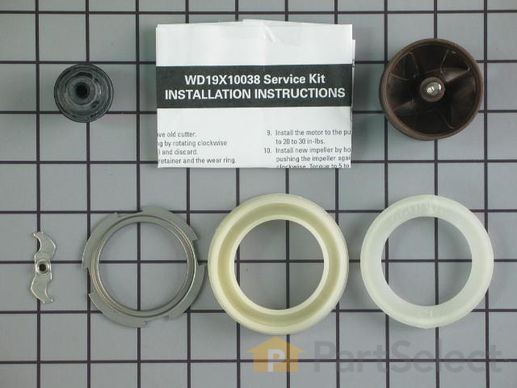
This impeller and motor shaft seal kit is used in dishwashers to rebuild the circulation pump. If your dishwasher has any of the following symptoms, replacing the part could be the solution: circulation pump is leaking, not cleaning dishes, not draining, making loud or odd noises. The tools needed for this repair are an adjustable wrench, 1/4 inch nut driver, 5/16 inch nut driver, Phillips screwdriver, flathead screwdriver, flat file, and needle nose pliers. Remember to unplug your dishwasher before installing this part and refer to the manual provided by the manufacturer for installation instructions and a detailed diagram.

$ 51.43
  In Stock
PartSelect Number PS1017766
Manufacturer Part Number WD19X10038

Replacing your General Electric Dishwasher Circulation Pump Impeller Kit

Replacing your Circulation Pump Impeller Kit

Customer Repair Stories

Frozen discharge line
Cleared line. Dishwasher didn't pump. Replaced pump kit. Discovered schematic attached to frame that showed ball in tube- not in sump. Replaced ball in proper place. Works great.
  • Terry from Gooding, ID
  • Difficulty Level:
    Really Easy
  • Total Repair Time:
    More than 2 hours
  • Tools:
    Nutdriver, Screw drivers, Socket set, Wrench (Adjustable)
0 of 1 people found this instruction helpful.
Was this instruction helpful to you?
Thank you for voting!
Fixes Symptom 5% of time

The pump ejects the water from the unit.

$ 161.23
  In Stock
PartSelect Number PS3486941
Manufacturer Part Number WD26X10051

Replacing your General Electric Dishwasher Dishwasher Pump And Motor Assembly

Replacing your Dishwasher Pump And Motor Assembly

Customer Repair Stories

Dishwasher pump was frozen
Ordered pump mechanism and replaced defective pump. A very easy replacement
  • George from Loving, NM
  • Difficulty Level:
    Easy
  • Total Repair Time:
    30 - 60 mins
  • Tools:
    Pliers, Screw drivers, Wrench set
0 of 1 people found this instruction helpful.
Was this instruction helpful to you?
Thank you for voting!
Fixes Symptom 4% of time

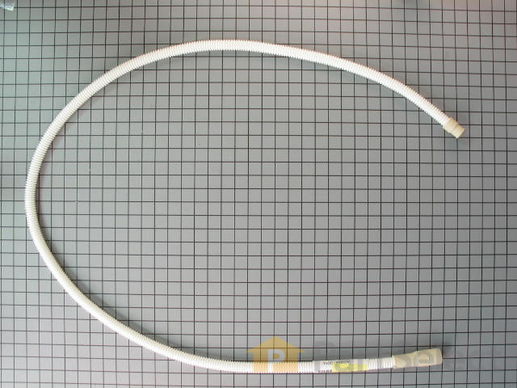
This drain hose is an OEM, manufacturer-approved replacement part for your dishwasher. The drain hose filters out the wastewater from the dishwasher. If there is a hole in it, water will leak out of your dishwasher. Shut off the water and power to the unit before beginning this repair. Accessing the drain hose involves unscrewing the dishwasher and pulling it out. Remove the clamp holding the hose in place to its connection under the sink, using a 5/16ths socket. Disconnect the fill line. Use a 1/4 inch nut driver to loosen the clamp at the other end of the drain hose. Keep a towel handy for any water still inside. Keep the clamps for use on your new drain hose. Reinstall all hoses and lines in reverse order.

$ 44.95
  In Stock
PartSelect Number PS260686
Manufacturer Part Number WD24X10014

Customer Repair Stories

Couldn't drain water
I connected one end of hose to the drain using a hose clamp and screwdriver then connected the other end to the dishwasher using anouther hose clamp and a screwdriver..
  • Janice from Rockville, MO
  • Difficulty Level:
    Really Easy
  • Total Repair Time:
    Less than 15 mins
  • Tools:
    Screw drivers
4 of 9 people found this instruction helpful.
Was this instruction helpful to you?
Thank you for voting!
Stinky Dishwasher
I pulled the dishwasher out and detached the drain hose. I attached the new drain hose after cleaning out the connection to the garbage disposal.

Now my dishwasher doesn't stink anymore!
  • Jeremy from Hailey, ID
  • Difficulty Level:
    Easy
  • Total Repair Time:
    30 - 60 mins
  • Tools:
    Screw drivers, Socket set
8 of 9 people found this instruction helpful.
Was this instruction helpful to you?
Thank you for voting!
Fixes Symptom 3% of time

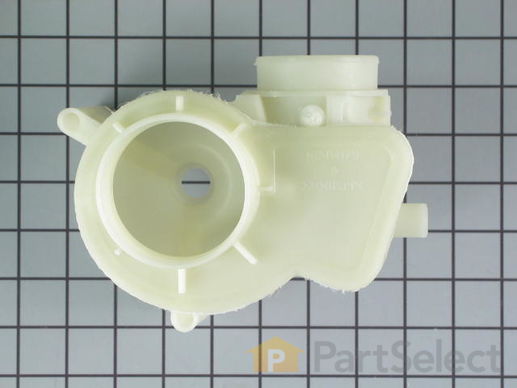
Please keep in mind this housing is for single drain outlet models only. This part will not work for dual outlet port models.

$ 73.21
  In Stock
PartSelect Number PS259587
Manufacturer Part Number WD19X10020
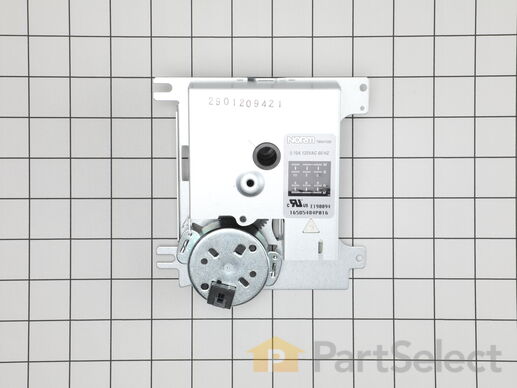
8 TIMER
Fixes Symptom 2% of time

This is a timer for use in dishwashers. The timer is responsible for ensuring the various parts of the dishwasher cycle activate at the correct time. If the timer is in any way broken or faulty, it will cause your dishwasher to not start, take longer than normal or finish too early, and will need to be replaced as soon as possible. This timer features a mostly metal construction and features a wire terminal on its top side. Replacing this timer will require a few tools, like a screwdriver or socket wrench, and some disassembly of your dishwasher will be necessary. This timer is an individual OEM part, so it does not come with any accessories.

$ 80.31
  In Stock
PartSelect Number PS17626228
Manufacturer Part Number WD21X33641
Fixes Symptom 2% of time

This water inlet valve should be located behind the lower kickplate panel in either the right or left corner. The attaching solenoid on the valve open and close according to the desired amount of water needed.

$ 46.95
  In Stock
PartSelect Number PS3654179
Manufacturer Part Number WD15X10014

Replacing your General Electric Dishwasher Dishwasher Inlet Valve

Replacing your Dishwasher Inlet Valve

Customer Repair Stories

Leaking water when in use.
Part was an exact match. Make sure to use plumber's tape on all threads. Had to really tighten fittings to prevent leaks. Screws are a little difficult to get to. Test for leaks first, before final installation.
  • J from Walnut, CA
  • Difficulty Level:
    Easy
  • Total Repair Time:
    1- 2 hours
  • Tools:
    Pliers, Screw drivers, Socket set
16 of 22 people found this instruction helpful.
Was this instruction helpful to you?
Thank you for voting!
Water leak, small puddle to front left of dishwasher
You'll need to remove the front toe kick and (if installed, the GE Profile baffling for additional silencing action).

You will need to disconnect the right wire connection to access the right screw (and may need to use a flat head screwdriver). You can then remove the 2 screws that hold the Valve Water Inlet on.
... Read more >You will then need to loosen and the hose clamp that attaches the water line to the Valve Water Inlet. You may need to force it undone since the rubber connection is pretty secure around the water tube inlet.

Disconnect the plastic wire housing from the Valve Water Inlet and you should now have the Valve Water Inlet disconnected.

Reverse the order and reconnect everything and you should be good to go!

Double-check for any leaks prior to pushing everything back in :)
  • Greg from Burlington, VT
  • Difficulty Level:
    Easy
  • Total Repair Time:
    15 - 30 mins
  • Tools:
    Nutdriver, Socket set
64 of 84 people found this instruction helpful.
Was this instruction helpful to you?
Thank you for voting!