Your coupon for will be reflected when you check out!
✖
Your coupon for
✖
Hello!
You're visiting the PartSelect site in U.S.
Would you like to shop on the Canadian site?
Stay on this site
Go to Canadian site
✖
Model Number Locations
1Select Category Type
Select Category Type
2Select Product Type
Select Product Type
3Select {MODEL} Type
Select {MODEL} Type
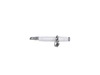
Sample Model Number Tags
Model numbers can be made up of numbers (1005400, for example) or a combination of letters and numbers (LAT1000AAE). The model number will most likely appear on either a paper sticker or a metal plate. Your appliance's model number tag may look similar to the sample model number tags shown here (model number highlighted in yellow):
Model has been saved to My Models. If you're not signed in, your lists are available on this device and will expire within 30 days.
Model has been saved to My Models.
This burner cap is for cooktops. Burner cap fits on top of the burner head. The burner cap protects the burner head from spills and helps spread out the burner flame for even heating.
$36.24
In Stock
Order now and your part arrives in 2-3 business days!
This burner cap is for cooktops. Burner cap fits on top of the burner head. The burner cap protects the burner head from spills and helps spread out the burner flame for even heating.
$38.15
In Stock
Order now and your part arrives in 2-3 business days!
Discover the power of the genuine OEM Bosch Display Module, designed to perfectly fit and function with specific models of Bosch, Thermador, and Gaggenau appliances. This essential part controls and b...
$198.95
In Stock
Order now and your part arrives in 2-3 business days!
Sold individually.
This burner cap is for cooktops. Burner cap fits on top of the burner head. The burner cap protects the burner head from spills and helps spread out the burner flame for even heating.
$38.15
In Stock
Order now and your part arrives in 2-3 business days!
Getting to the igniter is trivial, only requiring the removal of the stove bottom (two set screws) and a heat shield (the heat shield is held in place by screws with size 20 star-driver heads). At this point a splice could be made to the original wires, IF ceramic wire nuts were included with the replacement igniter (but, alas, they are n
... Read moreot). IF a splice were made the repair would be a very easy, 10-minute job.
To replace the igniter then requires the complete removal of the back of the range (17, size 20 star-driver, screws, if I remember correctly), plus the removal of an additional heat shield (one more screw). Then one must carefully lift and free the back from tabs on both sides that are set into slots. (Oh, and you probably want to loosen the electrical cord shield that interferes with the back coming off.) The new igniter wire plug is only then very easily re-attached to existing harness. Everything is then replaced to finish the repair.
None of this is difficult, if you don't mind moving your range away from the wall and dealing with on the order of 20 screws. Personally, I think I would have rather found an igniter with ceramic wire nuts to splice to the original wires (certainly not as elegant as replacing igniter and wires entirely, but far quicker and easier).