Your coupon for will be reflected when you check out!
✖
Your coupon for
✖
Hello!
You're visiting the PartSelect site in U.S.
Would you like to shop on the Canadian site?
Stay on this site
Go to Canadian site
✖
Model Number Locations
1Select Category Type
Select Category Type
2Select Product Type
Select Product Type
3Select {MODEL} Type
Select {MODEL} Type
Sample Model Number Tags
Model numbers can be made up of numbers (1005400, for example) or a combination of letters and numbers (LAT1000AAE). The model number will most likely appear on either a paper sticker or a metal plate. Your appliance's model number tag may look similar to the sample model number tags shown here (model number highlighted in yellow):
Model has been saved to My Models. If you're not signed in, your lists are available on this device and will expire within 30 days.
Model has been saved to My Models.
This inner door glass is a heat resistant part that fits into a stove, oven, wall oven, cooktop, or range as the inner glass panel of the appliance door. The glass panel allows you to see the items be...
$89.22
In Stock
Order now and your part arrives in 2-3 business days!
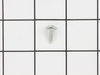
This is a multi-use and multi-appliance screw. It can be used on a microwave, refrigerator, range/oven, air conditioner, dehumidifier, washer, or dryer. The measurements of this screw are 8 x 1/2 inch...
$20.95
In Stock
Order now and your part arrives in 2-3 business days!
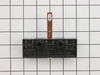
The temperature sensor measures the temperature inside the oven. If your oven is too hot, not heating evenly, is not heating enough when baking, or simply will not start, you could have a faulty tempe...
$68.26
In Stock
Order now and your part arrives in 2-3 business days!
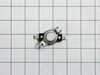
This kit contains 4 grate feet for a range. These are the feet to fit your burner grates so the burner will not scratch your cooktop. The are black in color and made of rubber. These feet are fitted w...
$11.95
In Stock
Order now and your part arrives in 2-3 business days!
This bottle of non-abrasive cooktop cleaner breaks down and gets rid of the hardest baked-on stains and residue without causing any harm to your appliance. The bottle is 10 oz and does not require a l...
This part is the replacement door gasket for your oven. It is made of gray rubber and is sold individually. The door gasket runs along the circumference of the oven door and creates a seal that insula...
$45.14
In Stock
Order now and your part arrives in 2-3 business days!
Ask our experts a question about this model and we'll get back to you as soon as possible!
1 question answered by our experts.
Sort by:
< Prev
1
Next >
Search filter:
Clear Filter
Your search term must have 3 or more characters.
Keep searches simple. Use keywords, e.g. "leaking", "pump", "broken" or "fit".
Sorry, we couldn't find any existing answers that matched.Try using some different or simpler keywords, or submit your new question by using the "Ask a Question" button above!
Colin
October 24, 2023
Error code F1-E0. need to replace user interface. what part number do i need?
For model number KDRU783VSS03
Hello Colin, thank you for writing. The F1-E0 error code indicates a communication failure between the oven's control board and the electronic oven sensor. This can be caused by a faulty sensor or a malfunctioning control board. The Control Board is discontinued with no replacement. The Sensor is PS11748765. We hope this helps.
Easily removed the door from the oven by releasing clips attached to the door hinge -- very nicely engineered. Removed about 6 philips head screws to allow the door assembly to be taken apart for access to the glass. Lifted out the broken glass, cleaned the inside of the door, installed the new glass, reassembled the door (a two minute
... Read more project), and reattached the door to the oven. Cleaning the inside of the door took longer than the actual repair!
Removed the oven door by following the straightforward instructions in the user's manual. Removed philips head screws to take the door assembly apart. Removed clips holding the two inner door glass plates, and the two plates. Removed the clamp holding the broken glass plate, then the glass and associated glass fragments. Then cleaned
... Read moreand re-installed the three glass plates and their clamps in reverse order. Re-assembled the door and re-attached to the oven. Only cautionary note is to be careful when removing, handling and re-installing the various glass plates. Watch out for fragments from the broken plate; they can cut you and/or fall on the floor.
Important note: hinges are left and right do not mix them up or door will not re-assemble properly and you'll get to do it twice.
Steps I took:
Removed the oven door per the instructions in the oven operator manual. Removed several screws to release the interior steel liner.
Removing the steel liner was a
... Read more bit of a hassle, Had to manipulate it to get it loose but it eventually came away from the stainless steel exterior door panel.
Disassembled the interior glass layers, there are three. The glass you need to replace is the last layer, of course. removed and discarded the broken glass. Note: the interior glass is not secured by a bracket or screws, it is held in place by compression of the interior steel liner and a another liner that is inside the door assembly (you'll figure this out when you dis-assemble).
Another note: there is a fluffy material gasket between these two liners, use care when you disassemble or the fluffy gasket will turn into confetti.
Take the opportunity to clean all glass and parts of the accumulated oven grease.
Re-assembled door and re-installed...looks good.
Another note, getting the door back together requires a little patience because there are clamping overlaps of the steel liner to the SS exterior door panel. Be prepared to jockey things around a little and make sure all your screw holes are all lined up before you begin to button it up. Remember, hinges are left and right they are not interchangeable.


 – Part Number: W11675844")


")

