EasyApplianceParts is now PartSelect! We've merged our sites to provide a better shopping experience for you.   Full Details
Back
Back
Keep typing for more specific results...
Models > KEBS109BSS00 > Symptoms > Will Not Start

Parts That Fix KitchenAid Wall Oven KEBS109BSS00 Will Not Start

Will Not Start is a commonly reported symptom for the KEBS109BSS00 KitchenAid Wall Oven, and we have put together a full guide on how to fix this. This advice is based on feedback from people who own this exact appliance. We have listed the most common parts for your KEBS109BSS00 KitchenAid Wall Oven that will fix Will Not Start. We have included repair instructions, and helpful step-by-step video tutorials. If you are experiencing this issue, not to worry, DIYers just like you have fixed this, and shared their experience to help you!
Fixes Symptom 68% of time

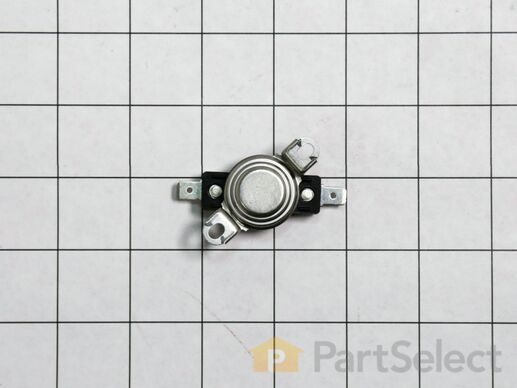
This thermal fuse is a manufacturer-approved replacement part for your oven. It is common for the oven to lose power after completing a self-cleaning cycle, and the thermal fuse is often at fault. Replacing the blown fuse is a fairly easy repair, and involved removing the top of the oven to swap out the fuse. Make sure to turn off the power source to the oven before beginning this repair.

$ 28.30
  In Stock
PartSelect Number PS11756138
Manufacturer Part Number WPW10545255

Customer Repair Stories

Thermal fuse blew while oven was in use and we had a power outage.
Thanks to PartSelect they suggested to try a new thermal fuse first. They also gave a brief description of how to install it. There advice was right on. Replaced the fuse in about 20 minutes from throwing the breaker to turning it back on.

Instructions: Turn off breaker. Remove oven door. Remove screws holding it to cabinet. Remove racks. Slide oven out about four inches. Remove four screws holding control panel. Remove thermal fuse. Replace thermal fuse and put it back together.

Thank you PartSelect. Thermal fuse cost me about $28.00 with shipping. This repair would have cost a couple of hundred if I had to call a repair technician.
  • Jeffrey from TOWNSEND, TN
  • Difficulty Level:
    Really Easy
  • Total Repair Time:
    15 - 30 mins
  • Tools:
    Pliers, Screw drivers
13 of 16 people found this instruction helpful.
Was this instruction helpful to you?
Thank you for voting!
After running oven in BROIL for lengthy period, entire oven shut off, thermal fuse blown
USE 2 PEOPLE FOR SAFETY! SWITCH OFF OVEN POWER BREAKER!! Remove screws attaching oven to wall opening, slide out entire oven just far enough to get to 2 screws on either side of controls, remove those screws (may need stubby screwdriver), lift control front, opens forward, have 2nd person hold control panel cover while removing centered thermal fuse (plugs on both ends, may need needle-nose pliers to grip plug on fuse.) Remove old fuse, plug in new one. Close control panel, replace side screws, TEST POWER BEFORE pushing oven back into wall, replace wall-holding screws. Less than 30 minutes. EXTRA PERSON MAKES EASY!
  • JAMES P from UPATOI, GA
  • Difficulty Level:
    Very Easy
  • Total Repair Time:
    30 - 60 mins
  • Tools:
    Pliers, Screw drivers
25 of 29 people found this instruction helpful.
Was this instruction helpful to you?
Thank you for voting!
Fixes Symptom 24% of time

This part is for oven ranges, it connects individual wires and protects the device from electrical surges, voltages, and current. With this part, the house power is connected to the range wire harness. Some symptoms replacing the terminal block could be a solution for are little to no heat when baking, element will not heat and/or it will not start. This part will prevent loosening and will reduce damage caused by corrosion (by two different metals). Refer to the instructional diagram for further replacement guidance and exact placement. You must unplug the appliance before installing this part and wear gloves to protect your hands.

$ 26.95
  In Stock
PartSelect Number PS11750972
Manufacturer Part Number WPW10245259

Replacing your Maytag Range Range Terminal Block

Replacing your Range Terminal Block

Customer Repair Stories

The oven and ranges would not heat up and an F9 error was displaying on the Oven Screen.
So, the F9 error indicates a electrical power issue. First I pulled the oven out and verified I had 240 volts at my outlet.

Then I removed the fire panel over the terminal block and the issue was apparent. The nuts on the terminal block were corroded. This had cause the resistance in the connection to raise and burn up the wire to my oven plug at the terminal block.

I removed the whole back panel and everything else seemed OK visually.

1. I go new connectors for the oven plug, stripped the wires, and crimped on the new connectors.

2. The terminal block DOES NOT come with the nuts to connect the wire to the terminal block. Mine were so corroded they had to be replaced. So I went and purchased the correct ones and installed the terminal block and reconnected all the wires.

3. I applied some dielectric grease to the connections through out the process of reinstalling to prevent it from happening in the future.
  • Jared from UNION GROVE, AL
  • Difficulty Level:
    Really Easy
  • Total Repair Time:
    30 - 60 mins
  • Tools:
    Pliers, Screw drivers, Socket set
7 of 7 people found this instruction helpful.
Was this instruction helpful to you?
Thank you for voting!
Burned terminal block and filter board
Removed and replaced above named parts, rewired.Be sure to tighten all nuts that secure wires. I believe this is what caused the problem.
  • Joseph from Decatur, GA
  • Difficulty Level:
    Easy
  • Total Repair Time:
    30 - 60 mins
  • Tools:
    Nutdriver, Screw drivers, Socket set, Wrench set
94 of 203 people found this instruction helpful.
Was this instruction helpful to you?
Thank you for voting!
Fixes Symptom 4% of time

Also known as a meat probe.

$ 72.70
  In Stock
PartSelect Number PS11747165
Manufacturer Part Number WP9755542

Replacing your KitchenAid Wall Oven Range Temperature Probe

Replacing your Range Temperature Probe

Customer Repair Stories

Oven light bulb inop
Taking off the glass lense for the light bulb was harder than I thought. It unscrews counterclockwise, but it was very hard to get off. It would not turn. I ended up using connector pliers I use for work, that has rubber jaws. The lense unscrewed very easy with it. Light also unscrews out. PartSelect.com is the only way to go to buy parts for appliances. It is simple, even has the illustrated parts catalog. And it saves a lot of time and gas, driving around looking for the part!!. PartSelect came through again.
  • Ed from Canyon Country, CA
  • Difficulty Level:
    Easy
  • Total Repair Time:
    Less than 15 mins
1 of 2 people found this instruction helpful.
Was this instruction helpful to you?
Thank you for voting!
faulty meat probe
Not a repair. Just needed to replace the meat probe sensor for the programmable oven. Quick and easy purchase and very fast delivery took care of the problem. I was back in business.
  • Kent from Seattle, WA
  • Difficulty Level:
    Really Easy
  • Total Repair Time:
    Less than 15 mins
38 of 68 people found this instruction helpful.
Was this instruction helpful to you?
Thank you for voting!
Fixes Symptom 4% of time

$ 81.43
  In Stock
PartSelect Number PS11742549
Manufacturer Part Number WP4449751

Customer Repair Stories

upper oven of wall oven would not heat suspected high temp limit switch
removed unit from cabinet tested switch it was OK checked wiring and found shorted out wire leading to switch. cut out bad section and spliced wire back together
problem solved
  • William from Carbondale, CO
  • Difficulty Level:
    Really Easy
  • Total Repair Time:
    15 - 30 mins
  • Tools:
    Nutdriver
1 person found this instruction helpful.
Was this instruction helpful to you?
Thank you for voting!