Back
Back
Keep typing for more specific results...
Models > MHW3505FW1 > Symptoms > Will not drain

Parts That Fix Maytag Washer MHW3505FW1 Will not drain

Will not drain is a commonly reported symptom for the MHW3505FW1 Maytag Washer, and we have put together a full guide on how to fix this. This advice is based on feedback from people who own this exact appliance. We have listed the most common parts for your MHW3505FW1 Maytag Washer that will fix Will not drain. We have included repair instructions, and helpful step-by-step video tutorials. If you are experiencing this issue, not to worry, DIYers just like you have fixed this, and shared their experience to help you!
Fixes Symptom 89% of time

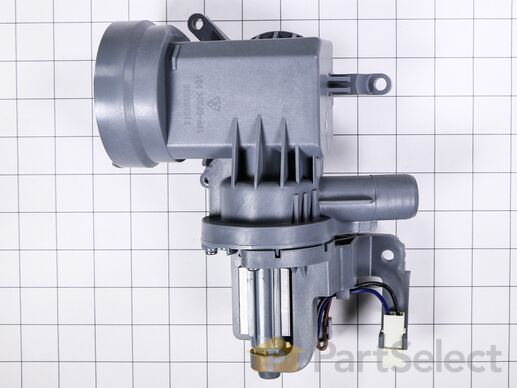
This drain pump for your washer is designed to remove the dirty water during and after the washing cycle. If your washer has water left in it after its washing cycle is over, or if your washer is experiencing leaks around the drain pump, the pump may be damaged or bad and in need of replacement. Ensure you remove and test your drain pump with a multimeter before replacing it. Replacing this pump will require some disassembly of your washer. This pump is sold individually, and does not come with any wire harness or other accessories.

$ 53.95
  In Stock
PartSelect Number PS11756700
Manufacturer Part Number WPW10605427

Customer Repair Stories

F9 E1 error drain pump too long, filter was clear so pump failure
Disconnect water lines and drain lines, unplug unit.
Remove top panel of washer to access the door release, one open remove any clothes and use the shop vac to capture water from the drum. Close the door after sucking up water.
Move washer to access back panel and remove 1/4 screws.
Lay washer on its side and disconnect the power supply to the pump.
Remove the 4 bolts hold the pump to the unit. While removing the pump, use the shop vac to catch any remaining water in the washer.
After old pump is removed place new pump in unit and attach bolts to secure the pump to the washer. Connect the electrical plug to the pump.
Place the unit in the upright position and put the back panel back on the washer.
Place the top panel back on the washer.
Reconnect water lines and turn the water on.
Connect drain line and plug unit in. Once unit is back in position. Turn on unit and wash as normal.
  • Richard from WEST CHESTER, PA
  • Difficulty Level:
    Really Easy
  • Total Repair Time:
    30 - 60 mins
  • Tools:
    Nutdriver, Pliers, Socket set
13 of 15 people found this instruction helpful.
Was this instruction helpful to you?
Thank you for voting!
Drain pump was cracked
Turned washer on its side. Pulled the bottom plate off. Then unplugged the electrical lines. Then unbolted the drain pump and bolted the new drain pump in. Then reversed the process.
  • JASON from HILLIARD, FL
  • Difficulty Level:
    Very Easy
  • Total Repair Time:
    Less than 15 mins
  • Tools:
    Nutdriver, Pliers
24 of 33 people found this instruction helpful.
Was this instruction helpful to you?
Thank you for voting!
Fixes Symptom 9% of time

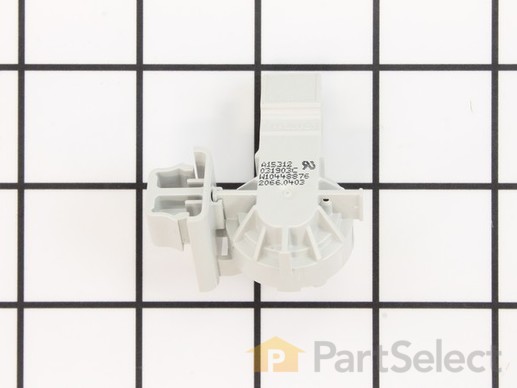
This part is located behind the control panel. It helps determine the level of water in the washer. As the water fills the hose, while tub is filling, it will push the air against a diaphragm inside the switch. More water that enters the tub, more pressure is applied against the switch.

$ 46.95
  In Stock
PartSelect Number PS11754877
Manufacturer Part Number WPW10448876

Customer Repair Stories

The washer level switch broke
I am still waiting for the correct part to arrive, I was sent a part but it was the wrong part, the wrong part number and it was nothing that would work on a washing machine. I think someone else ended up with my part and I got theirs.
  • Paul from CATONSVILLE, MD
  • Difficulty Level:
    Really Easy
  • Total Repair Time:
    30 - 60 mins
2 of 3 people found this instruction helpful.
Was this instruction helpful to you?
Thank you for voting!
Door locked because of faulty water level switch
First some background. The door locked up the first time when appliance was less than one year old. The "Maytag Repairman" finally succeeded in getting the door open after propping up the front of the machine and fumbling around underneath for a period of time and then assured me the problem was solved. The problem recurred less than a year later, and I called another repairman who seemed to have an easier time of it, and charged $293.42 to replace the water level switch. About six months later the same problem recurred and I took the cover off the top of the machine and found there a booklet "For Service Technician's Use Only". VERY HELPFUL. Told how extremely easy it was to unlock door - took about five seconds. Replacing the switch itself involved pulling one tubing off and disconnecting one elec connection from old switch and replacing on new switch. Total cost $50 plus a few dollars for shipping.
  • George from ORO VALLEY, AZ
  • Difficulty Level:
    Really Easy
  • Total Repair Time:
    Less than 15 mins
  • Tools:
    Nutdriver
27 of 33 people found this instruction helpful.
Was this instruction helpful to you?
Thank you for voting!
Fixes Symptom 2% of time

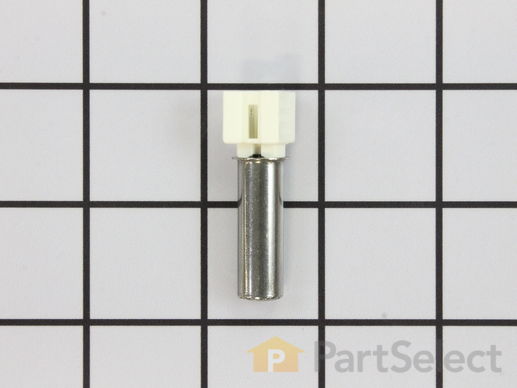
This part regulates the temperature of the water in the tub. The sensor is located in the heating element.

$ 33.54
  In Stock
PartSelect Number PS11755214
Manufacturer Part Number WPW10467289

Replacing your Whirlpool Washer Washer Temperature Sensor

Replacing your Washer Temperature Sensor

Customer Repair Stories

Washer posting a f6 error
This was an easy fix . PartSelect was quick and had all the info I needed to repair my washer. Plus shipping was super fast. Thanks
  • Robert from Salt Lick, KY
  • Difficulty Level:
    Really Easy
  • Total Repair Time:
    Less than 15 mins
  • Tools:
    Screw drivers
37 of 111 people found this instruction helpful.
Was this instruction helpful to you?
Thank you for voting!
Replacing the heat sensor following an F-24 Error Notice.
I followed your repair video explicitly, simple fix. However, one should
be careful when disconnecting the two prong electrical connector from
the heat sensor. the two black wires can pull free easily. In that case, the
rear of the female plastic wired connector must be extracted to allow the two black wires to be "pushed" into the narrow slot which displaces the
wire insulation and allows for a good electrical connection. If a punch tool is not available a pair of needle nose pliers works. Also, observe
the orientation slots on both the male andfemale connectors - they
connect one way only! I set the washer on it's face while effecting this
repair to better see what I was doing (eyesight not as good as it used to be). Thanks for the timely support!
  • william from VIRGINIA BCH, VA
  • Difficulty Level:
    Really Easy
  • Total Repair Time:
    30 - 60 mins
  • Tools:
    Nutdriver, Pliers
2 of 2 people found this instruction helpful.
Was this instruction helpful to you?
Thank you for voting!
Fixes Symptom 1% of time

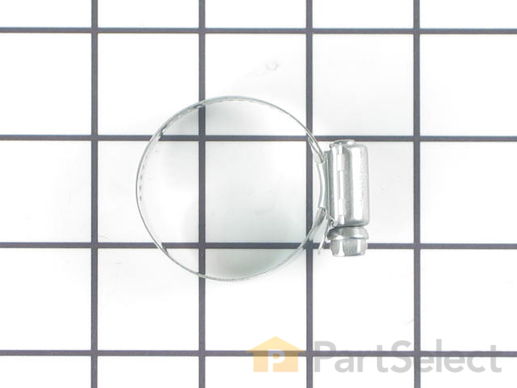
The hose clamp is used to hold the water hose in place which will prevent the hose from leaking water. Sometimes the clamp may lose its ability to latch on, causing a leaking washer. For the installation, you will need a flat head screw driver to replace the clamp and a drill to access the screws to remove the front of the washer. Be careful if you do not have specific clamp pliers as the clamp could fly off. Once the front of the washer has been removed, take a quick look for water damage or any obvious signs of where the leak is coming from. If it is not obvious, run water to test.

$ 9.95
  In Stock
PartSelect Number PS11740613
Manufacturer Part Number WP285655

Replacing your Kenmore Washer Washer Hose Clamp

Replacing your Washer Hose Clamp