EasyApplianceParts is now PartSelect! We've merged our sites to provide a better shopping experience for you.   Full Details
Back
Back
Keep typing for more specific results...
Models > MVWB300WQ1 > Symptoms > Will not drain

Parts That Fix Maytag Washer MVWB300WQ1 Will not drain

Will not drain is a commonly reported symptom for the MVWB300WQ1 Maytag Washer, and we have put together a full guide on how to fix this. This advice is based on feedback from people who own this exact appliance. We have listed the most common parts for your MVWB300WQ1 Maytag Washer that will fix Will not drain. We have included repair instructions, and helpful step-by-step video tutorials. If you are experiencing this issue, not to worry, DIYers just like you have fixed this, and shared their experience to help you!
Fixes Symptom 92% of time

This pump helps expel water from the washing machine and is activated after the spin speed is maintained for a specific period of time.

$ 94.63
  In Stock
PartSelect Number PS5136124
Manufacturer Part Number W10536347

Replacing your Whirlpool Washer Washer Drain Pump

Replacing your Washer Drain Pump

Customer Repair Stories

Water pump for draining
The actual install of the pump was extremely easy. I removed the back cover, (After unhooking water, drain and electricity. I laid the machine on its front ( USE CAUTION WHEN DOING THIS, THERE ARE SHARP EDGES on the FRAME) After bandaging my cut fingers, I used a nut-driver/screwdriver to remove the screws, pliers to remove the Spring clamps, unhooked the wiring( its a single plug in) and reverse the procedure for installing.

I saw where a person had put the screws in the filter below the tub. I had to find the clips on the front of the machine, (about 7 in in from the sides) I removed the nut cover on the agitator, used a socket to remove the agitator, tub, and a nut driver to remove the filter. I found 3 areas where coins could get through the drain filter, and I used self tapping screws to make an obstruction that water could get through but not the coins. I reinstalled tub. Before re installing the agitator, I got some fiber glass window screening and cut a piece to go over the drain slots in the bottom of the tub but under the agitator, then reinstalled the agitator.

I noticed that the new pump had more re enforcing at the areas where the 1st pump broke. I doubt that it will break, but I am not taking any chances. I put the screen in to prevent the coins from getting to the drain filer 1st and the back up was the screws in the drain filter.
  • Kerry from Alleyton, tX, TX
  • Difficulty Level:
    Easy
  • Total Repair Time:
    30 - 60 mins
  • Tools:
    Nutdriver, Pliers, Socket set
67 of 80 people found this instruction helpful.
Was this instruction helpful to you?
Thank you for voting!
Loose change entered drain pump, cracked housing leaked all water out
Disconnect power, hot/cold supply and drain hose. Tip washer onto front side, expect some additional water to leak out. Remove the cracked drain pump, 3 screws, hose clamps, and electrical plug.

Tip washer back up, use the putty knife to pop the top cover up (clips are about 6.5in in from sides). Unclip the white plastic cover over the outer and inner tubs. Pop the center cap from inside the inner tub, exposing the bolt holding the inner tub down. Remove bolt, pull inner tub up and out.

At bottom of outer tub remove 2 screws from drain access cover, should find some change under there (or in the pump).

Re-assemble using new pump.

Note:
Before new pump arrived I was able to use some silicone sealant, epoxy, and black tape to temporarily fix the cracked pump housing after pulling it out.
  • ROBERT from BARRINGTON, IL
  • Difficulty Level:
    Easy
  • Total Repair Time:
    30 - 60 mins
  • Tools:
    Nutdriver, Socket set
205 of 239 people found this instruction helpful.
Was this instruction helpful to you?
Thank you for voting!
Fixes Symptom 6% of time

This kit includes one driver hub and two driven basket hubs. The basket hub is located under the agitator. If your washer is not agitating or spinning properly, the hubs will need to be replaced.

$ 32.95
  On Order
PartSelect Number PS11723155
Manufacturer Part Number W10820039

Replacing your Whirlpool Washer Washer Basket Hub Kit

Replacing your Washer Basket Hub Kit

Customer Repair Stories

Error reading 5D - wouldn't spin
3rd time replacing this part. The plastic grooves against the metal get wore down. Only 20$ to repair ! Take off the 3/8 bolt - center pops out. Remove screws pop out old piece and tighten new piece each side evenly.
  • Theresa from WALFORD, IA
  • Difficulty Level:
    Easy
  • Total Repair Time:
    Less than 15 mins
  • Tools:
    Pliers, Screw drivers
20 of 23 people found this instruction helpful.
Was this instruction helpful to you?
Thank you for voting!
The washer was making a horrible noise during the spin cycle
Removed a cap in the center of the tub basket which has a bolt that needs removed I believe it's a 9/16 after I removed the bolt I then removed the center of the bottom of the basket assembly which then allowed me to get to the basket hub that needed replaced it was a little dirty and I couldn't get it out so I sprayed a little penitrating oil on it let it sit a little then I was able to remove the hub and install the new one then I put it all back together and the washer is working great
  • Kevin from CLARK, MO
  • Difficulty Level:
    Really Easy
  • Total Repair Time:
    30 - 60 mins
  • Tools:
    Pliers, Screw drivers, Socket set
52 of 64 people found this instruction helpful.
Was this instruction helpful to you?
Thank you for voting!
Fixes Symptom 2% of time

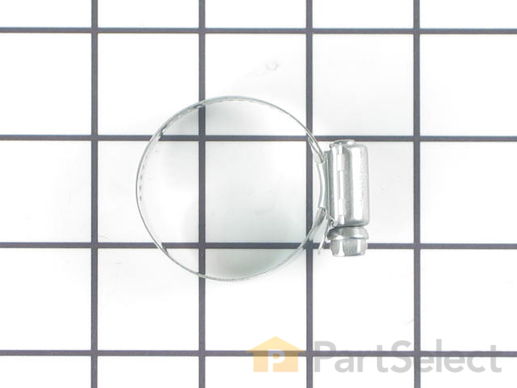
The hose clamp is used to hold the water hose in place which will prevent the hose from leaking water. Sometimes the clamp may lose its ability to latch on, causing a leaking washer. For the installation, you will need a flat head screw driver to replace the clamp and a drill to access the screws to remove the front of the washer. Be careful if you do not have specific clamp pliers as the clamp could fly off. Once the front of the washer has been removed, take a quick look for water damage or any obvious signs of where the leak is coming from. If it is not obvious, run water to test.

$ 9.95
  In Stock
PartSelect Number PS11740613
Manufacturer Part Number WP285655

Replacing your Kenmore Washer Washer Hose Clamp

Replacing your Washer Hose Clamp