Parts That Fix General Electric Refrigerator PSE25KSHBHSS Not dispensing water
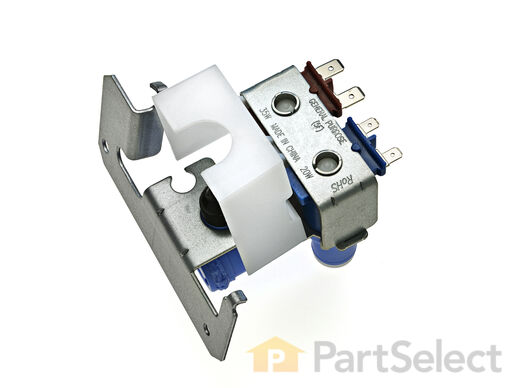
This water inlet valve (Refrigerator Water Inlet Valve Assembly) supplies water to the ice maker and the water dispenser in your refrigerator. It is located at the back of the fridge, beneath the bottom panel. It is connected directly to 2 water supplies, a wiring harness, and your inlet water tube. This part is located at the back of the fridge, beneath the bottom panel. It is connected directly to 2 water supplies, a wiring harness, and your inlet water tube. Minerals and sediments can build up over time and cause a blockage in your inlet valve. They can also cause the valve to stick open, leading to an overflow of water. If this part is malfunctioning, water flow to your appliance could be compromised. Check for small ice cubes or a lack of ice cubes/water, as this is an obvious sign the part is damaged. The water inlet valve must be replaced if the solenoids no longer have continuity or the valve has internal blockage. Test your water inlet valve with a multimeter. You can test both the water dispenser side and the ice maker side. The part measures approximately 3 inches long and 2.75 inches wide and is constructed of plastic and metal. This replacement part features 1 dual inlet water valve with quick connections. It also has 1/4 and 5/16 John Guest fittings for the outlet lines and a 1/4 compression fitting for the inlet line.
Replacing your General Electric Refrigerator WATER VALVE WITH GUARD

Customer Repair Stories
-
michael from pennsburg, PA
-
Difficulty Level:Easy
-
Total Repair Time:30 - 60 mins
-
Tools:Wrench set
-
ralph from bristow, VA
-
Difficulty Level:Really Easy
-
Total Repair Time:Less than 15 mins
-
Tools:Nutdriver, Screw drivers, Socket set
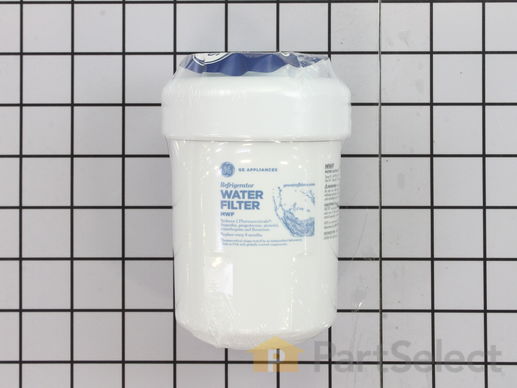
This OEM ice and water filter fits side-by-side and bottom-freezer GE models. The most common reason you would need to change this part is if you have never updated your model and it is no longer filtering your water. This also may lead to your refrigerator not dispensing water or ice properly. Manufacturers recommend you change your filter every six months to ensure it properly filters impurities. Depending on the model, a red light might also indicate that the filter is due for a replacement. Note: As per the manufacturer, this is an updated water filter. If you have never installed the updated part or your old model was made by Culligan, you may need the adapter to install the filter. See related parts. This filter is located inside the refrigerators upper right corner. It is common for water to drip from the dispenser when being changed so place a cloth underneath before you begin this repair. To remove the filter, turn it to the left until it releases without pulling down. Fill the new filter with tap water to prepare it. Position the new filter into the holder taking note of the arrows. The arrow on the front should be facing out. Gently push up on the filter and turn it to the right to secure it. Do not over-tighten. To release air in the system run 1-1/2 gallons of water through it. If your model has a reset button, press and hold this for a few seconds to reset it.
Replacing your General Electric Refrigerator Refrigerator Ice and Water Filter

Customer Repair Stories
-
David from Tacoma, WA
-
Difficulty Level:Really Easy
-
Total Repair Time:Less than 15 mins
-
Alfred from Novato, CA
-
Difficulty Level:Really Easy
-
Total Repair Time:Less than 15 mins
The filter is NOT included with this part.
Customer Repair Stories
-
Richard from Chandler, AZ
-
Difficulty Level:Really Easy
-
Total Repair Time:15 - 30 mins
-
Tools:Screw drivers, Socket set
-
Robert from Sandston, VA
-
Difficulty Level:Really Easy
-
Total Repair Time:30 - 60 mins
-
Tools:Screw drivers, Socket set
This genuine OEM solenoid is designed for use with GE refrigerators and controls the opening and closing of the ice chute door. It serves as a direct replacement for a worn or faulty solenoid, helping to restore proper ice dispenser function. Constructed from durable metal, this part includes all necessary wiring for installation and is sold individually. Installation requires a Phillips screwdriver. Always refer to your appliance’s manual or diagram to ensure proper placement and compatibility before beginning the repair.
Replacing your General Electric Refrigerator Refrigerator Dispenser Door Solenoid Assembly

Customer Repair Stories
-
scott from lake orion, MI
-
Difficulty Level:Really Easy
-
Total Repair Time:Less than 15 mins
-
Tools:Nutdriver, Screw drivers
-
Graeme from Sarasota, FL
-
Difficulty Level:Easy
-
Total Repair Time:15 - 30 mins
-
Tools:Screw drivers
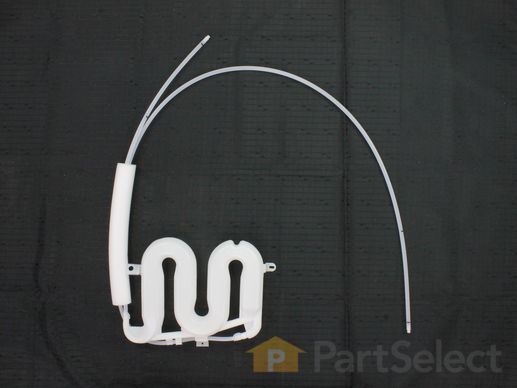
This tank stores water until the water actuator is activated and water is requested.
Replacing your General Electric Refrigerator Refrigerator Water Tank Assembly

Customer Repair Stories
-
Thomas from Waynesboro, VA
-
Difficulty Level:Easy
-
Total Repair Time:15 - 30 mins
-
Tools:Nutdriver, Screw drivers
2. Removed drawers and bottom three shelfs
3. Remove screw inside refrige that is holding the water tank in place
4. Remove bottom front grate on fridge (2 screws) and disconnect water line from quick disconnect (residual water will run out of line)
5. Remove bottom cover on back of fridge
6. Dis ... Read more connect water line from quick disconnect on bottom left side when looking from the back of the fridge (residual water will run out of line)
7. Remove water tank from inside of fridge
8. Install new water tank - install screw that hold water tank in position
9. Route lines through hole and to the two locations you removed the old ones
10. Install both lines by pushing them all the way in the quick disconnects. Pull on them to make sure they are secure.
11. Turn on water and look for leaks
12. Reinstall bottom front grate (2 screws)
13. Reinstall back cover (5 or 6 screws)
14. Install shelfs and drawers inside fridge
-
Matt from RPV, CA
-
Difficulty Level:Easy
-
Total Repair Time:30 - 60 mins
-
Tools:Screw drivers
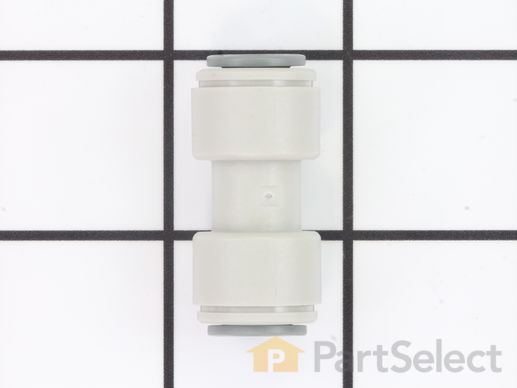
Quick connector for plastic water line - 5/16" to 5/16"
Replacing your General Electric Refrigerator Refrigerator Union Connector 5/16 To 5/16

Customer Repair Stories
-
Laura from Manchester, NH
-
Difficulty Level:Really Easy
-
Total Repair Time:15 - 30 mins
-
Tools:Screw drivers
-
Sherry from Auburn Hills, MI
-
Difficulty Level:Really Easy
-
Total Repair Time:Less than 15 mins
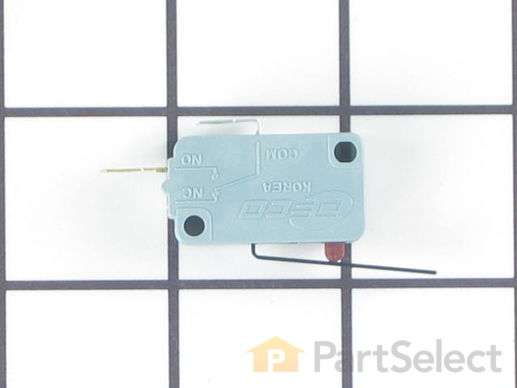
This is the replacement micro switch, or dispenser switch for your refrigerator. It is gray in color and measures approximately 1 inch by half an inch. The dispenser switch is what tells your refrigerator that it is ok to dispense ice or water. If your refrigerator is not dispensing ice or water, you may have a faulty or damaged switch. Be sure to disconnect the power to your refrigerator before you begin this repair. This switch is sold individually and is a genuine OEM replacement part sourced directly from the manufacturer.
Replacing your General Electric Refrigerator Refrigerator Switch

Customer Repair Stories
My problem is the water dispenser does work intermittently. When we place the glass in position and hit the lever, the lights in the control panel go off and no water is dispensed. My next guess may be the water valve or the control panel. The icemaker makes ice but I have had problems with it dispensing for nearly a year now.
-
Curtis from Corona, CA
-
Difficulty Level:Easy
-
Total Repair Time:15 - 30 mins
-
Tools:Pliers, Screw drivers
The difficult part was accessing the area to get to the micro switch.
The trim had to be removed, then the cover.
Then one unplug ... Read more s the board and removed the face plate which also contains the micro switch.
Once removed the two electrical terminals had to be disconnected, the micro switch installed and terminal reconnected.
Then reverse the removal procedure.
Then on to the double outlet replacement.
Suggest watching the installation video for the replacement although it was really a straight forward repair.
Two things to remember.
1. Unplug the fridge
2. Shut off the water to the dispenser
Overall it was not bad at all.
This was my first attempt at refrigerator repair and it went well.
Good luck on yours.
John
-
John from Mason, OH
-
Difficulty Level:Easy
-
Total Repair Time:15 - 30 mins
-
Tools:Nutdriver, Pliers, Screw drivers, Wrench (Adjustable)
This part is a replacement filter bypass cap for your refrigerator. If you intend to use an external water filtration system for your refrigerator, the bypass cap will allow you to do so. To use a filter bypass cap, simply screw it in where you would normally screw in the regular water filter. If you have a bypass system installed and your ice maker doesn’t make ice, your water dispenser doesn’t make water, or if there is water dripping inside your refrigerator, you may need to replace the bypass filter cap. This part is made of white plastic and is sold individually.
Customer Repair Stories
-
Linda from Liberty, NC
-
Difficulty Level:Really Easy
-
Total Repair Time:Less than 15 mins
-
Fred from Edgartown, MA
-
Difficulty Level:Really Easy
-
Total Repair Time:Less than 15 mins
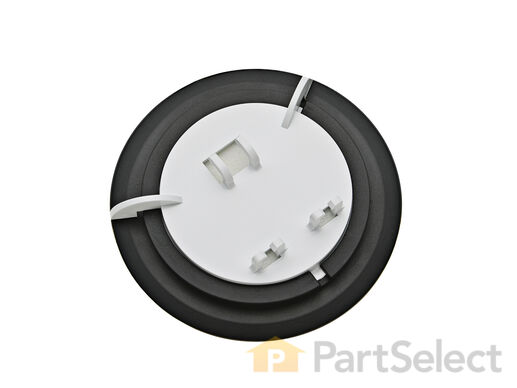
This “Dispenser Door Assembly” (Door Recess Assembly, Ice Door Assembly, Dispenser Door, Refrigerator Dispenser Ice Chute Door Kit, Dispenser Door Flap, Ice Chute Door, Flapper) keeps the room air from infiltrating the freezer. Once the lever is pressed, the door flap opens and allows the ice to dispense into your container. If your door flapper is broken, it could allow outside air to enter the freezer and alter the inside temperature. You may notice frost buildup surrounding the dispenser area. The door flap can disconnect from the dispenser lever, or the tabs that hold it in place may break. Frequent use may distort the sealing face and cause air leaks and frost buildup. This part mounts in the ice dispenser, and measures approximately 3.25 inches in diameter. It is constructed of plastic and rubber, and comes in white/black. This part is sold individually.
Replacing your General Electric Refrigerator Refrigerator Dispenser Door Assembly Or Flapper

Customer Repair Stories
-
D from ZELLWOOD, FL
-
Difficulty Level:Easy
-
Total Repair Time:15 - 30 mins
-
Tools:Screw drivers
-
Jeff from Columbia City, IN
-
Difficulty Level:Really Easy
-
Total Repair Time:Less than 15 mins
-
Tools:Screw drivers
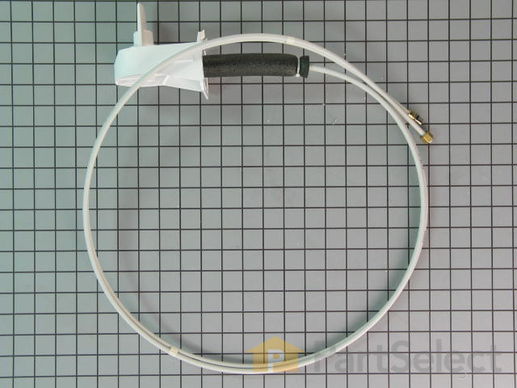
This part is the replacement water line for your refrigerator. It is a long plastic tube, which is 5/16 of an inch in diameter. If your refrigerator is leaking, or will not dispense water or ice, you may have a damaged water line. When you replace the water line, you may want to pick up a new water tube union as well. You can use a utility knife to cut the old water line where it is damaged, and use the union to attach the new water line to the old one. This tubing is sold individually and is an OEM part.
Replacing your General Electric Refrigerator Refrigerator Tubing

Customer Repair Stories
-
Peter B from Los Altos Hills, CA
-
Difficulty Level:Easy
-
Total Repair Time:More than 2 hours
-
Tools:Nutdriver, Screw drivers
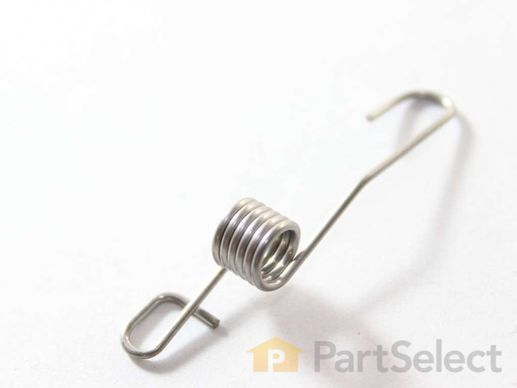
This door recess spring or dispenser lever spring in your refrigerator is used to return the ice door to the closed position or the dispenser lever to the home position once released. You will find the spring in the water dispenser assembly, behind the main control panel. If the dispenser lever is malfunctioning or the dispenser ice door is not closing, you may need to replace this door recess spring.
Replacing your General Electric Refrigerator Refrigerator Recess Door Spring

Customer Repair Stories
-
Todd from Milton, WI
-
Difficulty Level:Easy
-
Total Repair Time:15 - 30 mins
-
Tools:Screw drivers
-
JOHNNY from FORT WORTH, TX
-
Difficulty Level:Really Easy
-
Total Repair Time:15 - 30 mins
-
Tools:Pliers, Screw drivers
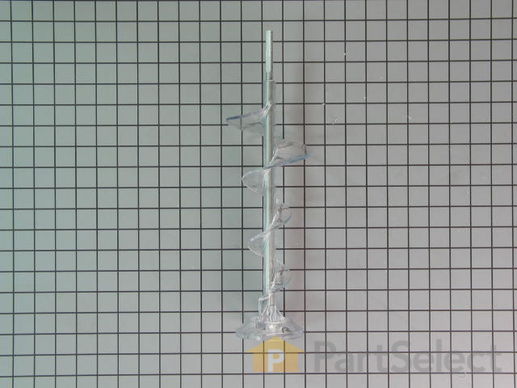
The ice bucket auger is located within the ice bucket assembly in your freezer. It stirs and dispenses the ice in the bucket. You may need to replace the auger if your ice maker is noisy, or not dispensing ice. Disassembly of the ice bucket assembly is necessary to replace this part. Turn off power to the appliance before removing the ice bucket assembly to do this repair.
Replacing your General Electric Refrigerator BUCKET AUGER

Customer Repair Stories
2) Removed 5 screws total
3) (hardest part) JImmied a flat blade screwdriver into the left top side of the housing and pried gently to disengage the plastic holding clip. This only allows the left side of the housing to move up about a half-inch. Did the same on the right side and 'wal ... Read more ked' the assembly out of the bin.
4) Removed the C clip and washer that holds the auger. and removed the auger assembly.
5) Before removing the screw at the end of the assembly, it is a good idea to take pictures of the ice crushing part of the assembly so that it goes back on correctly.
6) Removed the screw and carefully stacked the ice crush blades and washers.
7) Installed the ice crush blades on the new auger, re-installed the screw, washer and C clip.
8) Re-assembly is easy, you just need to set the end of the auger in the back of the ice bin and slowly re-install the housing portion.
-
robert from wesley chapel, FL
-
Difficulty Level:Easy
-
Total Repair Time:30 - 60 mins
-
Tools:Pliers, Screw drivers
It is not that hard to do the repair it just takes some patience and paying attention to details.
-
Tim from Newport News, VA
-
Difficulty Level:A Bit Difficult
-
Total Repair Time:30 - 60 mins
-
Tools:Pliers, Screw drivers
This crank door recess is supplied directly from the original equipment manufacturer. The plastic part is fastened behind the interface dispenser assembly in the freezer door. Activated by the dispenser solenoid, this part regulates the opening and closing of the ice chute door. A screwdriver is needed for the repair. The crank door recess is sold individually.
Replacing your General Electric Refrigerator Refrigerator Dispenser Door Recess Crank

This defrost termination thermostat (Defrost Limiter Thermostat, High Limit Thermostat, Refrigerator Defrost Bi-Metal Thermostat) acts as a safety device to stop the evaporator coil from overheating, by turning off the defrost heater at the end of the defrost cycle. This part attaches to the tubing of the evaporator coil in the freezer. A faulty defrost termination thermostat may result in the defrost heater never heating and a solid frost buildup on the evaporator coil, which results in too warm temperatures. The thermostat contacts are normally closed and have continuity until it reaches 140 degrees. If this high limit thermostat is open at room temperature or colder, it is defective. This limit thermostat has an attached mounting clip and comes with pink and amber wire leads. The thermostat is 1 inch in diameter and 1/2 inch thick, the 2 wire leads are 10 inches long.
Replacing your General Electric Refrigerator Refrigerator Defrost Thermostat

Customer Repair Stories
-
doyle from kingston, WA
-
Difficulty Level:Really Easy
-
Total Repair Time:15 - 30 mins
-
Tools:Nutdriver, Socket set
Note: If there is a large amount of ice build up on your coils a hair dryer works great. The drain is on the bottom anyway. Also , you may want to seal around the wire nuts to keep moisture out. I did
-
Michael from Sylva, NC
-
Difficulty Level:Easy
-
Total Repair Time:30 - 60 mins
-
Tools:Socket set


