Your coupon for will be reflected when you check out!
✖
Your coupon for
✖
Hello!
You're visiting the PartSelect site in U.S.
Would you like to shop on the Canadian site?
Stay on this site
Go to Canadian site
✖
Model Number Locations
1Select Category Type
Select Category Type
2Select Product Type
Select Product Type
3Select {MODEL} Type
Select {MODEL} Type
Sample Model Number Tags
Model numbers can be made up of numbers (1005400, for example) or a combination of letters and numbers (LAT1000AAE). The model number will most likely appear on either a paper sticker or a metal plate. Your appliance's model number tag may look similar to the sample model number tags shown here (model number highlighted in yellow):
Model has been saved to My Models. If you're not signed in, your lists are available on this device and will expire within 30 days.
Model has been saved to My Models.
This is a pulsator cap for various models of Samsung washing machines. This metal cap is designed to fit over the wash plate and agitator mounting bolt, ensuring clothes do not get caught on it during...
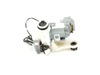
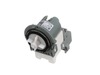
This is a water inlet valve designed for Samsung washing machines. Water inlet valves are used to control the hot and/or cold water going into the washing machine, and if it is broken or damaged can c...
This adjustable leg, also known as a levelling leg, is a genuine OEM part supplied by Samsung for use with washing machines. The leg supports the washing machine by ensuring that it is level and balan...
Introducing the Samsung Suspension Rod Assembly, a genuine and integral part for maintaining the optimum performance of your Samsung washer. Made from superior quality materials, this damper is precis...
This selector knob, also called the control knob, is used to choose different settings and cycles on your dryer. This knob is silver in color and is found on the control panel. If it becomes damaged, ...
$57.95
In Stock
Questions And Answers for WA48J7700AW
Be the first to ask our experts a question about this model!
✖
Ask a Question
Ask our experts a question on this model and we'll respond as soon as we can.
Shut off water and electrical supply to appliance, take water supply hoses off to allow for proper access to back of machine. Take off back panels of appliance. Disconnect two hoses from pump. Take out two screws which attach pump to washer body. Detach wiring which connects pump to control unit ( that takes a little time). Install p
... Read moreump in designated location, connect hoses, connect wiring to control unit, connect appliance to powere source, test run to make sure everything works properly, make final detailed wire connection Pump to control unit, install back panels, Connect water supply hoses .....and be proud of yourself!
Removed the plastc clip from the washer basin side that was not broken and removed the basin...slipped the new basin in place, inserted plastic clip holders...too more thought than skill as no instructions were included with the part.


 – Part Number: DC97-16931B")