EasyApplianceParts is now PartSelect! We've merged our sites to provide a better shopping experience for you.   Full Details
Back
Back
Keep typing for more specific results...
Models > WRF532SMHZ01 > Symptoms > Leaking

Parts That Fix Whirlpool Refrigerator WRF532SMHZ01 Leaking

Leaking is a commonly reported symptom for the WRF532SMHZ01 Whirlpool Refrigerator, and we have put together a full guide on how to fix this. This advice is based on feedback from people who own this exact appliance. We have listed the most common parts for your WRF532SMHZ01 Whirlpool Refrigerator that will fix Leaking. We have included repair instructions, and helpful step-by-step video tutorials. If you are experiencing this issue, not to worry, DIYers just like you have fixed this, and shared their experience to help you!
Fixes Symptom 83% of time

The p-trap drain tube kit may also be known as the duck bill, or the drain pipe, and it is compatible with your refrigerator. The function of the p-trap drain kit is to carry the water that has formed during the defrost cycle to the bottom of the refrigerator, where your drain pan is located. The tools you will need for this repair include a 1/4-inch nut driver and a small flat-blade screwdriver. To do this repair you will need to pull the refrigerator forward in order to reach the lower access panel at the back. This kit includes the tube extension piece and spacer.

$ 41.95
  In Stock
PartSelect Number PS8691807
Manufacturer Part Number W10619951

Replacing your Whirlpool Refrigerator Refrigerator P-Trap Drain Tube Kit

Replacing your Refrigerator P-Trap Drain Tube Kit

Customer Repair Stories

Freezer icing up .
Watched Partselect video of P-trap installation.Removed water line & back cover& disconnected wires to water solenoid .Removed old drain tube & old problematic rubber funnel. Used contact cleaner to clean rubber residue from drain line and used a little silicone to aide reassembly. Job went well thanks to video.
  • Rich from Lansing, IL
  • Difficulty Level:
    Easy
  • Total Repair Time:
    30 - 60 mins
  • Tools:
    Nutdriver, Wrench (Adjustable)
16 of 17 people found this instruction helpful.
Was this instruction helpful to you?
Thank you for voting!
Water leaking from bottom of refrigerator onto floor
The video on website is very good and explains everything in detail. Just follow the directions. This is EASY!!!!
  • Jack from DINUBA, CA
  • Difficulty Level:
    Really Easy
  • Total Repair Time:
    30 - 60 mins
  • Tools:
    Nutdriver, Screw drivers
107 of 119 people found this instruction helpful.
Was this instruction helpful to you?
Thank you for voting!
Fixes Symptom 11% of time

Boost the longevity of your refrigerator with this genuine Whirlpool drain pan. Designed to fit selected models of Whirlpool, KitchenAid, Maytag, Jenn-Air, Amana, Inglis, and Magic Chef refrigerators, this part ensures a neat and clean interior. The drain pan sits at the bottom of the cabinet, hidden behind the toe grille, and collects water that trickles out through the drain line during the defrost cycle. Please refer to your owner's manual for guidance during installation. Carefully verify compatibility with your model before purchasing, since parts may have subtle differences in size and shape. This drain pan will enhance your refrigerator's performance and is a quality investment for your kitchen.

$ 70.97
  In Stock
PartSelect Number PS11756973
Manufacturer Part Number WPW10655367

Customer Repair Stories

leak wather
i check where come the leak , and was the pan-drip so i look for everywhere and then i found this excellent website so ii was a afraid is the part don come right but was good im happy know my refigerator is excellent and not leak.know the repair make sure when you change the pan -drip you have tu put the new pandrip and then the fan you have tu put right first and then whit your hands have to turned carefully firts the lef side and then the right side and is done. thanks.
  • felix from lakeland, FL
  • Difficulty Level:
    Easy
  • Total Repair Time:
    15 - 30 mins
  • Tools:
    Nutdriver
0 of 1 people found this instruction helpful.
Was this instruction helpful to you?
Thank you for voting!
drip pan was cracked
Removed rear cover, removed fan and than drip tray. install new tray and reassemblied
  • Brian from Bismarck, ND
  • Difficulty Level:
    A Bit Difficult
  • Total Repair Time:
    30 - 60 mins
  • Tools:
    Nutdriver
28 of 82 people found this instruction helpful.
Was this instruction helpful to you?
Thank you for voting!
Fixes Symptom 2% of time

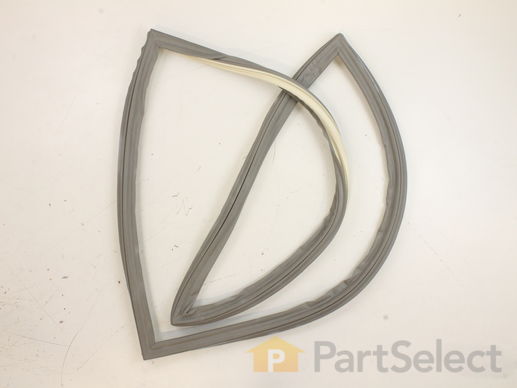
This door gasket is used to seal the refrigerator door when closed to keep the cool air inside and the room air out.

$ 129.95
  In Stock
PartSelect Number PS11759515
Manufacturer Part Number W10830162

Customer Repair Stories

Door seals split and condensation forming
Removed the old gasket and made sure we put the new one in the same way. A wooden mixing spoon was the best tool for pushing the gasket into the track without hurting it. We used the back of the spoon and it went right in with no problem.
  • Chet from TOLEDO, OH
  • Difficulty Level:
    Really Easy
  • Total Repair Time:
    15 - 30 mins
15 of 15 people found this instruction helpful.
Was this instruction helpful to you?
Thank you for voting!
Door gasket wasnt sealing anymore and had some minor cracks
First, I removed the old door gasket by pulling it out of the channel it was mounted in, noting the orientation of the gasket. Then, it was a simple matter of lining the new gasket up with the channel and pressing it into the groove. Very easy repair, and the door seals great!
  • Joel from DELRAY BEACH, FL
  • Difficulty Level:
    Very Easy
  • Total Repair Time:
    Less than 15 mins
28 of 28 people found this instruction helpful.
Was this instruction helpful to you?
Thank you for voting!
Fixes Symptom 2% of time

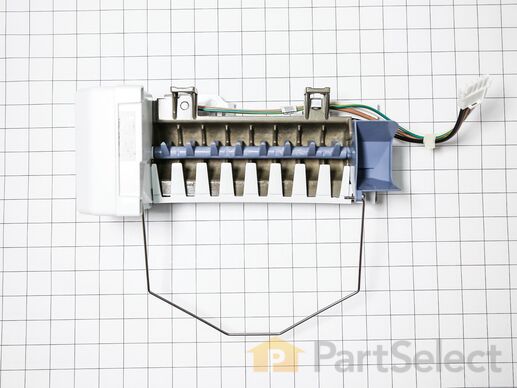
This is an ice maker assembly for various models of refrigerator. This ice maker assembly is used to freeze and eject ice into the ice bucket, then dispense the ice. This ice maker comes with the necessary shut-off arm, as well as a wire harness to properly install it into the freezer compartment of your refrigerator. If your current ice maker is either not producing ice or not breaking the ice up properly, it will need to be replaced. This ice maker assembly is an OEM part and is sold on its own, without any other parts or accessories.

$ 77.15
  In Stock
PartSelect Number PS11765620
Manufacturer Part Number W10884390

Customer Repair Stories

Ice maker was leaking fresh water into the tray freezing large clumps of cubes together.
First and foremost shut off the water supply to the Ice maker. Some recommend unplugging the refrigerator or disabling the circuit breaker to the refrigerator. Then after emptying the freezer remove the freezer door by loosening the four hex head screws and lift the door straight up and set it off to the side.You can then remove the lower basket. Now locate the clamps located at the rear sides of the inner basket and use a small flat blade screwdriver to gently push the tabs toward the outside of the side clamps while pulling up at the same time and releasing the clamp. Now repeat this procedure on the opposite side of the inner basket. The inner basket can then be pulled out being careful to not damage the roller tracts or gear rollers. Three hexhead screws secure the ice maker to the wall. The screw under the ice maker must be removed while the two on top just loosened. The electrical plug is removed by depressing the tabs on the top and bottom of the plug and then pulling outward. Carefully lift the ice maker upward and out from the two upper hex head screws. You can then install the replacement icemaker by reversing the procedure.
  • william from GROVE, OK
  • Difficulty Level:
    A Bit Difficult
  • Total Repair Time:
    15 - 30 mins
  • Tools:
    Nutdriver, Screw drivers
16 of 17 people found this instruction helpful.
Was this instruction helpful to you?
Thank you for voting!
Ice maker did not work in the bottom freezer
Shut down refrigerator at the breaker. Placed freezer items in a cooler. Removed top shelf. You must release roller covers on each side to remove the shelf ( Two front screws must be removed) Took off freezer door. (4 screws holding the door to the bracket) Disconnected ice maker electronic plug. Totally removed bottom screw holding ice maker. Loosen two top screws and remove ice maker. Reverse process to install.
  • Raymond from NORTH VENICE, FL
  • Difficulty Level:
    Easy
  • Total Repair Time:
    30 - 60 mins
  • Tools:
    Screw drivers, Socket set
33 of 43 people found this instruction helpful.
Was this instruction helpful to you?
Thank you for voting!
Fixes Symptom 1% of time

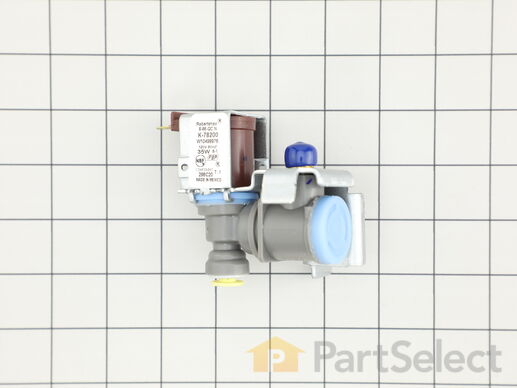
The water inlet valve is a crucial component in refrigerators, responsible for supplying water to the ice maker and water dispenser. It controls the flow of water from the household supply line, ensuring that the right amount is delivered to the refrigerator's internal systems. If the water inlet valve becomes faulty, you may notice issues such as slow water dispensing, no ice production, or leaking near the back of the refrigerator. Replacing a malfunctioning valve can restore proper water flow and prevent further damage. For installation, first unplug the refrigerator and turn off the water supply. The valve is typically located at the back of the appliance, where the water line connects. Remove the faulty valve, reconnect the water line to the new part, and secure it in place. Once installed, restore power and test for proper operation.

$ 84.34
  In Stock
PartSelect Number PS11755667
Manufacturer Part Number WPW10498976

Customer Repair Stories

not dispenceing water
replaced water valve still does not work
  • paul from HARWICH, MA
  • Difficulty Level:
    Really Easy
  • Total Repair Time:
    30 - 60 mins
  • Tools:
    Nutdriver, Pliers
3 of 6 people found this instruction helpful.
Was this instruction helpful to you?
Thank you for voting!
Leak at the water inlet valve
Unplug the refrigerator, removed the screws/nuts from the backing plate. Disconnected the water supply line. Removed the backing plate, disconnected the internal water line. Removed the water inlet valve from the backing plate. Installed new valve, reconnected water lines, put backing plate back on. Done.
  • John from BROOKLYN PARK, MN
  • Difficulty Level:
    Really Easy
  • Total Repair Time:
    Less than 15 mins
  • Tools:
    Nutdriver
2 of 3 people found this instruction helpful.
Was this instruction helpful to you?
Thank you for voting!
Fixes Symptom 1% of time

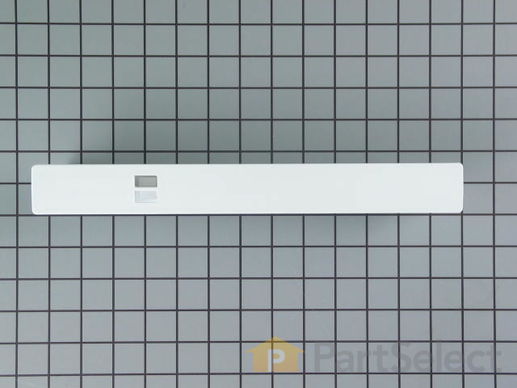
This is a center crisper rail for your refrigerator. This part acts as a support rail for the crisper drawer by holding the center of the crisper frame. You will need to replace this part is if your current drawer is not opening or closing properly. This crisper rail is white and it is made entirely of plastic. It is roughly 13.5 inches long, and 2.5 inches wide. This is an easy repair which requires no tools.

$ 52.46
  In Stock
PartSelect Number PS11757048
Manufacturer Part Number WPW10671238

Replacing your Kenmore Refrigerator Refrigerator Center Crisper Rail (White)

Replacing your Refrigerator Center Crisper Rail (White)

Customer Repair Stories

crisper drawers were off center rail due to c.r fracture
removed old rail,lifted glass panel above and inserted new rail-voila!!done.
  • albert from quakertown, PA
  • Difficulty Level:
    Really Easy
  • Total Repair Time:
    Less than 15 mins
42 of 46 people found this instruction helpful.
Was this instruction helpful to you?
Thank you for voting!
Cracked & Snapped Center Crisper Rail
A very easy fix took all of five minutes
  • Ruth from Roxbury, MA
  • Difficulty Level:
    Really Easy
  • Total Repair Time:
    Less than 15 mins
229 of 252 people found this instruction helpful.
Was this instruction helpful to you?
Thank you for voting!