Your coupon for will be reflected when you check out!
✖
Your coupon for
✖
Hello!
You're visiting the PartSelect site in U.S.
Would you like to shop on the Canadian site?
Stay on this site
Go to Canadian site
✖
Model Number Locations
1Select Category Type
Select Category Type
2Select Product Type
Select Product Type
3Select {MODEL} Type
Select {MODEL} Type
Sample Model Number Tags
Model numbers can be made up of numbers (1005400, for example) or a combination of letters and numbers (LAT1000AAE). The model number will most likely appear on either a paper sticker or a metal plate. Your appliance's model number tag may look similar to the sample model number tags shown here (model number highlighted in yellow):
Model has been saved to My Models. If you're not signed in, your lists are available on this device and will expire within 30 days.
Model has been saved to My Models.
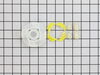
This kit is used for replacing the agitator directional cogs (Agitator Dogs, Agitator Repair Kit, Washer Agitator Dogs, Agitator Dog Ears). The agitator is what creates the thrusting motion in your wa...
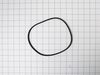
This is an inner cap seal, but may also be known as an O-ring, and it is a part for your washing machine. Some symptoms replacing this part will fix include: leaking from your appliance, uncontrollabl...
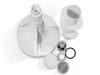
This is a replacement clutch assembly or cam kit for your washer. The clutch assembly is mounted on the drive shaft on the bottom of your washer. You may need to replace the clutch assembly if the spl...
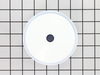
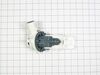
This is lid lock designed for use within various washing machines. This lid lock, also known as a latch assembly, is used to secure the lid of your washing machine during the washing cycle. If your wa...
This touch-up paint can be used on a wide variety of household appliances. It is most often used on washers, dryer, refrigerators, dishwashers, ranges, freezers, trash compactors, or microwaves. It is...
$12.58
In Stock
Questions And Answers for WTW4816FW3
We're sorry, but our Q&A experts are temporarily unavailable.
Please check back later if you still haven't found the answer you need.
28 questions answered by our experts.
Sort by:
< Prev
1
2
3
Next >
Search filter:
Clear Filter
Your search term must have 3 or more characters.
Keep searches simple. Use keywords, e.g. "leaking", "pump", "broken" or "fit".
Sorry, we couldn't find any existing answers that matched.Try using some different or simpler keywords, or submit your new question by using the "Ask a Question" button above!
Doug
October 19, 2024
Continues to drain with or without the door closed. Lights do not light up on panel. We have tried unplugging, over night, and plugging back up. It still drains for hours
For model number WTW4816FW3
Hello Doug, thank you for your question. The pressure level on the Board PS16744838 detects the water level in the washing machine and if it is faulty, the water level is no longer detected correctly, which can result in the drain pump continuing to run even after there is no water in the washing machine. We hope this helps.
Drain pump does not stop. Even when trying to start new load. It would stop sometimes when unplugged and plugged back but start again as soon as you try to select a mode. Lights on panel still work
For model number WTW4816FW3
Hi Wesley,
Glad to hear from you. The water level pressure hose that connects to the bottom of the washer tub applies pressure to the electronic control board letting it know how much water is in the washer. If the electronic control board is not operating correctly, the drain pump may start draining and run constantly. This may be caused by a clogged or damaged water pressure hose. To inspect the water pressure hose, disconnect the washer from the electrical outlet and remove it. Inspect the hose and the valve for any signs of cracking, wear, or damage. If it shows any of these signs, you will need a replacement water pressure hose. Also, check the drain hose to see if it is connected properly and that it is positioned correctly in the stand-pipe. If there are any clogs in it, it will need to be cleaned out or replaced. If the drain hose is fine, you may have a malfunctioning water inlet valve. If a component in the valve has failed, water will continue to flow into the washer. You will need to check the water inlet valve for continuity with multimeter to see if it is operating normally. If the water inlet valve is fine, then you will need to replace the electronic control board. We hope this helps!
What do I need to do to get the lid to lock. The machines won’t wash or do anything because of it
For model number WTW4816FW3
Hello Wiltena, thank you for contacting us. According to our understanding, the issue is most probably with the lid lock assembly, part number PS12704713. You may need to replace it to fix the issue. We hope this solves your problem!
what is the part number for a replacement hot water inlet valve mine got crossthreaded when they installed it leaks bad
For model number WTW4816FW3
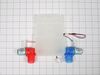
Hello Sara, thank you for contacting us. The hot water inlet valve for your model does not come separately, and it comes as a part of the water inlet valve assembly, part number PS12349269, which contains two inlets, one for hot water and one for cold. You may need to replace it to solve the problem. Glad to be of assistance!
hi, my machine went on the BLINK, it runs all the time. I unplug it for the night and plug it back in, and it still makes the same noise. it sounds like the pump is trying to pump the water out. the machine is only a year old, I need help. Sincerely,
For model number WTW4816FW3
Hi Karin, thank you for contacting us. Check if the pump is functioning correctly and not clogged or damaged. If it is fine, the issue could be with the control board, part number PS16744838. It manages commands and ensures the appliance operates correctly according to the selected settings. You may need to replace it to fix the issue. We hope this sorts out your problem!
First pry off the cap of the agitator. Then using a socket remove the bolt that holds the plastic cup in place. Remove this cup by prying it loose from the two tabs that hold it in place. Once this cup is removed you can get to the broken cogs. Slip the new cogs into the underside of the cup, and slide the cup back down in the a
... Read moregitator housing using the slots on the side for a guide. (You may want to remove the entire agitator and assemble everything upside down, then flip it all back over to mount, so the cogs don't fall out). Tighten the bolt, snap the cap back in place on top of the agitator and your'e done. Easy repair.
pull off softner dispenser, pop off agitator cap by inserting straight screw driver into small slot, remove bolt inside agitator with socket wrench and long extension, pull agitator straight up off shaft, place agitator on floor, with feet holding bottom half pull top half apart from bottom half by pulling straight up, note direction of o
... Read moreld cogs remove and replace with new, reassemble
Pulled off the dispenser. Used socket set to remove bolt. Removed entire agitator out of washer. Placed both feet on bottom of agitator and then pulled up on the upper agitator. It took some muscle due to the years of washer use. I used a flat-head screwdriver to weaken the plastic clips holding down the old bearing-driven cam. Once
... Read more I got the upper agitator off, the guts were easy to pull out. Then I just re-assembled with the 3 new parts (the Cam Driven, the Dog Ears, and the Bearing-Driven Cam).


 Diagram and Parts List for Whirlpool Washer")


 – Part Number: 72017")