


ZSC2001CSS General Electric Microwave - Overview
Sections of the ZSC2001CSS
[Viewing 1 of 1]
Keep searches simple, eg. "belt" or "pump".

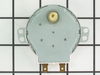
Turntable Guide with Rollers
PartSelect #: PS228014
Manufacturer #: WB06X10304
This roller guide sits underneath the glass turntable tray.
No Longer Available

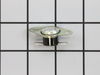
Oven Cavity Thermal Cut Out
PartSelect #: PS1993849
Manufacturer #: WB27X10985
Also known as a Sensor or Fuse. This part will trip once the inside of the cavity overheats and exceeds the recommended temperature.
No Longer Available

High Voltage Diode
PartSelect #: PS239843
Manufacturer #: WB27X1160
This diode has a 1/4" female connection and an eyelet.
$94.00
In Stock


Manuals & Care Guides for ZSC2001CSS
Click to downloadInstall
Installation Instructions
(0.18MB)
Install
Installation Instructions
(0.25MB)
Manual
Owner's Manuals
(1.62MB)
Specs
Product Specifications Sheet
(0.14MB)
Care
Use and Care Manual
(0.73MB)
Questions And Answers for ZSC2001CSS
We're sorry, but our Q&A experts are temporarily unavailable.
Please check back later if you still haven't found the answer you need.
Common Symptoms of the ZSC2001CSS
[Viewing 3 of 3]Won’t turn on
Fixed by
these parts
these parts

Show All
Tray won’t turn
Fixed by
these parts
these parts

Show All
No heat
Fixed by
these parts
these parts

Show All
Keep searches simple. Use keywords, e.g. "leaking", "pump", "broken" or "fit".
Microwave dead--no LEDs lit on front panel
Removed microwave from enclosure and removed cover, hoping it was as simple as a blown fuse. Found extremely helpful diagnostic sheet thoughtfully provided by manufacturer in an envelope affixed to top of cavity. Fuse was fine, but tracing the power feed into the machine revealed that the oven cavity thermostat was open--no continuity acr
... Read more
oss it, and the diagnostic sheet indicated that it was non-resettable. Verified the issue by temporarily by-passing the blown thermostat to ascertain that the front panel display got power. It took longer to get the screws for the cover and enclosure back on than it did to replace the thermostat, once I received the replacement part. Microwave works just fine now, thanks!
Read less
Parts Used:
-
Steve from Redmond, WA
-
Difficulty Level:Easy
-
Total Repair Time:15 - 30 mins
-
Tools:Screw drivers
37 of 45 people
found this instruction helpful.
Was this instruction helpful to you?
Thank you for voting!
Noise and no Heat on Microwave oven.
First, I waste $65 by calling some "REPAIR" service. They showed at home and charge me that just to tell me
Second, I researched on the web and ordered a part, which was not the issue. I waste abnother $72
Third, I found Part-Select and got the right answer: the Diode was the problem. Ordered the part form Part-Select and it FIx ... Read more ed it !!!
Note: I did not buy a new microwave because this one is mounted on the wall and it will cost me +$800 just the lowest price.
Read less
Parts Used:
-
Luis from Plano, TX
-
Difficulty Level:Easy
-
Total Repair Time:Less than 15 mins
-
Tools:Screw drivers, Wrench set
33 of 49 people
found this instruction helpful.
Was this instruction helpful to you?
Thank you for voting!
while cooking a big dish of food, the microwave just stopped and went black
Fortunately, my brother-in-law suggested it might be the "cut out" switch. After unplugging the microwave, I opened it up and identified one of two cut outs and removed the wires from each side of the cut out. To test if that was the problem, I connected the two wires together, bypassing the cut out. When I plugged the unit back into t
... Read more
he wall socket, the lights came back on, and i ran the microwave for a few seconds. It verified that this was the problem. I ordered the part and when it arrived, I removed it with a philips screw driver and replaced it with the new one. I replaced the screw, buttoned the unit back up, plugged it in, and saved a few hundred bucks on a replacement microwave, and as important, saved our landfills and planet a tiny but.
Read less
Parts Used:
-
Mark from South Jordan, UT
-
Difficulty Level:Really Easy
-
Total Repair Time:Less than 15 mins
-
Tools:Screw drivers
19 of 21 people
found this instruction helpful.
Was this instruction helpful to you?
Thank you for voting!