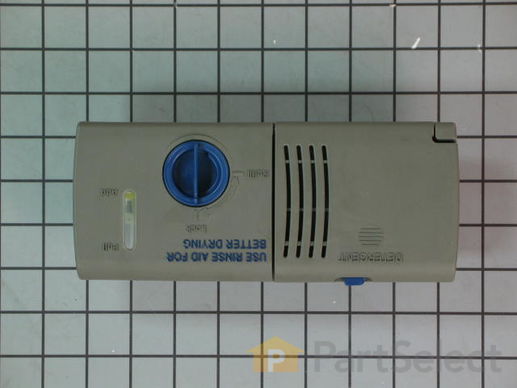
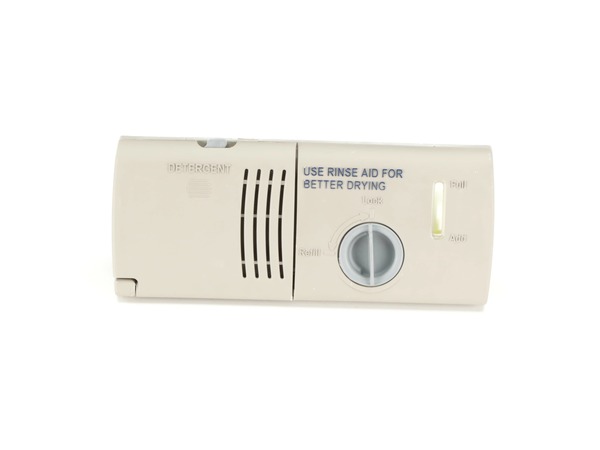
This part releases the detergent and rinse aid into the dishwasher. Light grey in color. The detergent dispenser attaches to the inner door panel and holds the dishwasher detergent and rinse agent in a covered compartment.
How Buying OEM Parts Can Save You Time and Money
Part Videos
Replacing your KitchenAid Dishwasher Detergent Dispenser Assembly
Troubleshooting
This part fixes the following symptoms:
Will not dispense detergent | Door latch failure | Not cleaning dishes properly | Leaking
Keep searches simple. Use keywords, e.g. "leaking", "pump", "broken" or "fit".
Sorry, we couldn't find any existing reviews that matched. Try using some different or simpler keywords.
★★★★★
★★★★★
Larry L - October 1, 2023
Verified Purchase
Easy repair- part arrived quickly, all went well
Watched a u-tube video to replace, very easy, took 30 minutes from start to finish. Was happy with the replacement part, was as advertised and received quickly. Save yourself the repair bill and do it yourself .
★★★★★
★★★★★
Mitch P - February 11, 2021
Verified Purchase
OEM
Like new
★★★★★
★★★★★
Kristin H - June 6, 2020
Verified Purchase
Easy self repair
Replacing this part was fairly easy while watching the how to video. However, dishwasher leaked when we tried the first wash. We had to tighten all the screws and then it worked great!
★★★★★
★★★★★
Wayne D - December 4, 2019
Verified Purchase
I found instructions on You Tube that made the repair simple
The replacement part worked and only took about 30 minutes to install.
★★★★★
★★★★★
Joseph P - August 23, 2019
Verified Purchase
Low Effort Repair
Anybody could do this repair.
★★★★★
★★★★★
Walt R - October 17, 2018
Verified Purchase
Working fine!
Successfully followed install instructions on a YouTube video. Definitely need two persons to reattached door panels together. Some difficultly in reattaching electrical connector. But dispenser has been working for two weeks. Expect it to work for years to come.
★★★★★
★★★★★
Ben F - October 9, 2018
Verified Purchase
Part works great, service gives me pause
My order came fast and has fixed my dishwasher. Unfortunately it wasn’t a great transaction overall. The item came in a box completely unwrapped and unprotected. No bubble wrap, packing peanuts, even crumbled newspaper would have been nice. It was just the part loose in a corrugated box. Because of this and the shoddy handling shipping agents are known for, the latch on the dispenser was broken off upon arrival. I decided to just reattach it and install it and it has worked out fine. But, I will seriously consider other options next time I need such an appliance part.
★★★★★
★★★★★
Edward M - September 25, 2018
Verified Purchase
repair was easy
The directions on the computer were easy to follow and the repair worked well
★★★★★
★★★★★
Margaret O - September 24, 2018
Verified Purchase
Great part
The part was the correct one and my machine is now working properly
★★★★★
★★★★★
Tom B - September 1, 2018
Verified Purchase
Right part, easy install
The biggest challenge was making sure that it was truly the right part since I have a Maytag but the part is generally branded as Whirlpool. PartSelect assured me that it was the right part (apparently Maytag and Whirlpool are actually the same company and only have superficial differences). Bottom line, it fit, the installation was simple though a second person may have been helpful. I think it took about a half hour.
< Prev
1
2
3
Next >
Customer Repair Stories
Average Repair Rating: 3.4 / 5.0, 25 reviews.
What's this?
Sort by:
< Prev
1
2
3
Next >
Search filter:
Clear Filter
Your search term must have 3 or more characters.
Keep searches simple. Use keywords, e.g. "leaking", "pump", "broken" or "fit".
Sorry, we couldn't find any existing installation instruction that matched.
Detergent Dispenser Assembly door snapped the plastic piece that keeps it closed and the friction sleeve was found on the floor because it cracked and fell out.
Had to remove the face of the door and then unscrew the inside of the door. The dispenser assembly was easy to remove and replace but the friction sleeve was a little more difficult. That has a plastic piece that attachs to the door and when we pulled the plastic piece to attach to the bracket it fell off. It took a bit to attach but once
... Read more we did the 2 of us did the other side in seconds. One held the plastic piece with a pliers and the other attached to the bracket.
Repaired according to the video attached to the part I ordered. The problem is that though the replacement part look like the one I was replacing, once installed I realized the electrical connector on the replacement part did not match the cable connector from the dishwasher control panel. I called support to find out my options and got a
... Read more message that because of the scary Covid-19 issue, nobody was available to tell me what my options are. So I have a nice, new, installed replacement part that won't work because of different electrical connectors. I'm happy though that the governors and politicians don't have to worry about things like this. They continue to receive their paychecks and can simply order new appliances rather than try to fix 18 year-old equipment like the rest of us.
Read less
Sean from UPLAND, CA
Difficulty Level:
Easy
Total Repair Time:
30 - 60 mins
Tools:
Nutdriver, Socket set
2 of 2 peoplefound this instruction helpful.
Was this instruction helpful to you?
Thank you for voting!
Detergent Dispenser would not open
Replace Dispenser, 6 screws to remove outer panel, disconnect electrical connector, remove 6 screws and remove dispenser. Replacement same steps backwards. Don't forget Flap prior to installing metal frame and screws.
ROBERT from CEDAR RAPIDS, IA
Difficulty Level:
Really Easy
Total Repair Time:
15 - 30 mins
Tools:
Nutdriver, Screw drivers
1 personfound this instruction helpful.
Was this instruction helpful to you?
Thank you for voting!
Not as Easy as Pie
First, my husband had to buy a part to get the screws out of the door. The process first took him an hour. I tested the dishwasher and I had leaks all over the place. So, he removed the part and put it back in and tried to run it again without putting the door back on, and we saw it was leaking at the new part that was installed. It to
... Read moreok at least another hour until it was "reseated" properly so that it did not leak.
Read less
Kate from READING, PA
Difficulty Level:
A Bit Difficult
Total Repair Time:
More than 2 hours
Tools:
Nutdriver, Screw drivers
1 personfound this instruction helpful.
Was this instruction helpful to you?
Thank you for voting!
Dishwasher wouldn't complete cycle - due to detergent dispenser door not opening.
Step 1. Take less than 3 minutes to watch this: https://www.youtube.com/watch?v=bjJzP0YA188
Step 2. Read a review that said "my 10 year old son fixed this in less than 30 min".
Step 3. Ordered part, borrowed 3/16 nutdriver.
Hardest part was remembering the 4 longest screws went back in to the top of the d
... Read moreoor.
Read less
Russell from ATHENS, AL
Difficulty Level:
Really Easy
Total Repair Time:
30 - 60 mins
Tools:
Nutdriver, Screw drivers
1 personfound this instruction helpful.
Was this instruction helpful to you?
Thank you for voting!
The soap dispenser door wouldn't open by itself (spring was shot)
Took the new door that came with the dispenser assembly and popped it on in place of the old one. So now I have the rest of the (entirely superfluous) assembly which I don't need. Would have been nice to be able to purchase just the door (which, by the way, came as a separate part in the box, and instructions for installing were NOT inclu
... Read moreded in the video of installing the entire assembly.
Read less
Robert from BOWLING GREEN, OH
Difficulty Level:
Really Easy
Total Repair Time:
Less than 15 mins
Tools:
Screw drivers
1 personfound this instruction helpful.
Was this instruction helpful to you?
Thank you for voting!
dishwasher detergent door latch was missing.
I never would have purchased the Detergent Dispenser Assembly without watching the video on replacing it. The video was great. The project didn't seem too bad so I ordered the part.
I have two suggestions to add to the video.
First, mark the steel bracket that holds the Detergent Dispenser Assembly to the door wi
... Read moreth a magic marker in a corner BEFORE you unscrew it. It can be reinstalled 4 different ways and it would be helpful to know which one is correct (i.e. were the beveled edges pointing in or out?)
Second, the utensil tray has a flap that holds the utensils away from each other - if you use it. If you don't, this flap has a lip on it which fits nicely under the door latch and would be an excellent way to break off the latch when lifting out the tray. I strongly recommend removing this flap on the side of the tray that fits under the Detergent Dispenser Assembly.
Read less
james from SEATTLE, WA
Difficulty Level:
Really Easy
Total Repair Time:
30 - 60 mins
Tools:
Nutdriver, Socket set
2 of 2 peoplefound this instruction helpful.
Was this instruction helpful to you?
Thank you for voting!
Detergent dispenser not working
Took out screws on back of panel. Then followed instructions from the video provided
Jorgen from SULTAN, WA
Difficulty Level:
Easy
Total Repair Time:
1- 2 hours
Tools:
Nutdriver, Pliers, Screw drivers
1 personfound this instruction helpful.
Was this instruction helpful to you?
Thank you for voting!
Soap dispenser failure
The video provided was followed to the letter. I turned off the water supply and power to the unit. Then I Opened the door undid the 6 screws holding the the front panel on the door. Supported the front panel while unscrewing these fasteners. Then I taped the waterproof protective flap back out of the way. Next the electrical connector w
... Read moreas disconnected. It snaps in and out of the connection similar to a telephone jack connection. Then the six screws holding the dispenser in place were undone. Next I used a thin blade screw driver to release the tension on the top and bottom spring clips. The old unit was damaged beyond repair. The first thing I did to reinstall was to gently bend the top and bottom clips back to where they were before unit removal. My new unit was installed by reversing the above procedure. When I removed the new product from the shipping box I noticed the waterproof gasket was loose on one side. I was careful to lodge the gasket back in place before clipping unit in place. Whole process took approximately 20 minutes. That includes time to retrieve my tool boxes and clean up after I was finished. It was a relatively easy process if you know your way around a basic tool box.
Read less
Edward from HINGHAM, MA
Difficulty Level:
Really Easy
Total Repair Time:
15 - 30 mins
Tools:
Screw drivers
1 personfound this instruction helpful.
Was this instruction helpful to you?
Thank you for voting!
Rinse Aid was no longer working
I had a bit of trouble connecting the power source to the new unit and suggest connecting and disconnecting the snap in connector before installing the new dispenser. That way you can make sure exactly how the wiring clip inserts before screwing everything down. The video made this a very easy project
Thomas from LINCOLN, NE
Difficulty Level:
Easy
Total Repair Time:
1- 2 hours
Tools:
Nutdriver, Screw drivers, Socket set
1 personfound this instruction helpful.
Was this instruction helpful to you?
Thank you for voting!
< Prev
1
2
3
Next >
Questions and Answers
We're sorry, but our Q&A experts are temporarily unavailable.
Please check back later if you still haven't found the answer you need.
33 questions answered by our experts.
Sort by:
< Prev
1
2
3
Next >
Search filter:
Clear Filter
Your search term must have 3 or more characters.
Keep searches simple. Use keywords, e.g. "leaking", "pump", "broken" or "fit".
Sorry, we couldn't find any existing answers that matched.Try using some different or simpler keywords, or submit your new question by using the "Ask a Question" button above!
Justin
August 16, 2017
Is it possible to order just the little latch on the detergent dispenser or do you have to order the whole system?
Hi Justin,
Thank you for your inquiry. The latch for the detergent dispenser is not sold separately. The part is sold with the dispenser. I hope this helps. Thank you and have a great day!
48 people found this helpful.
Was this helpful?
Thank you for voting!
Jim
September 5, 2017
Is it possible to order just the plastic rinse cover plug from the detergent dispenser?
For model number KUDS301VSS4
Hi Jim,
Thank you for writing. The Rinse Aid Cap part number for this dispenser is PS11748135.
Hope this helps!
All i need is the cap for the detergent dispenser for the Jet dry part of the unit. Everything else is fine with the detergent dispenser!
For model number MDB6709AWW1
Hi Mary,
Thank you for your question. The part number listed under your model number for the cap is PS11750166. I hope this helps. Thank you and have a great day!
5 people found this helpful.
Was this helpful?
Thank you for voting!
Sherry
December 1, 2017
Soap doesn't always dispense when it it is supposed to. Sometimes I find the tablet in bottom of dishwasher, dishes aren't clean. Tried just liquid this am and liquid did the same thing.
For model number KUDL03IVWH0
Hi Sherry, Thank you for the question.Sounds like the dispenser latch or wax motor that releases the latch is defective.These parts are not sold separate from the dispenser its self so the full dispenser will need to be replaced, PartSelect Number PS11750167. Good luck with the repair!
5 people found this helpful.
Was this helpful?
Thank you for voting!
Joe
October 5, 2017
For this model it seems that the "top" screws holding the control panel must be removed to get the door cover off. Instead of leaving them in and only removing the 3 "bottom"screws on each side as shown in the video. Is that correct?
For model number KUDS50FVSS0
Hi Joe,
Thank you for your inquiry. For information on the installation on this part, there is a video listed with the part that you may reference on how to install it. I hope this helps. Thank you and have a great day!
4 people found this helpful.
Was this helpful?
Thank you for voting!
Hubert
March 13, 2020
I need to replace the detergent rinse dispenser. How do i remove the old dispenser from the door panel.
For model number GU2700XTST1
Good Day Hubert. Thank you for your question in regards to your unit (Model Number GU2700XTST1). The following URL is to a video we have prepared that should help you with this: https://www.youtube.com/watch?v=jCBjkjAQRFM&feature=emb_logo. We hope this helps! Best Regards.
4 people found this helpful.
Was this helpful?
Thank you for voting!
Tammy
December 1, 2017
I only need the little blue thing to latch the detergent door.What part number is that?
For model number Mdb7759aww2
Hi Tammy, Thank you for the question. The latch parts are not sold separate from the dispenser assembly,Part Number: PS11750167. Hope this helps!
3 people found this helpful.
Was this helpful?
Thank you for voting!
Frederick
April 12, 2018
All i need is the the dispenser cap, not the whole unit. Can i get just the screw in cap?
For model number MDB7749AWB2
Hello Frederick, thank you for your question. You are able to order just the Rinse Aid Knob. The PartSelect number for that part is Part Number: PS11750166. Please enter the part number into the site for current price and availability. Good luck with your repair!
2 people found this helpful.
Was this helpful?
Thank you for voting!
GREG
February 20, 2019
This video is incorrect for models with controls on the top edge of the door. I have removed the 6 suggested screws, and it's evident that more need to be remover. Which ones?
For model number MDB8959AWS4
Hello Greg, thank you for your question. We would recommend removing any other screws you see around the edge of the door. Also look for screws in the top corners. I hope this helps.
2 people found this helpful.
Was this helpful?
Thank you for voting!
Barbara
January 24, 2020
This dispenser was replaced in 2019 as it would not stay latched. The new dispenser leaks out the finish aid product with every wash. What is the life of this part? My dishwasher is 27 years old but has always worked until these issues. What do you recommend.?
For model number KUDS301VBL3
Hi Barbara. We do not have an estimated life of the dispenser. We do however have a one year warranty on our parts. I would replace it with PS11750167. The reviews are great as well.Thank you for your question and good luck with your repair.