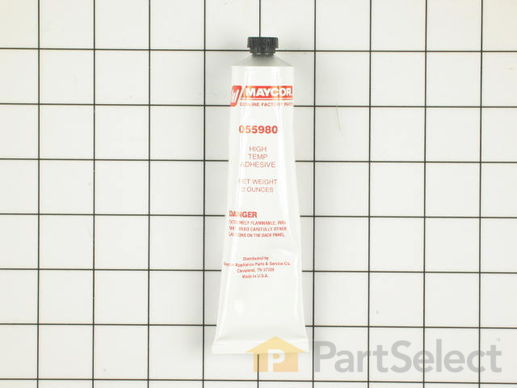
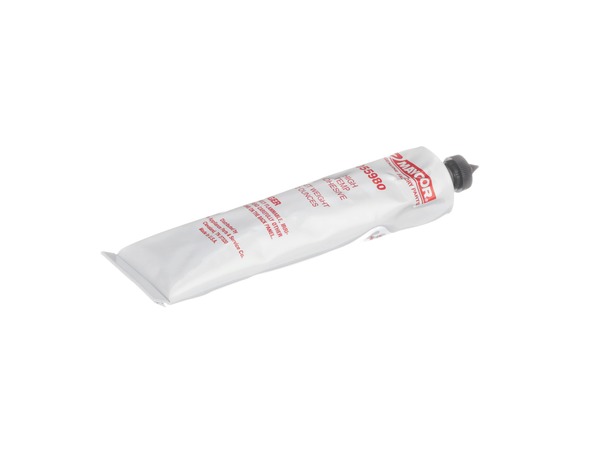
This is replacement high temperature adhesive for your washer and dryer. It is designed to hold objects together, and will not disintegrate at a high temperature. This is a 2-ounce tube of adhesive that is sold individually. This is an OEM product sourced directly from the manufacturer.
Keep searches simple. Use keywords, e.g. "leaking", "pump", "broken" or "fit".
Sorry, we couldn't find any existing reviews that matched. Try using some different or simpler keywords.
★★★★★
★★★★★
Frank C - November 20, 2023
Verified Purchase
Needed for door gasket on Whirlpool dryer
Works as expected, no need to remove old adhesive just apply and place new gasket.
★★★★★
★★★★★
Steve B - April 2, 2021
Verified Purchase
Easy Repair
Part (Adhesive) worked as advertised...exactly what I ordered!
★★★★★
★★★★★
Geraldine B - July 19, 2020
Verified Purchase
Dyer door seal repair
Glue worked great
★★★★★
★★★★★
Sylvia S - December 27, 2019
Verified Purchase
Worked great on dryer door seal
Order came quickly & parts in great condition. Installation of dryer door seal & adhesive was fairly simple.
★★★★★
★★★★★
James B - March 21, 2019
Verified Purchase
Easy cheesy sticky it works great
Fast/on time. Back to working order.
★★★★★
★★★★★
Laura B - January 1, 2019
Verified Purchase
22 yr old maytag
Looked for high temp. adhesive on home department store site and a glue guns came up. Glad I could get the glue from you.
★★★★★
★★★★★
Jose M P - October 23, 2018
Verified Purchase
Easy repair
Easy repair ,a good adhesive
★★★★★
★★★★★
Steven F - September 22, 2018
Verified Purchase
Messy but it worked!
2 oz. Was a bit of overkill for the repair. An applicator would have helped with the project. I have nearly 2 oz left after a successful instal.
★★★★★
★★★★★
Peter M - June 15, 2018
Verified Purchase
Great Adhesive
A little pricey but good stuff, worked exactly as advertised on my clothes washer drum kit. Would be five stars if it were a bit less expensive, I think there are cheaper alternatives.
< Prev
1
Next >
Customer Repair Stories
Average Repair Rating: 2.8 / 5.0, 16 reviews.
What's this?
Sort by:
< Prev
1
2
Next >
Search filter:
Clear Filter
Your search term must have 3 or more characters.
Keep searches simple. Use keywords, e.g. "leaking", "pump", "broken" or "fit".
Sorry, we couldn't find any existing installation instruction that matched.
Replacing gasket on dryer door
Ripped out the rest of the old gasket, applied glue, applied gasket, let dry.
I would point out that the adhesive says not to use around heat-producing products. And this was on a dryer. The instructional video never mentioned how long it took the glue to dry so that it could be restored. Just said, "until it dries.'
I watched a video on you tube repair videos and the repair went fairly easy. But I missed a part near the end of the video and placed a part too close to the shaft and it would not go into the spin mode. After watching the video again I was able to move the part 1/4" and it now works as good as new.
Simply remove the door, clean out any remaining gasket and loose glue. Apply a layer of high temp adhesive and quickly stretch the gasket and stick it in the glue. Let it dry overnight, remount the door and you are done.
Like in the video! The "easy" way with the block of wood and 3 electrical boxes. A little patience and this worked fine enough. The unit was stable raised up on the block of wood so no worries with it falling. I cleaned up the old damper pad from the front and then turned the unit by rotating on the block of wood (very easy as all the
... Read more weight is supported) and accessed the back from the "port" hole in the back of the machine. There was enough room to work. The old damper pads were not in bad shape for 30+ years old. I cleaned it all up and applied the adhesive to one pad at a time and positioned in place. I probably placed them a bit to high but it worked out fine in the end. I let dry overnight and then greased them up and lowered the tub onto them. One of the electrical boxes popped off the spring but it went right back on using the tub for leverage as in the beginning. That was a relief. In the 30+ years that I've heavily used this washer this past month saw the only repairs to the machine - a plastic valve last month and the damper pads now. The Maytag repair man is a lonely fella. The repair and diagnostic information and parts on this site are invaluable. And, they are correct and a good value. Thanks PartSelect!
Felt gaskets were worn and protruding into the drum. Cork and nylon bearing surfaces worn were
Removed and replaced felt gaskets as per the instructional video, simple task. Removed and replaced cork and nylon bearing surfaces, simple task. I did NOT need the high temp adhesive as recommended by a rep according to the model # provided. I did use a small amount to reattach the loose rubber gasket on the front drum panel. The adhesiv
... Read moree was an unnecessary added expense, and the cost of the cork and nylon bearing surfaces was excessive.
in reassembly, agitation cylce disappeared and went into a slow spin
I put everything back together like video and then did a small wash. The agitation cycle was gone! haha.....it was in a slow rotation and no agitation at all. The video guy seems to turn pulley wheel all the way clockwise till it bottoms out on brake and then he says to put the lug stop washer and screw it in 1/4" to 3/8" behind the tab o
... Read moren pulley and put screw in w/ lock washer. I watched other videos and figured out that was way too much turning on the pulley. I then unscrewed pulley and hand rotated it back on to the point where it barely start to make contact with brake and then I put the lug stop about almost 1/2" back, attached screw and lock washer and gave it a test and wallah! all good!.
I took dryer door off, put on a flat surface, used pliers to pull old seal off, use a brush to clean any remaining fibers, applied adhesive & let it dry for minute or two til tacky then install seal, let dry for 24hrs, put dryer door back on & done.
This repair may seem daunting to your average non-professional repairman (certainly did for me) but, it's really not too bad. Additional items that you will find useful are a 4"x4"x12" block of wood, Acetone, Wire Brush, Sturdy Cloth, Gloves. First step is to disconnect the water and power and move washer to a suitable work area. Remove t
... Read morehe front panel by removing the two screws located on the underside of the unit. Lift the front panel up and towards you from the bottom to free the top two clips, set panel aside. Once inside you will see that the tub is centered by three springs connected to eyelets that are bolted to the washer base. Mark the threads, then remove all three springs by removing the nuts from the underside of the washer, the tub is now free to move independent of the washer. Next you'll need to remove the two screws holding the top panel/Lid to the sides (be careful as this will greatly affect the washers overall rigidity). Once removed, carefully tilt the washer back just enough to slide the 4x4x12 block of wood underneath the main drive pulley connected to the bottom of the tub. Set the washer back down and the tub will now be propped up on the wood, exposing the damper pads on the washer base. Tear off the old pads and clean ALL residual glue using the acetone, wire brush and cloth. It's key to have a clean, smooth, and dry surface for the new pads to work properly. Once clean apply the new pads using the high temp glue and supplied instructions. I recommend applying one pad at a time as it requires a bit of dexterity. Don't slather the glue all around like I did or you'll be in a race against the clock to adjust them before the glue sets. I waited 4hrs for the glue to set, then applied the provided lube to each pad and re-assembled the washer in reverse order using the new springs. Be sure to check that your belts are still properly attached as the block of wood may have affected them. Finally, I checked and adjusted the leveling legs, Re-conneted water and power and gave it a test run. Washer runs great! 15+ loads with smooth operation and no more shakes or wobbles.
After removing the two screws that hold the front panel in place , I could easily see the areas I needed to work in .Also , I removed the two screws securing the top panel and raised it a few inches . I saw how the damper pads were worn away . I removed the 3 dampering springs by removing the eyebolts and the base mounting nuts . After th
... Read moree dampering springs are removed , the washing drum can be lifted up off the bottom .Just lean the machine towards the rear and place a 4x4 lumber under the big pulley on the bottom and allow the machine to slowly come forward again resting on the lumber .I followed the instructions supplied and cleaned the excess dirt and debris away from the pad mounting areas . I applied the glue as instructed and allowed it to dry . A little dexterity was needed but the new pads easily went into position . After allowing a little more glue time ,I removed the 4x4 lumber from the bottom and lowered the machine .I installed new centering springs and tightened the eyebolts to thier original positions .I secured the top and the front panels and performed a couple test cycles . perfect , no vibration at all. like new . I replaced the two drive belts on the bottom because they had never been replaced and they definitely showed wear . Another test and I was completed in around 2 hours .
raised the top (screwdriver) undid the front , then removed 4 screws (front seal )removed) undid the dryer belt , remove drum , wire brushed the drum , applied glue (tacky) applied the felt belt aka rear belt seal , dries quickly. reassemble
We're sorry, but our Q&A experts are temporarily unavailable.
Please check back later if you still haven't found the answer you need.
7 questions answered by our experts.
Sort by:
< Prev
1
Next >
Search filter:
Clear Filter
Your search term must have 3 or more characters.
Keep searches simple. Use keywords, e.g. "leaking", "pump", "broken" or "fit".
Sorry, we couldn't find any existing answers that matched.Try using some different or simpler keywords, or submit your new question by using the "Ask a Question" button above!
Marilyn
January 7, 2022
Is this adhesive also moisture proof?
Hello Marilyn, thank you for writing. We did find one sealant that is moisture proof. The part number is Silicone Rubber Adhesive - 2 oz PartSelect Number PS11740605. Silicone rubber adhesive is a high temperature adhesive that is used for gaskets on dryers and felt seals. It is used on many different appliances for many different application reasons. This silicone paste creates a waterproof seal between components. This product is a 2 oz. tube. Unplug your appliance if you will be working on any internal workings and applying this sealant. Wear gloves to protect your hand from accidently applying sealant to your skin. The surface must be clean, dry, and free from oil and grease. Coat one surface and let it dry for at least one minute and then bond. We hope this helps.
When replacing the felt seals that seal the drum, do you need the high temperature adhesive?
For model number MDG9206BWW
Hello Jeremy, Thank you for your inquiry. It is recommended as it is designed to hold at any high temperature. Hope this helps!
1 person found this helpful.
Was this helpful?
Thank you for voting!
Dale
November 14, 2019
We have a plastic sweater drying rack (Whirlpool 8212450a dryer drying rack ) that has cracked. Will this adhesive work to repair it and hold up in the dryer heat?
For model number Y055980
Good Day Dale. Thank you for your question in regards to the High Temperature Adhesive. We would recommend reaching out to the manufacturer at 866-698-2538 as they will be able to confirm if it will work in your specific unit. Best Regards.
1 person found this helpful.
Was this helpful?
Thank you for voting!
Claude
July 30, 2021
Could you please tell me what high temperature adhesive i need to purchase for the installation of the felt on my Samsung dryer.Thanks
claude
For model number DV339AEG/XAC
Hello Claude, Thank you for contacting us. We have researched the issue you have provided and have found
the part you are looking for is PartSelect Number PS11757492. Any Manufacturer Brand name Adhesive is sufficient. Good luck with your repair.
1 person found this helpful.
Was this helpful?
Thank you for voting!
Greg
May 7, 2018
How many tubes of wpy055980 glue are needed when replacing 2 felt strips wp33001807
For model number mde7600ayw
Hello Greg, Thank you for your inquiry. It is a two ounce tube of glue, so it is recommended one tube per seal. Hope this helps!
Was this helpful?
Thank you for voting!
Philip
July 7, 2022
What adhesive should I use for replacing felt seal?
For model number NDE7800AYW
Hello Philip, Thank you for contacting us. We have researched the model you have provided and have found the part you are looking for is PartSelect Number PS11757492. If you need help placing an order, customer service is open 7 days a week. Please feel free to give us a call. We look forward to hearing from you!
Was this helpful?
Thank you for voting!
John
April 10, 2023
Hello, is this 2 oz enough for 2 drum felts, front and back (1 drum has 2 drum felts)?
For model number 796.91182310
Hi John, thank you for reaching out. Based on our research, it is a two-ounce tube of glue and is recommended one tube per felt seal. We hope this helps!