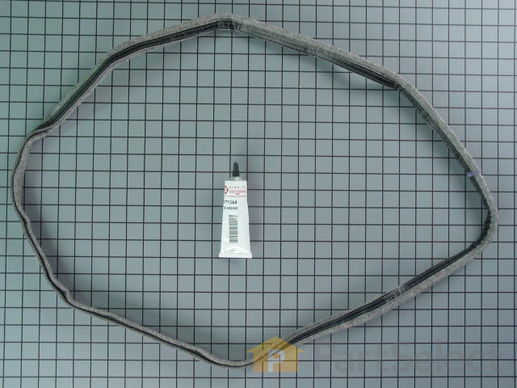
Part Location Diagram of 280114 Whirlpool Dryer Drum Seal with Adhesive
See part 27 in the diagram
( Grid squares measure 1x1 inch )
Customer Service Representative

Get in touch, we're here to help!

Monday to Saturday
8am - 9pm EST

customerservice@partselect.com

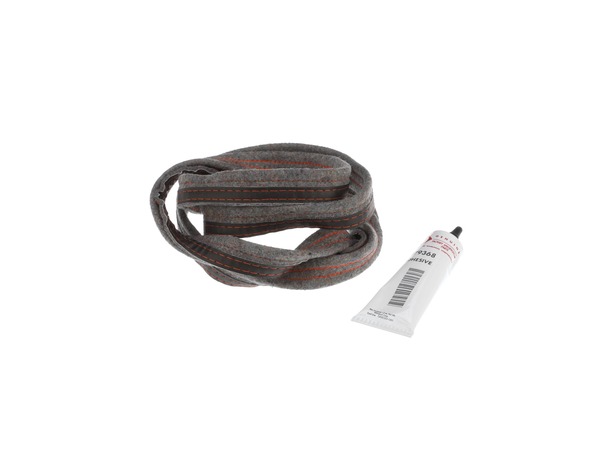
Dryer Drum Seal with Adhesive 280114

★★★★★
★★★★★
19 Reviews

Rated by 6 customers 

Easy 

1- 2 hours 

Ratings submitted by customers like you who bought this part.

$ 47.23
  In Stock
Get FREE EconoShip on orders over $100! T&C apply

Get this part fast! Average delivery time for in-stock parts via standard shipping: 1.8 days.

Does this part fit my model?

Need help finding your model number?
PartSelect Number PS970088
Manufacturer Part Number 280114
Manufactured by Whirlpool for Whirlpool, Kenmore, Maytag, KitchenAid
Product Description

Dryer Drum Seal with Adhesive Specifications

This drum seal with a silicone rubber adhesive is used in dryers. This part seals the drum to make sure air does not escape from the dryer. If your dryer is making loud noises, is not producing enough heat, or no heat at all, or there are marks left on your clothes, replacing the seal on your dryer can solve the problem. The tools needed for this installation project are: 1/4 inch nut driver, Phillips screwdriver, small flat blade screwdriver, and putty knife. Remember to unplug your dryer from the power source before beginning this installation project. Refer to the manual provided by the manufacturer for installation instructions.
How Buying OEM Parts Can Save You Time and Money

How Buying OEM Parts Can Save You Time and Money

Troubleshooting
This part fixes the following symptoms:
Noisy | Marks left on clothes
This part works with the following products:
Dryer, Washer Dryer Combo.
Part# 280114 replaces these:
AP3790434, 1065278, 280114, 280114VP, 3403265, 697694, W10116343, W10166807, W10521118
Back to Top
Customer Reviews
Average Rating:
★★★★★
★★★★★
19 Reviews
4.5
Filter By Rating:
  • 5 Stars
    14
  • 4 Stars
    3
  • 3 Stars
    1
  • 2 Stars
    0
  • 1 Star
    1
Sort by:
  • 1
  • 2
Sorry, we couldn't find any existing reviews that matched. Try using some different or simpler keywords.
  • 1
  • 2
Customer Repair Stories
 Average Repair Rating: 2.8 / 5.0, 6 reviews. What's this?
Sort by:
  • 1
Sorry, we couldn't find any existing installation instruction that matched.
Old. Original heat seal was deteriorated and peeling off. Streaks were getting on the clothes.
Removed the front panel, removed the tub and removed the old seal. Tub seal area was scraped, sanded and wiped with acetone to ensure a clean. Bonding surface. Applied adhesive with and acid brush to get a consistent adhesive layer without getting too much in any one place. Seal was a bit smaller than the tub circumference so it had to be stretch to fit. While the adhesive was curing , I took the time to clean the contact surfaces and vacuum the lint from inside the cabinet. Reinstalled the tub, drive belt and front panel.
  • Lawrence from ARITON, AL
  • Difficulty Level:
    A Bit Difficult
  • Total Repair Time:
    More than 2 hours
  • Tools:
    Screw drivers, Socket set
2 of 2 people found this instruction helpful.
Was this instruction helpful to you?
Thank you for voting!
Annoying loud metal to metal screeching noise.
Took the front part of the dryer out, released tension on the idler pulley, took the drum out, and remove the old drum seal. Make sure you remove the old adhesive with sandpaper or wire brush. Put the new adhesive on the seal, not on the drum. Adhesive is very runny. Seal may need to be stretched to fit the drum. Set the seal on the drum, let sit a few minutes. Put everything back together.
Other Parts Used:
Dryer Drum Seal with Adhesive Idler Pulley
  • Ricardo from ARBUCKLE, CA
  • Difficulty Level:
    Really Easy
  • Total Repair Time:
    30 - 60 mins
  • Tools:
    Screw drivers, Socket set
2 of 2 people found this instruction helpful.
Was this instruction helpful to you?
Thank you for voting!
Broken Drum Belt
Just like the video, just followed the video
Thanks,
  • Garry from Garland, TX
  • Difficulty Level:
    Easy
  • Total Repair Time:
    15 - 30 mins
  • Tools:
    Nutdriver, Screw drivers, Socket set
3 of 3 people found this instruction helpful.
Was this instruction helpful to you?
Thank you for voting!
Rear seal was damaged and started falling apart.
Had loud squealing prior knew rollers was going. Ordered repair kit that contained new belt , idle pully, and rollers. Knowing I had previously mended the door switch ordered a new to replace it. Unplugged and removed the dryer. Removed front lower panel, then the top and took the screws that held the front panel and door switch. Then I took the belt off and removed the drum. Removed the rear felt and cleaned the drum with fine mesh steel wool applied adehesive waited 5 mins and attached new felt. Then went to work cleaning the inside of the dryer with an air compressor. Rollers were next, poped the retainers and slide old ones off whiped the studs with a rag and put new ones on. Did the same with the belt tensioner pulley that came with the kit. Installed the new door switch and reassembled the dryer. Works great again, quiet etc. Easy fix and glad I ordered the kit.
Other Parts Used:
Dryer Door Switch Dryer Drum Seal with Adhesive Dryer Repair Kit
  • michael from HUDSON, ME
  • Difficulty Level:
    Really Easy
  • Total Repair Time:
    1- 2 hours
  • Tools:
    Nutdriver, Screw drivers
5 of 5 people found this instruction helpful.
Was this instruction helpful to you?
Thank you for voting!
Rear dryer drum seal came out
Used my Whirlpool Dryer User Instructions Manual and followed instructions and used the Cabinet Parts page to see the diagrams.
  • William from Pontiac, MO
  • Difficulty Level:
    Easy
  • Total Repair Time:
    More than 2 hours
  • Tools:
    Screw drivers, Socket set
16 of 28 people found this instruction helpful.
Was this instruction helpful to you?
Thank you for voting!
Rear tub seal failure
I removed the top cover and then the back cover, released the belt tensioner and removed the drive belt. Then slid the tub out of the unit and onto the back dack. Sanded the remnents of the old seal off. Wiped the tub lip with laquer thinner and applied the "fast" drying glue supplied with the kit. Installed the seal and re-assembled the unit...works fine
  • Jerry from Everett, WA
  • Difficulty Level:
    Easy
  • Total Repair Time:
    30 - 60 mins
  • Tools:
    Screw drivers, Socket set
66 of 84 people found this instruction helpful.
Was this instruction helpful to you?
Thank you for voting!
  • 1
Questions and Answers

We're sorry, but our Q&A experts are temporarily unavailable.
Please check back later if you still haven't found the answer you need.

14 questions answered by our experts.
Sort by:
  • 1
  • 2
Sorry, we couldn't find any existing answers that matched.Try using some different or simpler keywords, or submit your new question by using the "Ask a Question" button above!
Chris
January 2, 2018
Does this kit do both the front and rear felt seals on the drum, or do you need two kits?
For model number 11076934690
PartSelect logo
Hi Chris, Thank you for the great question. This kit is just one seal with one tube of adhesive, if you are replacing both front and rear seals you will need to order two kits. Good luck with the repair!

24 people found this helpful.

Was this helpful?
Thank you for voting!
David
December 17, 2019
Does this drum seal also fit the front of the dryer?
For model number WGD9150WW0
PartSelect logo
Hi David, Thank you for your question. Yes, this seal is used for both the front and the rear of your dryer. We hope this helps. Thank you and have a great day!

11 people found this helpful.

Was this helpful?
Thank you for voting!
Patricia
January 23, 2020
My dryer seal on the door is not glued down in one small section. Can I use the adhesive glue to glue down loose section or do I have to replace entire seal? Old, used, dryer. Not worth putting a lot of money into.
For model number GEQ9800PW2
PartSelect logo
Hello Patricia, Thank you for the question. You can use a High Temperature silicone rubber adhesive used in dryers to reattach that section of the seal. We hope this helps.

3 people found this helpful.

Was this helpful?
Thank you for voting!
Dan
November 10, 2019
I found this seal that came loose inside the drum. Does that mean i need to replace the seal on inside of the back of the drum in that groove and not the outside of the drum?
For model number LEQ8611LG0
PartSelect logo
Hello Dan, thank you for your question. The felt seal at the back of the drum wraps around the lip. So the one seal seals the inside and outside of the drum. I hope this helps.

2 people found this helpful.

Was this helpful?
Thank you for voting!
Chari
February 19, 2018
Will this help with snagging my clothes. If not - please tell me which part is.
For model number WGD8300SW0
PartSelect logo
Hello Chari, thank you for your question. The parts you would want to replace to fix this issue would be the Dryer Drum Seal with Adhesive 280114. There are two of these on the unit, one that goes around the front of the drum, and the other goes around the back lip of the drum. I hope this helps!

1 person found this helpful.

Was this helpful?
Thank you for voting!
Marcel
January 27, 2022
What is the length of this Part # 280114
For model number Part # 280114
PartSelect logo
Hi Marcel, Thank you for your question. We do not have the dimensions for this belt, but if you could provide us with the model number from your dryer, we would be happy to verify if this is the correct part for it. We have included a link from our website on where to locate the model number on your dryer. If you could resubmit your question with this information, we would be happy to help you. If you have any questions, please let us know. We are open 7 days a week. We look forward to hearing from you!

1 person found this helpful.

Was this helpful?
Thank you for voting!
Additional Links:
Joe
November 8, 2021
Does this fit a Samsung dryer model number DC97-07618A? Thanks for your help.
For model number DC97-07618A
PartSelect logo
Hello Joe, thank you for writing. The number DC97-07618A is a part number for a Samsung Dryer Gasket. The number PS970088 is for a Whirlpool Dryer Dryer Drum Seal. For us to locate the correct parts and repair information we will require the model number of the unit. Once you have located the model number, please feel free to resubmit the question and we will be happy to help you. We are looking forward to hearing from you!

Was this helpful?
Thank you for voting!
Angela
April 18, 2022
Loud screeching noise when turn on. Replaced the rollers, idler pulley and belt, however still screeching. How can I be sure it is the Rear Drum Felt vs the actual motor screeching? I read somewhere that the bearings in the motor can also cause noise.
For model number LER8648PG0
PartSelect logo
Hello Angela, Thank you for the question. The only way to know for sure is to remove the old felt and check for wear. We also suggest checking the Two-Piece Split Ring Bearing at the front of the drum. If you need help placing an order, customer service is open 7 days a week. Please feel free to give us a call. We look forward to hearing from you!

Was this helpful?
Thank you for voting!
Related Parts:
Ashley
November 4, 2022
Looking for a replacement dryer door seal for maytag mgd5500fC0.
For model number mgd5500fC0
PartSelect logo
Hello Ashley, thank you for reaching out. This is the correct dryer drum seal, part number PS970088, for your given model. If you require assistance to place an order, please contact customer service. We hope that helps!

Was this helpful?
Thank you for voting!
Tina
December 21, 2022
My felt dryer drum seal broke. I know my dryer is old. I'm looking to replace it. What do I order. since this dryer is no longer sold.
For model number 11069822801
PartSelect logo
Hi Tina, thank you for reaching out. This dryer drum seal, part number PS970088, is listed as compatible with your model. If you require assistance to place an order, please contact customer service. We hope that helps!

Was this helpful?
Thank you for voting!
  • 1
  • 2
You May Also Need ?
Model Cross Reference
This part works with the following models:
PartSelect Number: PS970088
Manufacturer Part Number: 280114
Brand
Model Number
Description
Kenmore
10687884100
Dryer
Kenmore
10687884300
Dryer
Kenmore
10687884600
Dryer
Kenmore
10697502820
Dryer - Kenmore Dryer Model 106.97502820 (10697502820, 106 97502820) Parts
Kenmore
11060052990
Dryer
Kenmore
11060052991
Dryer
Kenmore
11060056990
Dryer
Kenmore
11060056991
Dryer
Kenmore
1106007299
Dryer - Kenmore Dryer Model 110.6007299 (1106007299, 110 6007299) Parts
Kenmore
11060072990
Dryer
Kenmore
11060072991
Dryer
Kenmore
11060092990
Dryer
Kenmore
11060092991
Dryer
Kenmore
11060094990
Dryer
Kenmore
11060094991
Dryer
Kenmore
11060096990
Dryer
Kenmore
11060096991
Dryer
Kenmore
11060097990
Dryer
Kenmore
11060182000
Dryer
Kenmore
11060372710
Dryer - Dryer
Kenmore
1106090199
Dryer - Kenmore Dryer Model 110.6090199 (1106090199, 110 6090199) Parts
Kenmore
11060901990
Dryer
Kenmore
1106090299
Dryer - Kenmore Dryer Model 110.6090299 (1106090299, 110 6090299) Parts
Kenmore
11060902990
Dryer
Kenmore
11060904990
Dryer
Kenmore
1106090799
Dryer - Kenmore Dryer Model 110.6090799 (1106090799, 110 6090799) Parts
Kenmore
11060907990
Dryer
Kenmore
11060912990
Dryer
Kenmore
1106092299
Dryer - Kenmore Dryer Model 110.6092299 (1106092299, 110 6092299) Parts
Kenmore
11060922990
Dryer
Customer Service Representative

Get in touch, we're here to help!

Monday to Saturday
8am - 9pm EST

Contact Customer Service