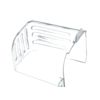
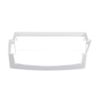
6EC3FHKXWA00 Whirlpool Refrigerator - Instructions
Keep searches simple. Use keywords, e.g. "leaking", "pump", "broken" or "fit".
Refrigerator, plastic framed, glass shelf became damaged (somehow),
Simply off-load food from damaged shelf; then remove old shelf itself. Fit the new shelf into the refrigerator shelf-slots. (No tools required.) Reload all the refrigerator food items on to new shelf and then grab a cup of coffee.
In my case it would have been nice to have been able to keep the old shelf glass since it was undamaged and had writing on it. But, no great loss!
In my case it would have been nice to have been able to keep the old shelf glass since it was undamaged and had writing on it. But, no great loss!
Parts Used:
-
Douglas from SANTA BARBARA, CA
-
Difficulty Level:Easy
-
Total Repair Time:30 - 60 mins
1 person
found this instruction helpful.
Was this instruction helpful to you?
Thank you for voting!
Broken parts
One screw holds the light lens. Door bin slips right in.
Parts Used:
-
David from MURRAY, UT
-
Difficulty Level:Very Easy
-
Total Repair Time:Less than 15 mins
-
Tools:Screw drivers
1 person
found this instruction helpful.
Was this instruction helpful to you?
Thank you for voting!
Refrigerator door not closing properly
We’d had the refrigerator repaired a year ago by the service department of our local appliance store. Turns out the service tech somehow used the wrong screw when replacing the door cam, causing it to rub on the cams and causing premature wear. After watching the provided repair video, it took about 10 minutes to remove the door, replace the cams and reinstall the door. Saved well over $100 and had the job done right this time.
Parts Used:
-
Bruce from MONTGOMERY, AL
-
Difficulty Level:Very Easy
-
Total Repair Time:Less than 15 mins
-
Tools:Socket set
1 person
found this instruction helpful.
Was this instruction helpful to you?
Thank you for voting!
Replace broken pan slide track for deli drawer
Technically there are no specific tool requirements for this repair, but getting the old slide track off of the shelf and getting the new one on can prove to require some elbow grease that I found some tools helped ease. The track attaches with tension of 3 dado-type slide joints as well as 3 pegs to lock it in place once those joints are aligned. I found use of a screwdriver to push the pegs out of their holes and then a hammer to force the piece to slide out of lock to help remove the old track. I then used the hammer again (lightly) to slide the new track into position so that the pegs would lock. I would stress though that this component being plastic, use of such tools should be done with great care if at all.
Parts Used:
-
Ben from Lansdale, PA
-
Difficulty Level:Easy
-
Total Repair Time:Less than 15 mins
-
Tools:Screw drivers
1 person
found this instruction helpful.
Was this instruction helpful to you?
Thank you for voting!
Track broke in half on both sides
Taking the track off was fine, but putting it on was a nightmare. You have to push in and pull forward to get the tabs into place. For some reason they added a couple of notches on either side of the track that made it near impossible to budge and it warped the track when in place. We couldn’t do it with two people. Finally, I was able to carefully shave down the notches and got one side on. The other side, I had to whittle down the tabs, too, and gently tap the plastic end with a hammer to get it to budge into place. It’s plastic, so I had to be extremely patient. So far it’s holding the drawer fine.
Parts Used:
-
Danielle from DUBLIN, OH
-
Difficulty Level:Difficult
-
Total Repair Time:More than 2 hours
1 person
found this instruction helpful.
Was this instruction helpful to you?
Thank you for voting!
The old Glass shelf on the crisper shattered and needed replacement
-
Gerald from ALLEN, TX
-
Difficulty Level:Very Easy
-
Total Repair Time:Less than 15 mins
1 of 2 people
found this instruction helpful.
Was this instruction helpful to you?
Thank you for voting!
broken track
removed old track put in new one.parts was here in 3 day and was about one half the cost of other places
Parts Used:
-
RONALD from BELLA VISTA, AR
-
Difficulty Level:Easy
-
Total Repair Time:Less than 15 mins
2 of 5 people
found this instruction helpful.
Was this instruction helpful to you?
Thank you for voting!
Plastic drawer slide broke
I watched the video on how to do from Partselect.Com and the repair went easily just as on the video.
Thank You PartsSelect.Com
Thank You PartsSelect.Com
Parts Used:
-
MICHAEL from ANDERSON, SC
-
Difficulty Level:Easy
-
Total Repair Time:15 - 30 mins
1 of 3 people
found this instruction helpful.
Was this instruction helpful to you?
Thank you for voting!
Both outside door handles turned very beige
Everything worked perfectly---thanks to the suggestion of your call center agent. She suggested that since the replacement door handles were no longer available, I should consider repainting them--it worked like a charm. Please tell her she was a life saver. We rent that house in Fl and my returning tenants had complained about the discoloring refer handles. Thank you
Parts Used:
-
Howard from Boynton Beach, FL
-
Difficulty Level:Easy
-
Total Repair Time:30 - 60 mins
-
Tools:Nutdriver
22 of 66 people
found this instruction helpful.
Was this instruction helpful to you?
Thank you for voting!
Dryer made loud intermittant humming sound after 20-30 minutes of use
Unplug Dryer. Remove 2 5/16in hex screws from lower panel and remove panel.Remove 3 5/16in hex screws attaching lint duct. Remove 8 1/4in hex screws attaching blower housing. Remove 2 1/4 hex screws attaching thermostat to blower housing. Using adj. wrench on back of motor shaft nut to hold, loosen fan assy. w/ 7/8in socket. Remove 3 5/16in hex screws holding fan housing to motor mount. Remove 2 5/16in hex screws holding housing and motor mount to base floor. Push belt pulley wheel up enough to loosen belt and take off rear motor pulley. Motor w/mount can be slid out bottom for replacement [wires are layed toward front].Using 6in flat tip screw driver press down to unlock front & back motor bushing holddown clamps. Pinch electrical wire connector ends to pull off old motor. Remove and Install new motor, reversing steps. Belt replacement [suggested w/new motor] requires removal of 2 5/16in screws to lift/remove door w/front panel [disconnect door switch wires upper right rear corner].Remove 4 5/16 screws holding front bulkhead. Once bulkhead is pulled up and off, allow front end of drum to sag and rest IN PLACE [removal not required to slip old belt off and install new belt]. Note belt location point around drum. Slide new belt on. Reinstall bulkhead and panel/door [Don't forget door swich wires]. Adjust belt into position and push spring-held belt pully up to allow looping of new belt around rear motor belt pulley. Complete w/hand turning of drum to ensure belt is aligned and feeding properly. Reinstall lower fan housing/covers/thermostat,etc removed for motor installation.
Parts Used:
-
Gregory from Virginia Beach, VA
-
Difficulty Level:Really Easy
-
Total Repair Time:30 - 60 mins
-
Tools:Nutdriver, Screw drivers, Socket set, Wrench (Adjustable)
1 of 3 people
found this instruction helpful.
Was this instruction helpful to you?
Thank you for voting!
Needed to replace both tracks for cheese drawer
Snapped the old tracks out and snapped the new tracks in place.
Parts Used:
-
Suzie from Arvada, CO
-
Difficulty Level:Easy
-
Total Repair Time:15 - 30 mins
0 of 1 people
found this instruction helpful.
Was this instruction helpful to you?
Thank you for voting!
Broken track would not support snack drawer
After removing the shelf from the refrigerator, I had to give the track a little gentle persuasion to get it out. Once out, it was only a matter of placing the new part, and returning the shelf to it's proper place. It was literally less than 5 minutes to do the entire repair (including the removal & replacement of items on the shelf).
Parts Used:
-
Scott from Beech Grove, IN
-
Difficulty Level:Really Easy
-
Total Repair Time:Less than 15 mins
-
Tools:Screw drivers
0 of 1 people
found this instruction helpful.
Was this instruction helpful to you?
Thank you for voting!
Track broke - easily slides off and the new one goes on just as easy.
Lightly tapped end of broken rail with rubber mallet to take the rail off. Again, aligned new rail and lightly tapped into place. Done in 5 minutes.
Parts Used:
-
Scott from South Riding, VA
-
Difficulty Level:Really Easy
-
Total Repair Time:Less than 15 mins
0 of 1 people
found this instruction helpful.
Was this instruction helpful to you?
Thank you for voting!
Ends of the refrigerator drawer tracks broke off...
... probably from overloading the drawer.
Used a rubber mallet to tap the old tracks out and the new ones into place. About 5 minutes total, and I am NOT a "handyman"!
Used a rubber mallet to tap the old tracks out and the new ones into place. About 5 minutes total, and I am NOT a "handyman"!
Parts Used:
-
Joseph from Ellington, CT
-
Difficulty Level:Really Easy
-
Total Repair Time:Less than 15 mins
1 of 4 people
found this instruction helpful.
Was this instruction helpful to you?
Thank you for voting!
Would not slip on all the way
Had to use sand paper as the slider as it would not go on all the way. After sanding the plastic down a bit, it took the excess off and slid on just fine. Every thing works as it should.
Parts Used:
-
Carol from Westfield, IN
-
Difficulty Level:A Bit Difficult
-
Total Repair Time:Less than 15 mins
0 of 1 people
found this instruction helpful.
Was this instruction helpful to you?
Thank you for voting!


