71463 LG Dryer - Instructions
Keep searches simple. Use keywords, e.g. "leaking", "pump", "broken" or "fit".
Lint filter had cracked and broken on the sides
-
Karen from Barrackville, WV
-
Difficulty Level:Very Easy
-
Total Repair Time:30 - 60 mins
7 of 8 people
found this instruction helpful.
Was this instruction helpful to you?
Thank you for voting!
Drum wasn't turning
I took the dryer apart. You have to take the top off, then the door/front off. There are wires & other parts that need to be unhooked as well. A flat tip screw driver can be used to pop the top off. The screws were all phillips. Once you take that all apart, then you can access the drum. I bought the belt because I thought that was what was wrong with it. Turned out to be hair in the drum rollers. Took those all off & put wheel grease on each of them, put new belt on (since I had it LOL) then put it all back together. Make sure everything is lined up correctly otherwise you will have to take it apart & reline (which I had to do)
I am a 49yr old female & was able to do this repair on my own!
I am a 49yr old female & was able to do this repair on my own!
Parts Used:
-
Beth from FROST, TX
-
Difficulty Level:Really Easy
-
Total Repair Time:1- 2 hours
-
Tools:Screw drivers
7 of 8 people
found this instruction helpful.
Was this instruction helpful to you?
Thank you for voting!
convert from natural gas orfice to LP gas orfice
I did not do the repair I hired the propane company to do it . It was too difficult for me.they removed top & front of dryer .removed & replaced gas orfice reinstall all parts that were removed. Install and test dryer IT cost me $91.59 for labor & $24.65 for the part & shipping.If the dryer had a side access near the gas valve it could have saved me the cost of labor. I could have done it myself.
Parts Used:
-
Ronald from MOUNTAIN HOME, AR
-
Difficulty Level:Very Difficult
-
Total Repair Time:1- 2 hours
-
Tools:Nutdriver, Pliers, Screw drivers, Socket set, Wrench (Adjustable), Wrench set
6 of 7 people
found this instruction helpful.
Was this instruction helpful to you?
Thank you for voting!
Did not heat
Called Parts Select and assisted me in proper parts needed. Drier works as new.
Took out drum. Found all parts easy to locate. Found defective part and replaced with new one.
Thank you Parts Select for your assistance.
Took out drum. Found all parts easy to locate. Found defective part and replaced with new one.
Thank you Parts Select for your assistance.
Parts Used:
-
Ephraim from CEDARHURST, NY
-
Difficulty Level:Easy
-
Total Repair Time:15 - 30 mins
-
Tools:Pliers, Screw drivers, Wrench (Adjustable)
5 of 5 people
found this instruction helpful.
Was this instruction helpful to you?
Thank you for voting!
No heat
Pull off the top and front of the dryer and reached in and replaced the part it was easy. Had to clean all the dryer out real good with from the lint
Parts Used:
-
Brent from HINCKLEY, UT
-
Difficulty Level:Really Easy
-
Total Repair Time:30 - 60 mins
-
Tools:Screw drivers
5 of 7 people
found this instruction helpful.
Was this instruction helpful to you?
Thank you for voting!
Dryer quit spinning
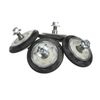
One of the roller assembly froze up & had a flat spot on it. There for causing the drum not to rotate. Pulled it out replaced the roller & up & running.
Parts Used:
-
Peggy from San Bernardino, CA
-
Difficulty Level:Easy
-
Total Repair Time:15 - 30 mins
-
Tools:Pliers, Screw drivers, Socket set, Wrench (Adjustable), Wrench set
4 of 4 people
found this instruction helpful.
Was this instruction helpful to you?
Thank you for voting!
Dryer door hinge broken
Opening the dryer door on the vertical axis rather than the horizontal axis, I unscrewed the three obvious screws. These screws are clearly visible when viewed from eye level. The broken hinge came off in two pieces, but presented no difficulty. I inspected the area around the hinge for auxiliary damage. There was none, but I did notice a wisp of cotton candy stuck in the lint trap. This was odd as I had not had cotton candy of any kind in my home or near my dryer ever. I did hear the faint sound of calliope music-I assumed this to be from an ice cream van that frequents the neighborhood-but failed to detect the tell-tale doppler effect of a moving vehicle. Disturbed, but determined to finish my task I removed the new part from the packaging and checked the fit. It fit perfectly. NOTE: Retain the screws from the hinge you remove, as the replacement hinge does not come with screws. I looked down to where my screws lay and saw the bulbous oversized toe of large red shoe. There was a star on the tip, painted in blue and yellow. I looked up from the shoe to see it attached to an ankle with a frilled cuff and up from there a baggy pair of pantaloons. At this point I realized that circuses now being illegal in this country, I clearly had a rogue clown on my hands. Sitting as I was I was not able to quickly get up, and in the confines of my washroom I had nowhere to run anyway. I had to think fast. I could smell the stale popcorn on the clown's breath as he leaned over, I reached for anything I could, grabbing up a pet cleaning vacuum hose. The clown just snorted and said, "You want a Phillip's head for that." The clown was right, of course. I installed the screws, checked that the door worked, and then the clown and I went for churros.
Parts Used:
-
Ricky from CHESAPEAKE, VA
-
Difficulty Level:Really Easy
-
Total Repair Time:Less than 15 mins
-
Tools:Screw drivers
4 of 4 people
found this instruction helpful.
Was this instruction helpful to you?
Thank you for voting!
Loud squealing during operation
We replaced the drum belt and the rollers. Everything was very easy and straightforward but took a fair bit of time due to the extensive disassembly required. We followed the video available on the website for the belt replacement, which was very clear and accurate. Unfortunately, the rollers we received used a different attachment method than the OEM rollers which are depicted in the video provided. Instead of attaching from the front with a triangular plastic lock washer, they had to be attached via a nut on the back side of the roller. This required some improvisation and was a little more involved. For the rear rollers, we actually had to remove another panel to access the nuts, which was not described in the video. Nevertheless, we managed to get everything replaced and the dryer is working like it was the day we bought it.
Parts Used:
-
Nathaniel from BRIDGEWATER, NJ
-
Difficulty Level:Easy
-
Total Repair Time:1- 2 hours
-
Tools:Screw drivers
4 of 4 people
found this instruction helpful.
Was this instruction helpful to you?
Thank you for voting!
Drum bearing had gone bad causing excessive noise
Followed the repair video provided in the order confirmation email. Was easy.
Parts Used:
-
Dennis from Manchester, IA
-
Difficulty Level:Really Easy
-
Total Repair Time:30 - 60 mins
-
Tools:Screw drivers, Wrench set
4 of 5 people
found this instruction helpful.
Was this instruction helpful to you?
Thank you for voting!
making squeaking noise
-
Paul from MONTGOMERY, AL
-
Difficulty Level:Easy
-
Total Repair Time:30 - 60 mins
-
Tools:Screw drivers, Wrench set
4 of 5 people
found this instruction helpful.
Was this instruction helpful to you?
Thank you for voting!
Shrieking noise when the dryer tried to turn
I assumed this was a belt problem. Ordered the belt and followed the excellent screw by screw instructional YouTube provided by PartSelect. In fact, I probably would not have attempted the repair, until I watched the video and was reassured that I could do it. When I got the front panel off, the problem was obvious. There was a dishrag stuck in the blower. Didn't need the belt, but the video was sure worth the price of the part (~$17). Mr. Appliance charges $109 to DIAGNOSE the problem! This was way easier than dealing with them, especially during a pandemic near the holidays.
Parts Used:
-
William from JOHNSON CITY, TN
-
Difficulty Level:Easy
-
Total Repair Time:30 - 60 mins
-
Tools:Screw drivers
3 of 3 people
found this instruction helpful.
Was this instruction helpful to you?
Thank you for voting!
Lint filter cracked
-
Kimberly from COMMERCE CITY, CO
-
Difficulty Level:Very Easy
-
Total Repair Time:Less than 15 mins
3 of 3 people
found this instruction helpful.
Was this instruction helpful to you?
Thank you for voting!
igniter would not light
Initially replaced igniter. Didn't think it was bad though. Read other suggestions on another website. None were the correct diagnosis for my situation. And when I figured it out they did not offer correct part. The dryer thermistor temp sensor (probe sensor) is what I replaced. Found it on Parts Select. I did replace other parts also. But that's the one that ultimately was the issue.
Was not hard at all if one is even a little handy.
Was not hard at all if one is even a little handy.
Parts Used:
-
Dave from SAINT JOHN, IN
-
Difficulty Level:Easy
-
Total Repair Time:15 - 30 mins
-
Tools:Screw drivers
3 of 3 people
found this instruction helpful.
Was this instruction helpful to you?
Thank you for voting!
Dryer work but wouldn’t shut off when finished cycle, had to shutoff from breaker
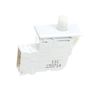
With a thin flat screwdriver I was able to pry out the old door switch, I replaced it with the new door switch, pushed back in dryer and so far is working since I installed a month ago.
Parts Used:
-
joaquin from MIAMI BEACH, FL
-
Difficulty Level:Very Easy
-
Total Repair Time:Less than 15 mins
-
Tools:Screw drivers
4 of 6 people
found this instruction helpful.
Was this instruction helpful to you?
Thank you for voting!
Filter edge cracked
-
Patrina from Elberta, MI
-
Difficulty Level:Very Easy
-
Total Repair Time:Less than 15 mins
3 of 3 people
found this instruction helpful.
Was this instruction helpful to you?
Thank you for voting!


