GDL1329CGS3 LG Washer Dryer Combo - Instructions
Keep searches simple. Use keywords, e.g. "leaking", "pump", "broken" or "fit".
Needed to replace dryer filter
Pull out the worn out dryer filter and replaced it with a new filter that I purchased through Partselect.com.
It fit perfectly.
It fit perfectly.
Parts Used:
-
Mike from LINO LAKES, MN
-
Difficulty Level:Very Easy
-
Total Repair Time:Less than 15 mins
3 of 3 people
found this instruction helpful.
Was this instruction helpful to you?
Thank you for voting!
The old lint filter was worn out.
I took the old lint filter out and put it in the garbage. I the put the new lint filter in the dryer. Problem solved
Parts Used:
-
Dennis from N SALT LAKE, UT
-
Difficulty Level:Very Easy
-
Total Repair Time:Less than 15 mins
3 of 3 people
found this instruction helpful.
Was this instruction helpful to you?
Thank you for voting!
Dryer work but wouldn’t shut off when finished cycle, had to shutoff from breaker
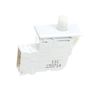
With a thin flat screwdriver I was able to pry out the old door switch, I replaced it with the new door switch, pushed back in dryer and so far is working since I installed a month ago.
Parts Used:
-
joaquin from MIAMI BEACH, FL
-
Difficulty Level:Very Easy
-
Total Repair Time:Less than 15 mins
-
Tools:Screw drivers
4 of 6 people
found this instruction helpful.
Was this instruction helpful to you?
Thank you for voting!
Not heat
Followed the instruction on video.was great after three parts now is OK .we have heat.still cheaper than having it service.
Parts Used:
-
Sal from MORENO VALLEY, CA
-
Difficulty Level:Really Easy
-
Total Repair Time:30 - 60 mins
-
Tools:Screw drivers, Wrench (Adjustable)
3 of 4 people
found this instruction helpful.
Was this instruction helpful to you?
Thank you for voting!
Dryer door latch broken
Part showed up in 2 days and repair took 2 min. Very easy. Thank you!!
Parts Used:
-
Paul from OVERLAND PARK, KS
-
Difficulty Level:Very Easy
-
Total Repair Time:Less than 15 mins
-
Tools:Screw drivers
3 of 4 people
found this instruction helpful.
Was this instruction helpful to you?
Thank you for voting!
Drum cracked
Repair was easy, but the part does not come with directions. It is pretty self explanatory if you are used to taking things apart and fixing them. Otherwise there are YouTube videos you can pull up. Dryer runs like it is new again though and it was way cheaper than buying a new dryer.
Parts Used:
-
Stephanie from RENO, NV
-
Difficulty Level:Really Easy
-
Total Repair Time:30 - 60 mins
-
Tools:Screw drivers
3 of 4 people
found this instruction helpful.
Was this instruction helpful to you?
Thank you for voting!
Broke the tub drum
-
Sergio from CORNELIUS, OR
-
Difficulty Level:Really Easy
-
Total Repair Time:30 - 60 mins
-
Tools:Nutdriver, Screw drivers
3 of 4 people
found this instruction helpful.
Was this instruction helpful to you?
Thank you for voting!
HST code given by dryer
Called LG on the phone and they gave the button presses for diagnostics, which then gave the HST code, saying the Humidity sensor was bad.
The part was described as the Humidity sensor module. Actually it's just the wire leads for the sensor which must be electronic and only accessible by disassembling the dryer. There were descriptions about cleaning the wires, perhaps because some people use dryer sheets which cause a buildup on the wires and prevent them from doing their job. I use wool balls and have no buildup on my wires and replacing them did not fix the sensor, because the module accessible inside the dryer is not the moisture sensor, but only the wire leads.
The part was described as the Humidity sensor module. Actually it's just the wire leads for the sensor which must be electronic and only accessible by disassembling the dryer. There were descriptions about cleaning the wires, perhaps because some people use dryer sheets which cause a buildup on the wires and prevent them from doing their job. I use wool balls and have no buildup on my wires and replacing them did not fix the sensor, because the module accessible inside the dryer is not the moisture sensor, but only the wire leads.
Parts Used:
-
marty from NEOSHO, MO
-
Difficulty Level:Easy
-
Total Repair Time:15 - 30 mins
-
Tools:Screw drivers
3 of 4 people
found this instruction helpful.
Was this instruction helpful to you?
Thank you for voting!
Broken link vet flap
Removed the old vent trap 3 screws total and replaced the new very quick and easy.
Parts Used:
-
JOSEPH from MANHASSET, NY
-
Difficulty Level:Very Easy
-
Total Repair Time:Less than 15 mins
-
Tools:Screw drivers
3 of 5 people
found this instruction helpful.
Was this instruction helpful to you?
Thank you for voting!
Lamp cover broke
Unscrew the screw, remove old part, place in new part, replace screw and you are done.
Parts Used:
-
Lorraine from SEQUIM, WA
-
Difficulty Level:Really Easy
-
Total Repair Time:Less than 15 mins
-
Tools:Screw drivers
2 of 2 people
found this instruction helpful.
Was this instruction helpful to you?
Thank you for voting!
I would turn on the dryer it would run for about 10-20 seconds and then shutoff, and could smell something burning
-
Kevin from MASHPEE, MA
-
Difficulty Level:Really Easy
-
Total Repair Time:15 - 30 mins
-
Tools:Screw drivers, Socket set, Wrench (Adjustable)
3 of 5 people
found this instruction helpful.
Was this instruction helpful to you?
Thank you for voting!
Locker assembly broke
Just unscrewed the original lock and screwed the new one on it was very easy
Parts Used:
-
temeaco from TULSA, OK
-
Difficulty Level:Very Easy
-
Total Repair Time:Less than 15 mins
-
Tools:Screw drivers
2 of 2 people
found this instruction helpful.
Was this instruction helpful to you?
Thank you for voting!
Old filter seal torn
-
Frederic from KILLEEN, TX
-
Difficulty Level:Very Easy
-
Total Repair Time:Less than 15 mins
2 of 2 people
found this instruction helpful.
Was this instruction helpful to you?
Thank you for voting!
Dryer was making a terrible sound.
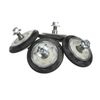
An appliance repairman determined the problem which was that it needed new pulleys and thankfully PartSelect carried them. He installed them in an hour and my dryer runs fine now.
Parts Used:
-
NANCY from ATASCADERO, CA
-
Difficulty Level:Really Easy
-
Total Repair Time:30 - 60 mins
2 of 3 people
found this instruction helpful.
Was this instruction helpful to you?
Thank you for voting!
noise when you ran dryer
Opened front of dryer - removed drum - replace all 4 rollers (2 had bad shafts) - replace drum with new belt - reassembled
Parts Used:
-
D Michael from Plymouth, IN
-
Difficulty Level:A Bit Difficult
-
Total Repair Time:1- 2 hours
-
Tools:Wrench set
1 person
found this instruction helpful.
Was this instruction helpful to you?
Thank you for voting!


